Create Virtual Machine in Vietnix Cloud
After creating a virtual network, the next step is to create virtual machines and connect to them using SSH.
Pre-Creation Planning
Before creating virtual machines, make sure you have:
- An active Vietnix Cloud account
- A project with sufficient resources (CPU, RAM, and storage)
- A virtual network with available IP addresses
Preparing SSH Keys
SSH keys provide a secure way to access your virtual machines.
Linux / macOS
Run the following command in your terminal. Press Enter to accept the default settings:
ssh-keygen -t rsa -b 4096 -C "your_email@example.com"
The public key will be saved at:
~/.ssh/id_rsa.pub
Add SSH Keys
-
Log in to the Vietnix Cloud Dashboard.
-
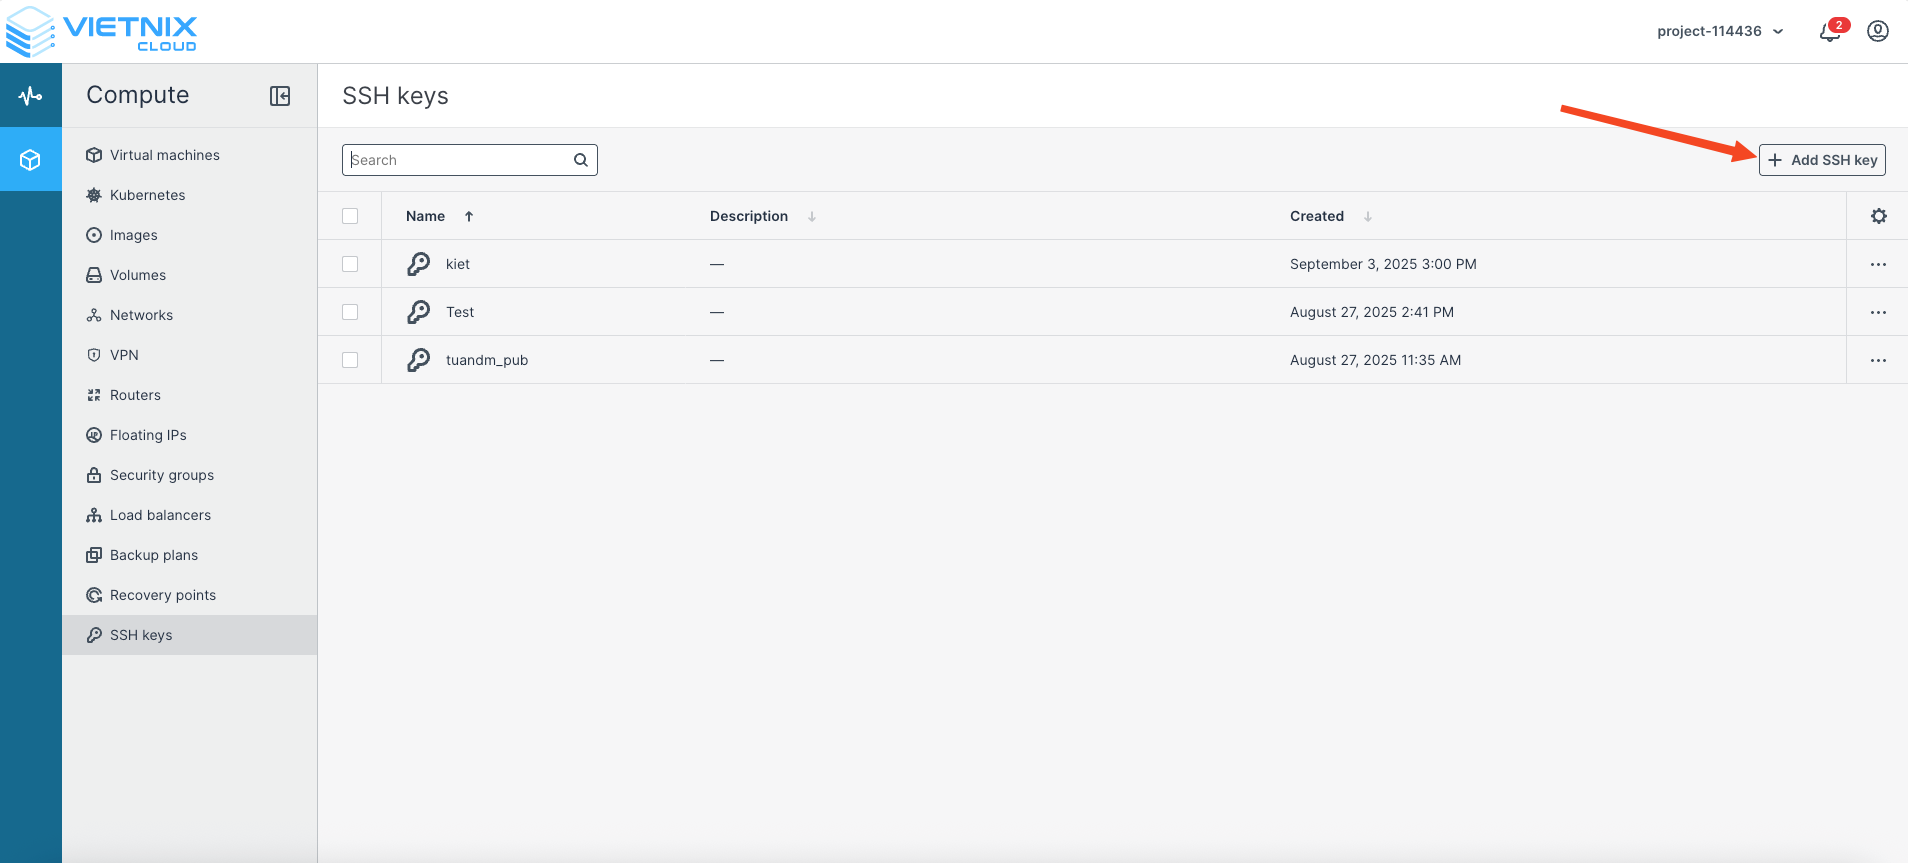
Navigate to Compute → SSH Key.
-
Click Add SSH Key.
-
Enter your public SSH key (usually the contents of
id_rsa.pub) and click Save.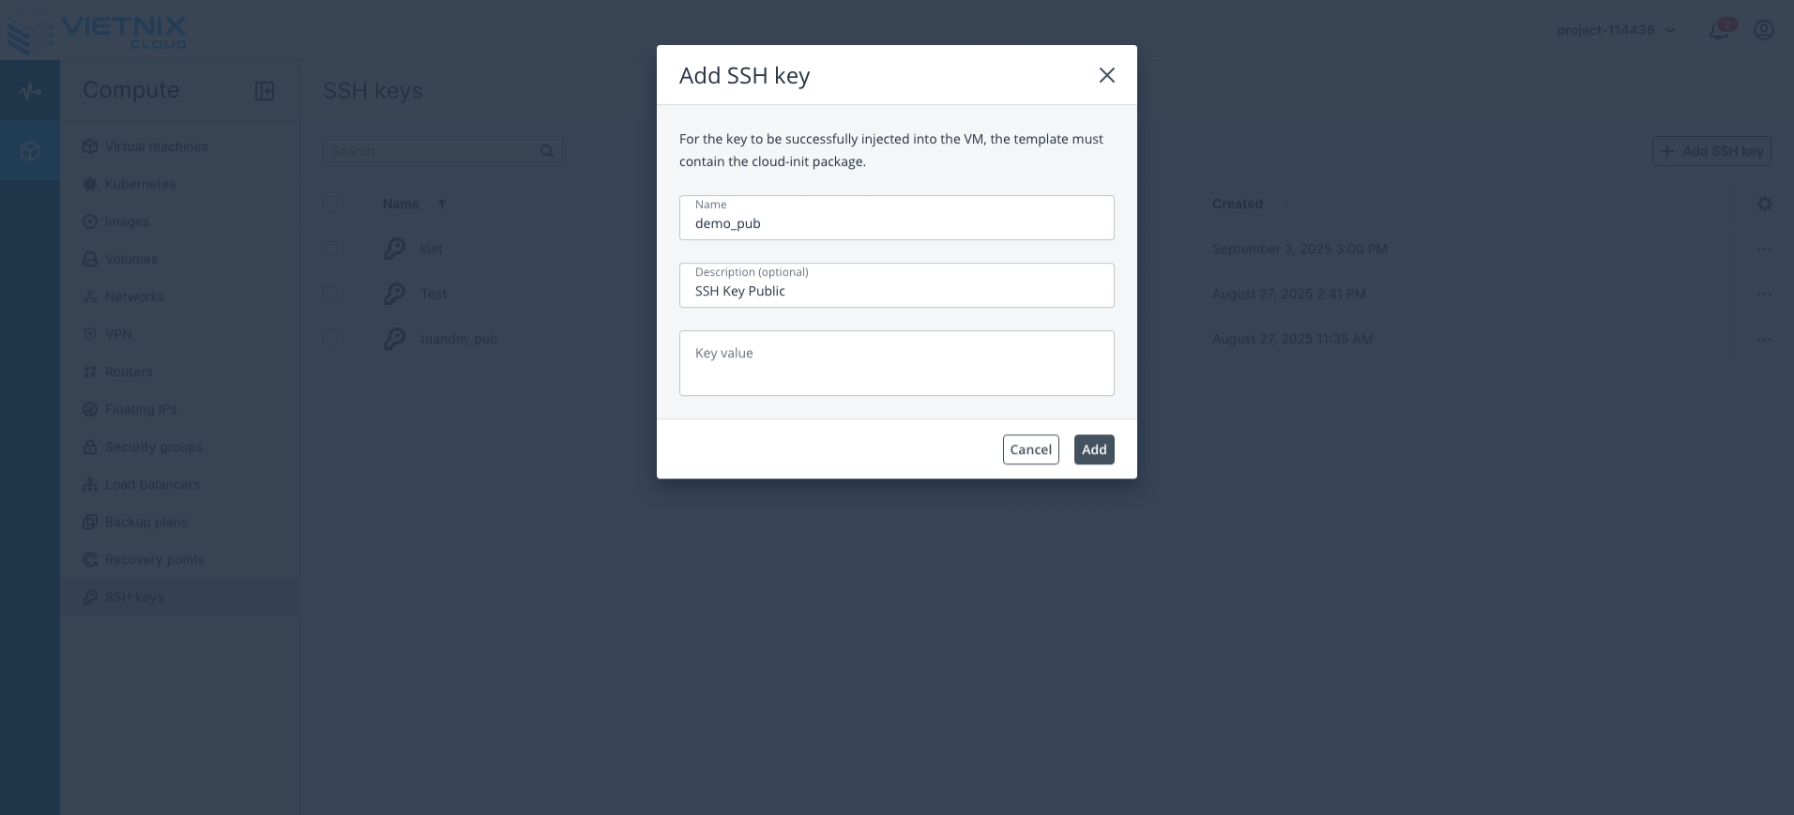
Create Virtual Machines
-
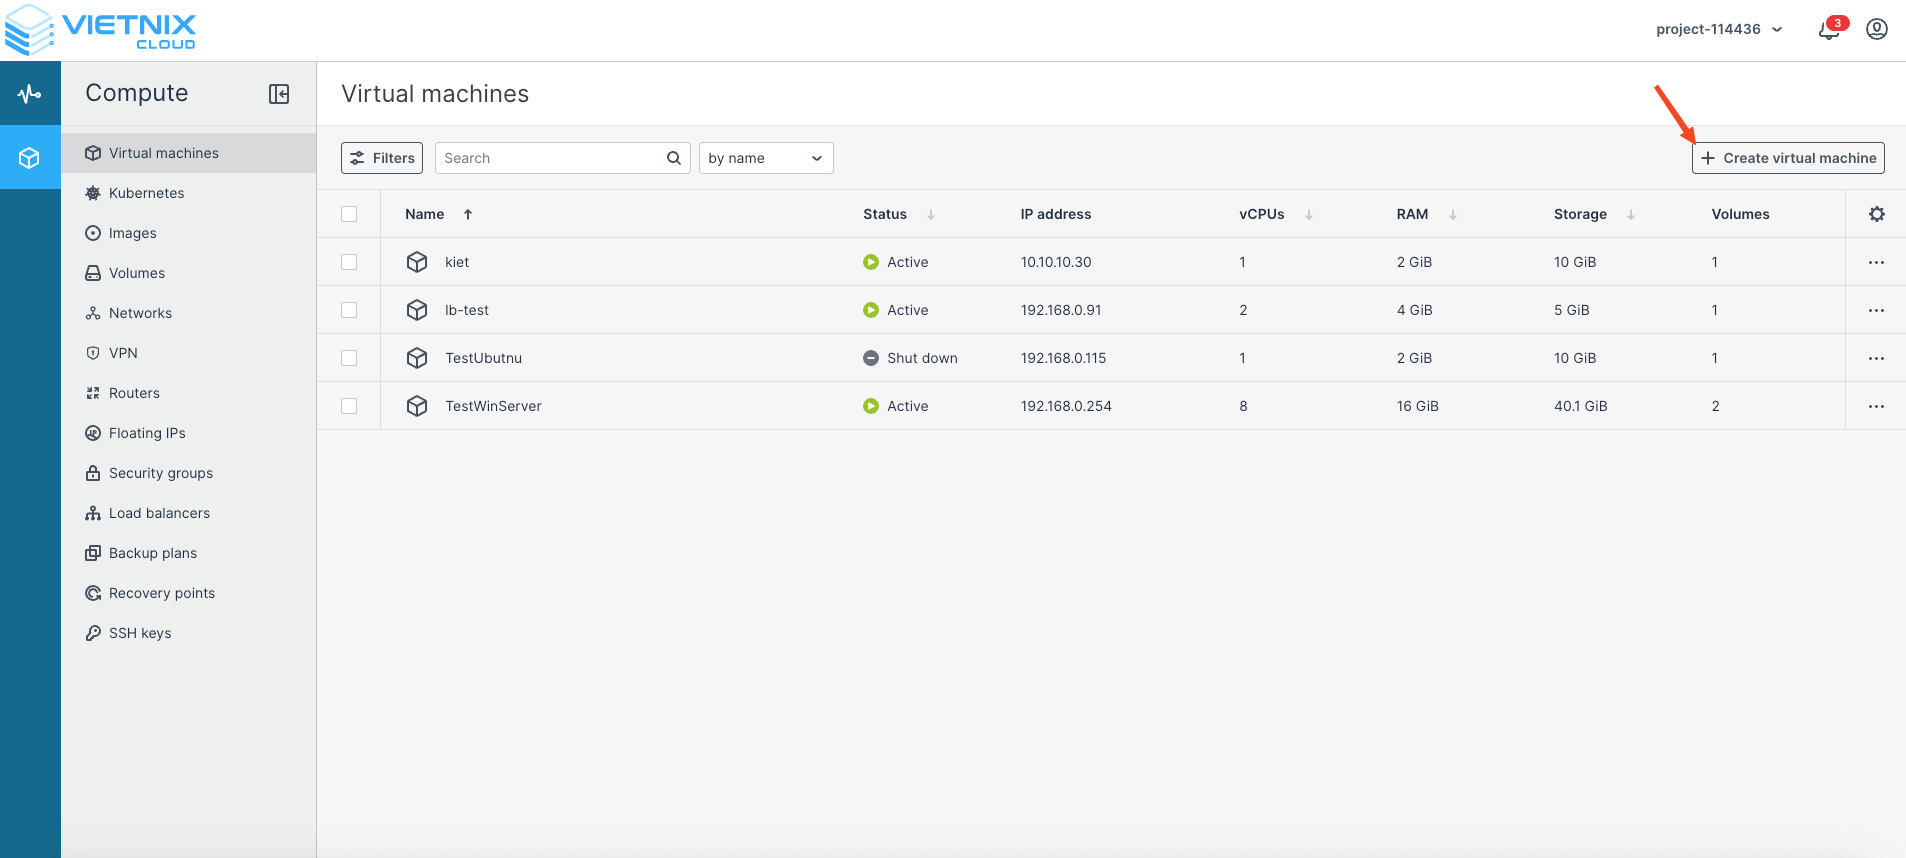
Navigate to Compute → Virtual Machines.
-
Click Create Virtual Machine.
-
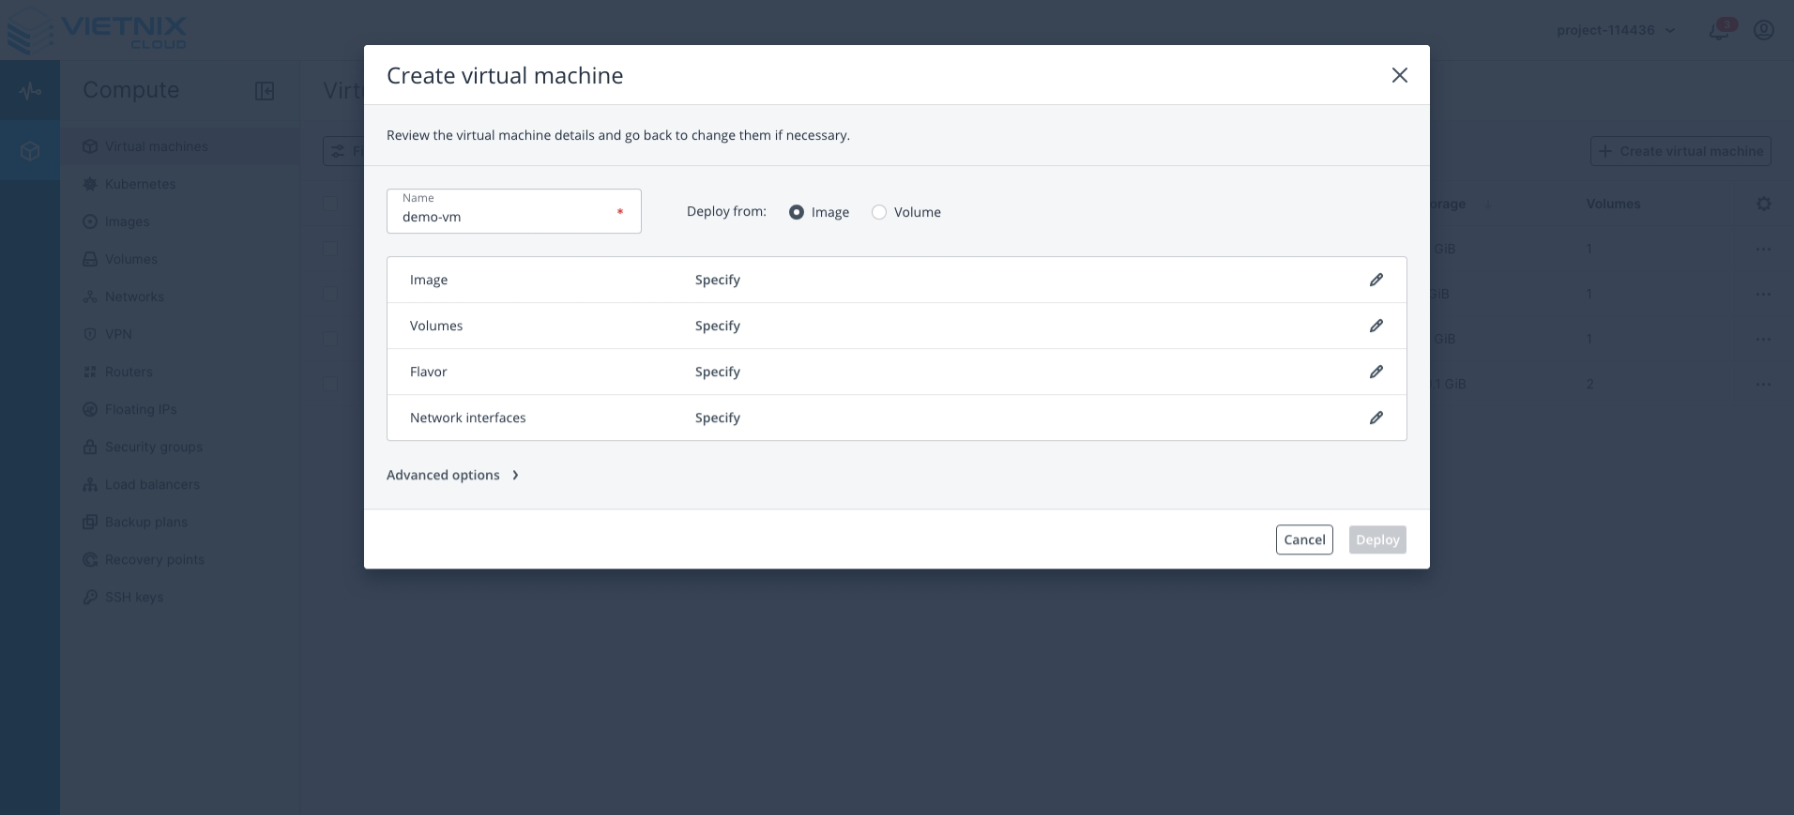
Configure your virtual machine:
-
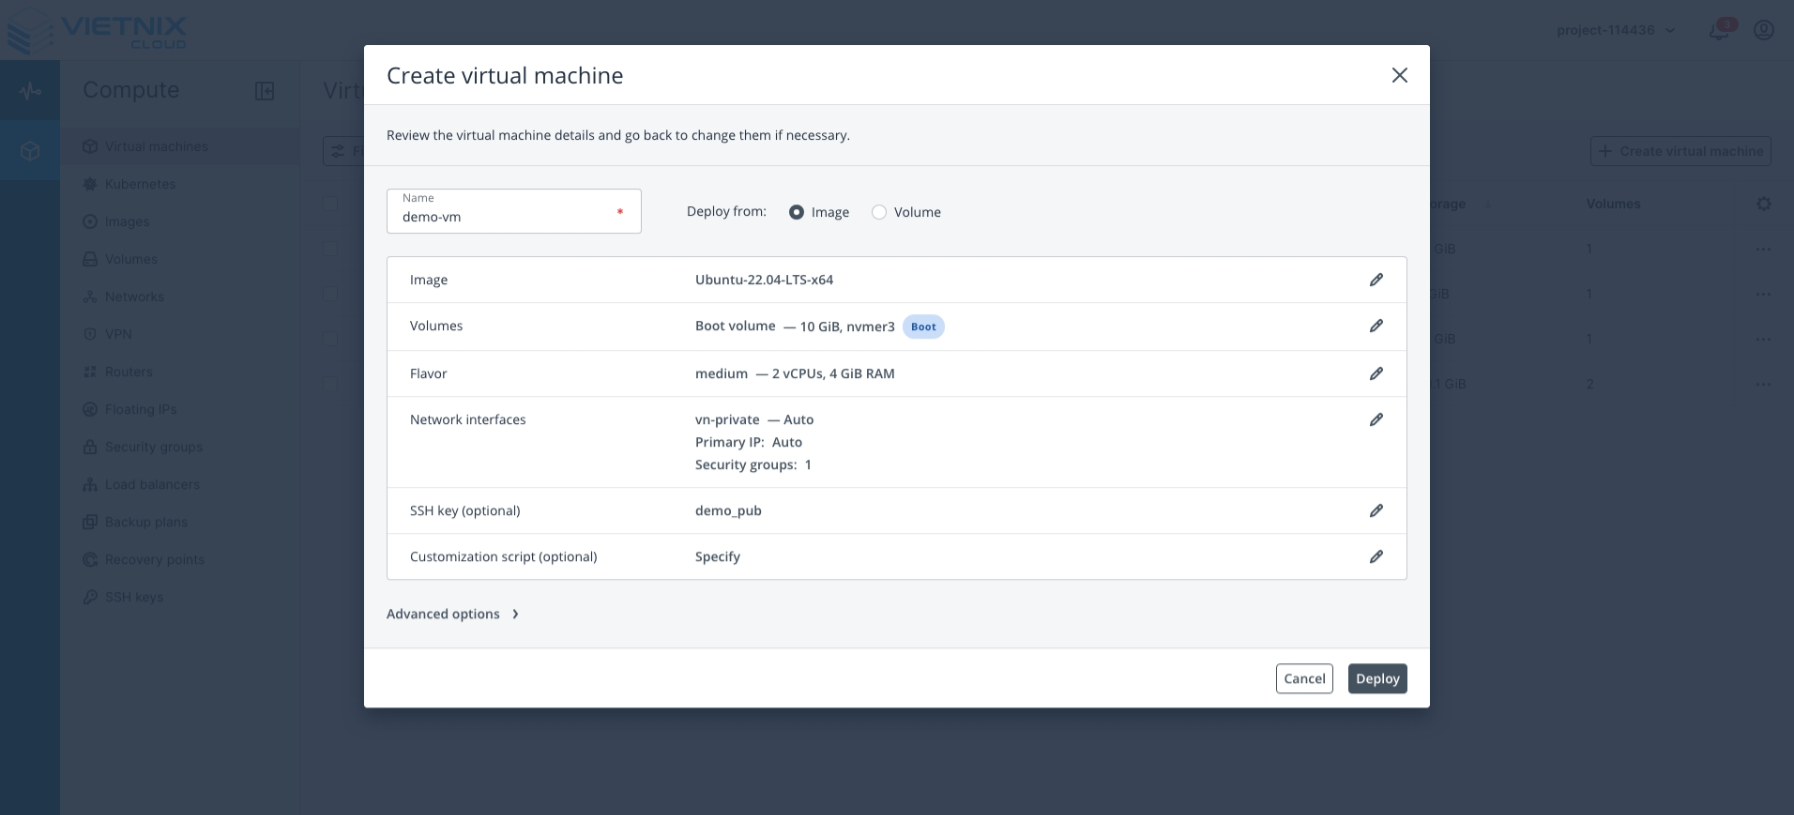
Name: Enter a name for the virtual machine.
-
Deploy From: Select the deployment method (Image or Volume).
-
Image: Choose the image for the virtual machine (e.g.,
Ubuntu-22.04-LTS-x64).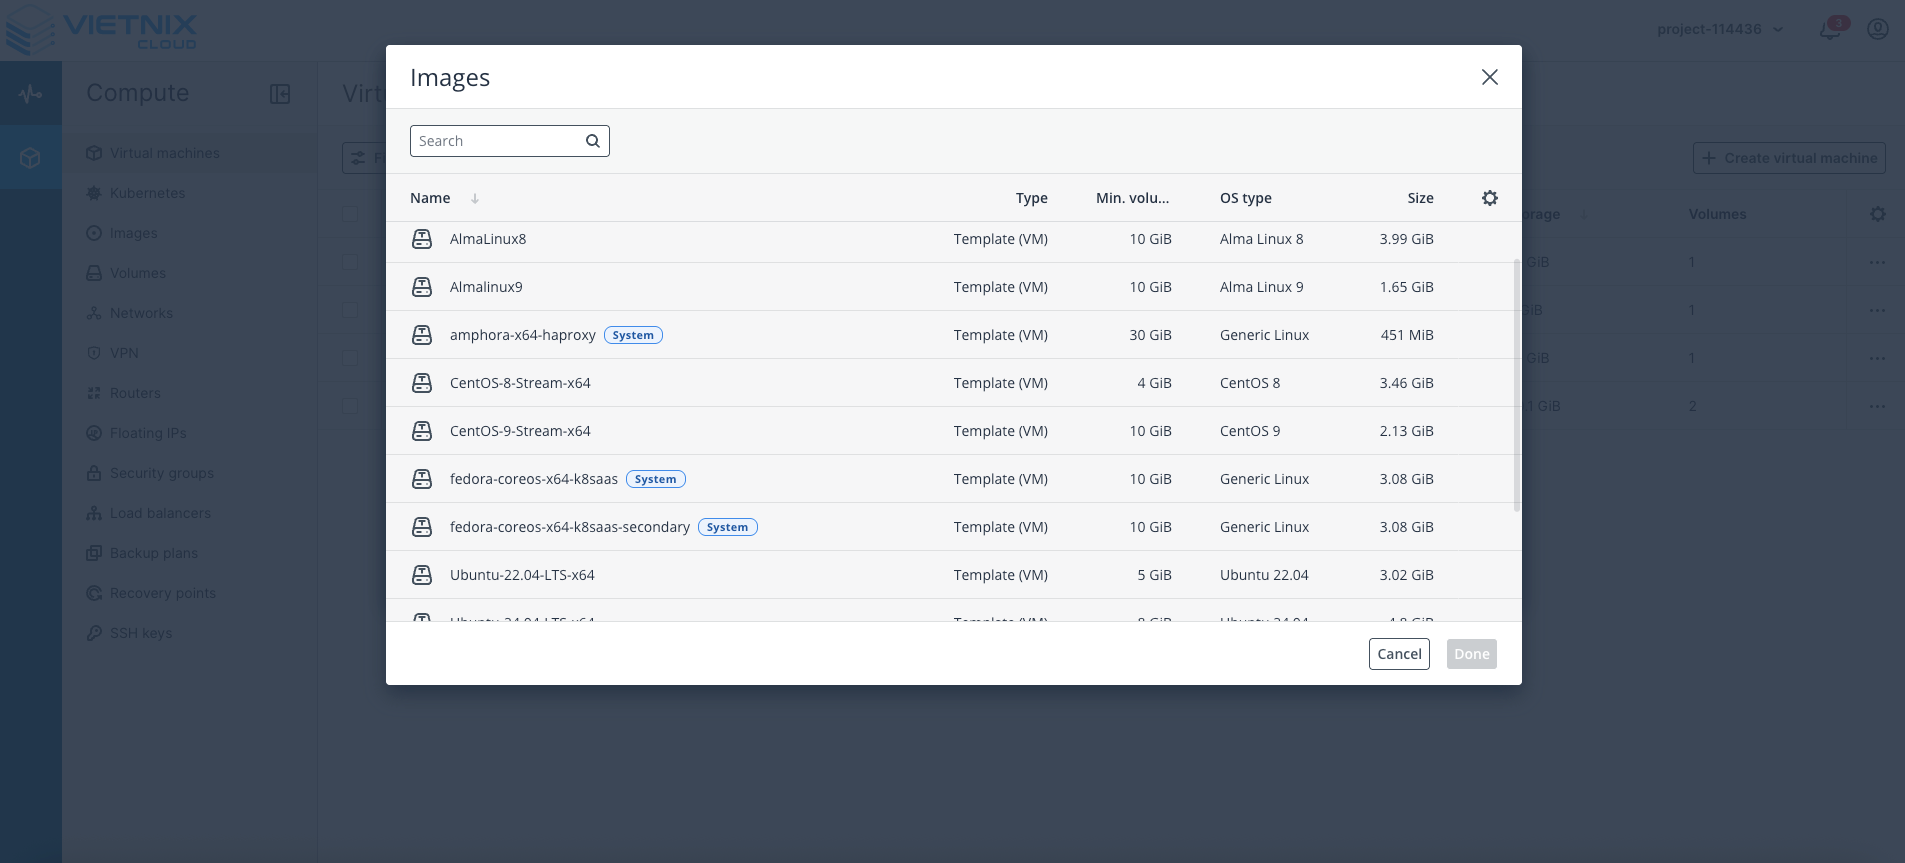
-
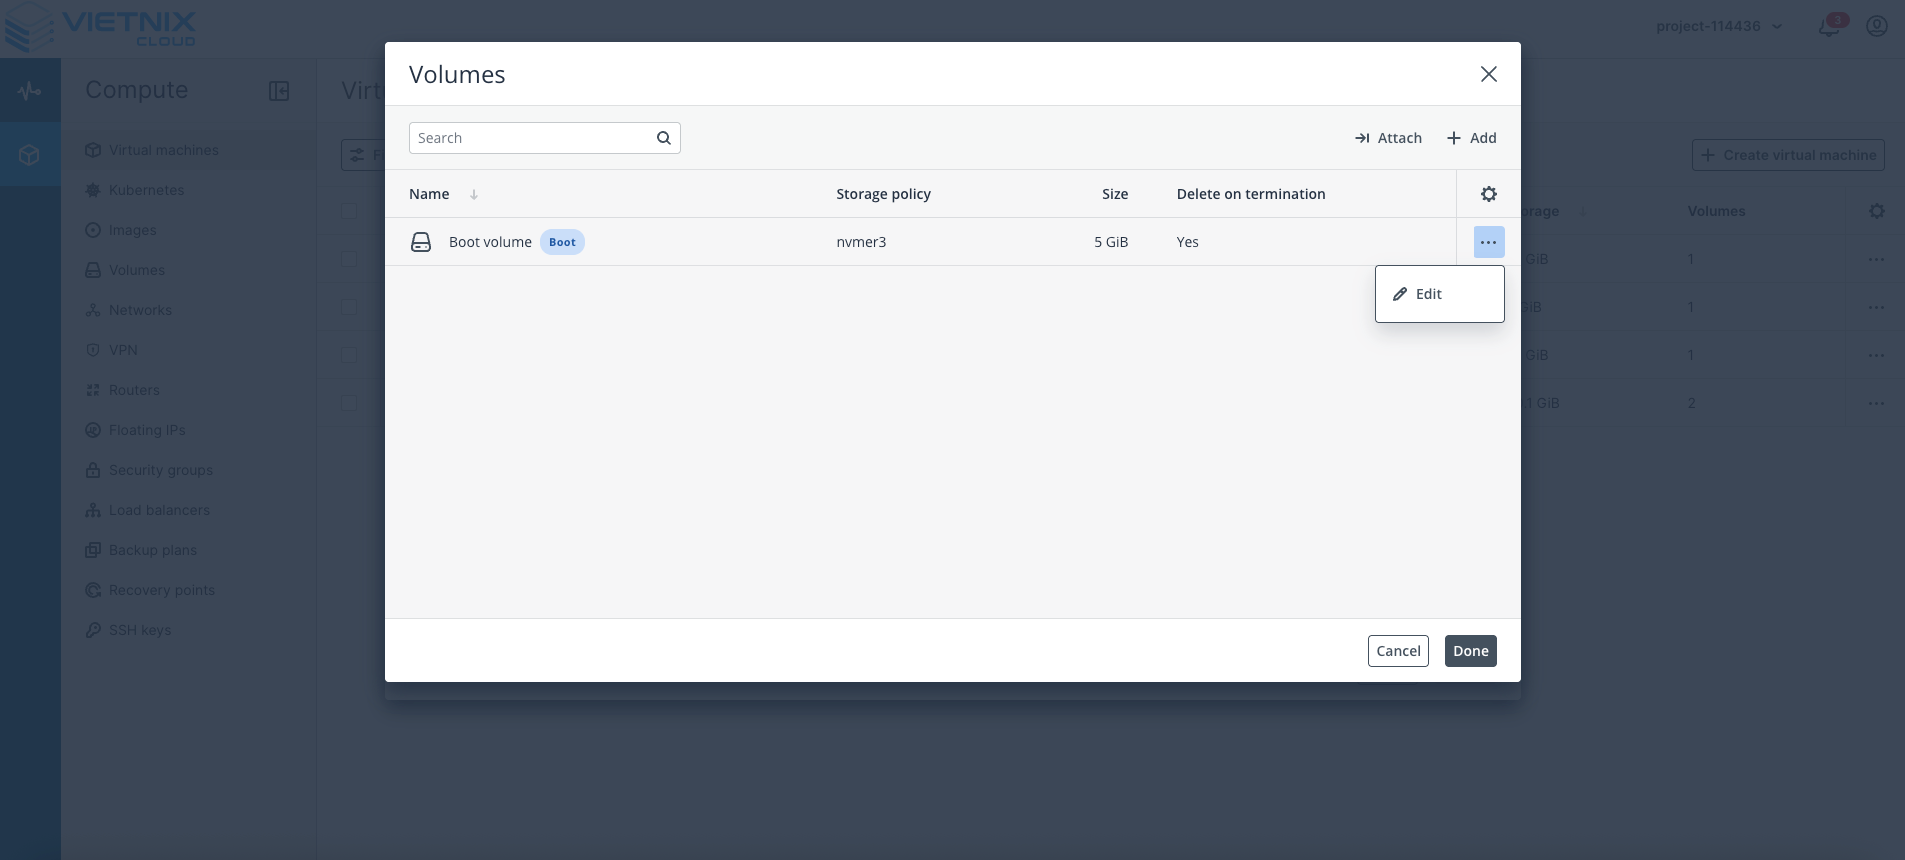
Volume (Optional): If deploying from an image, a boot volume will be created. You can edit the size (e.g., increase to 10 GB).
-
Flavor: Select the resource configuration for the VM (e.g.,
medium). Adjust based on your needs.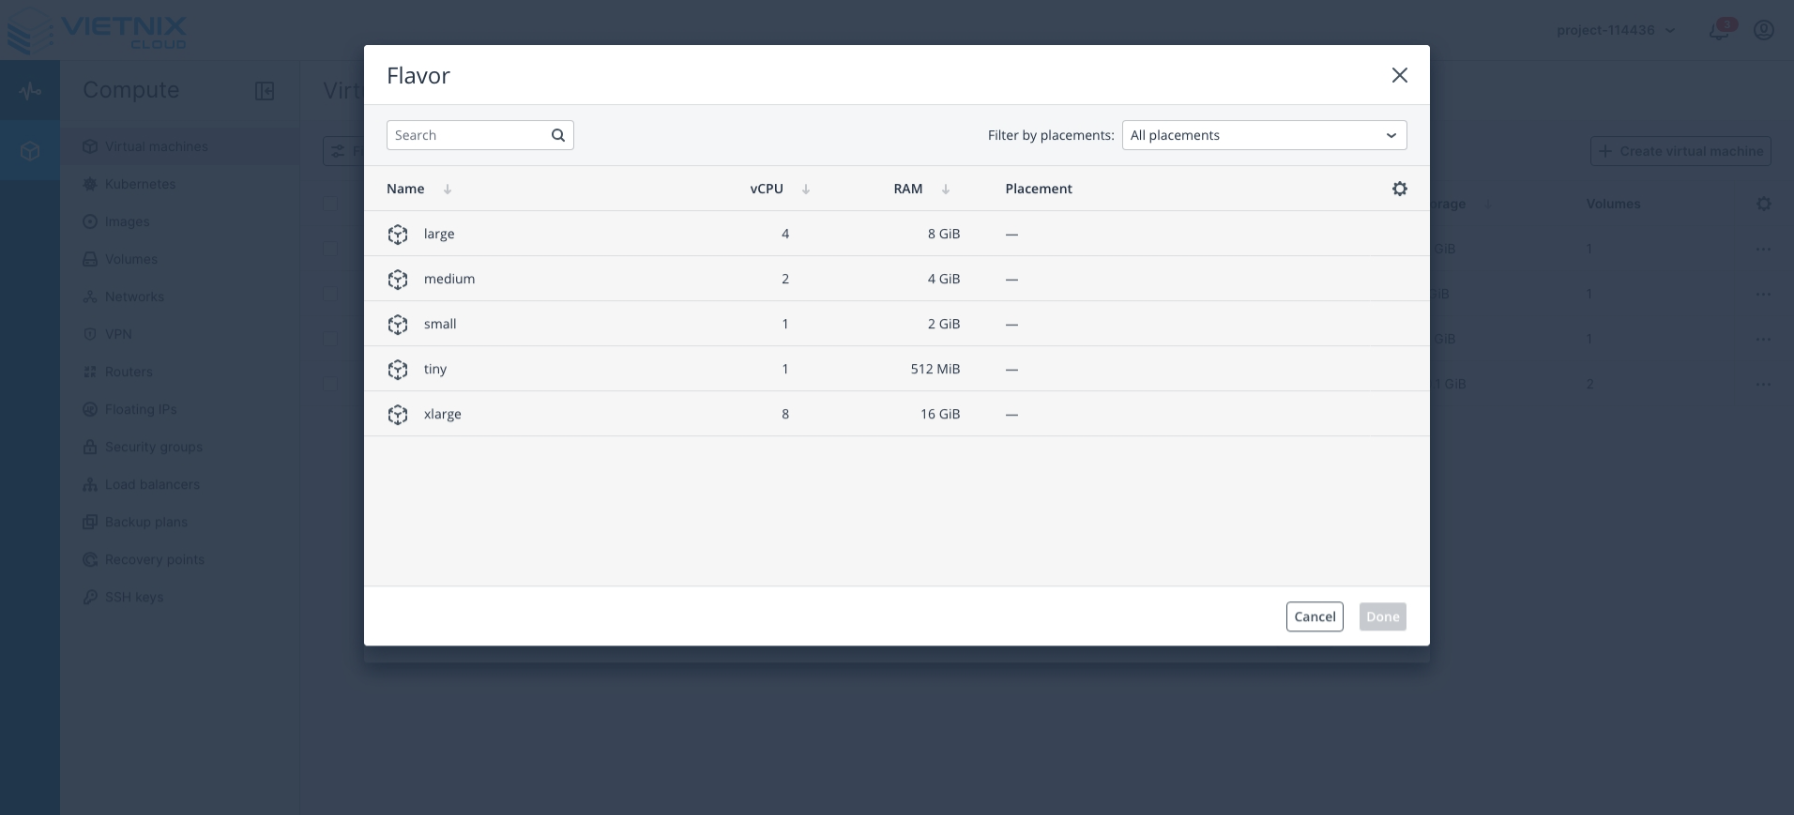
-
Network: Choose the virtual network created earlier.
Click Add, select the network, and leave other values as default. Click Add → Done.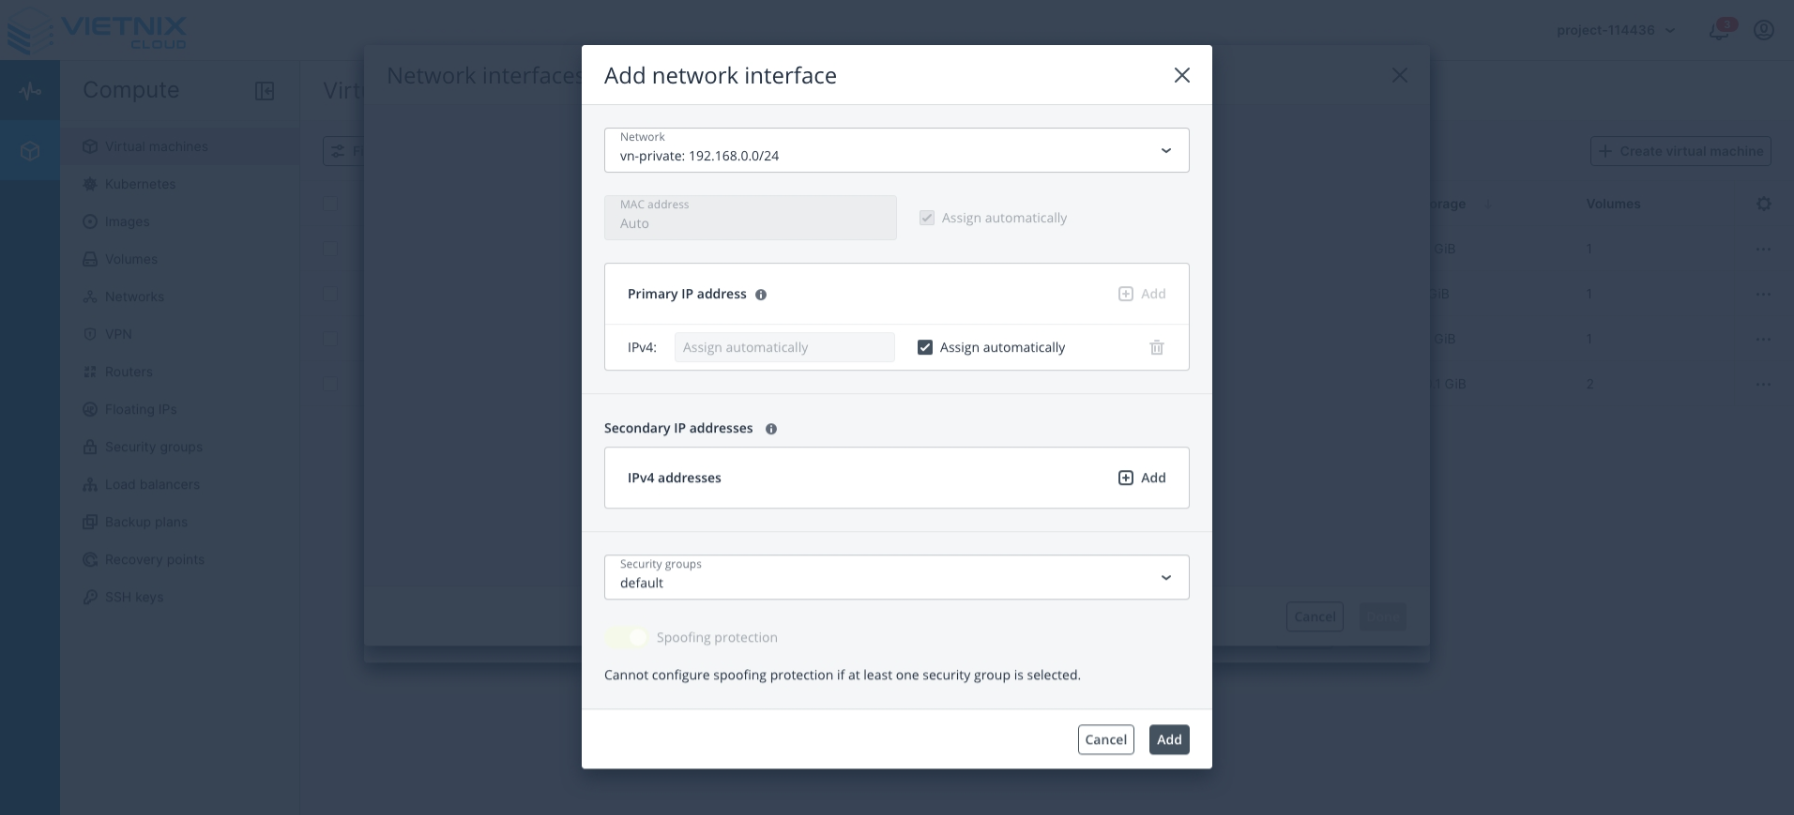
-
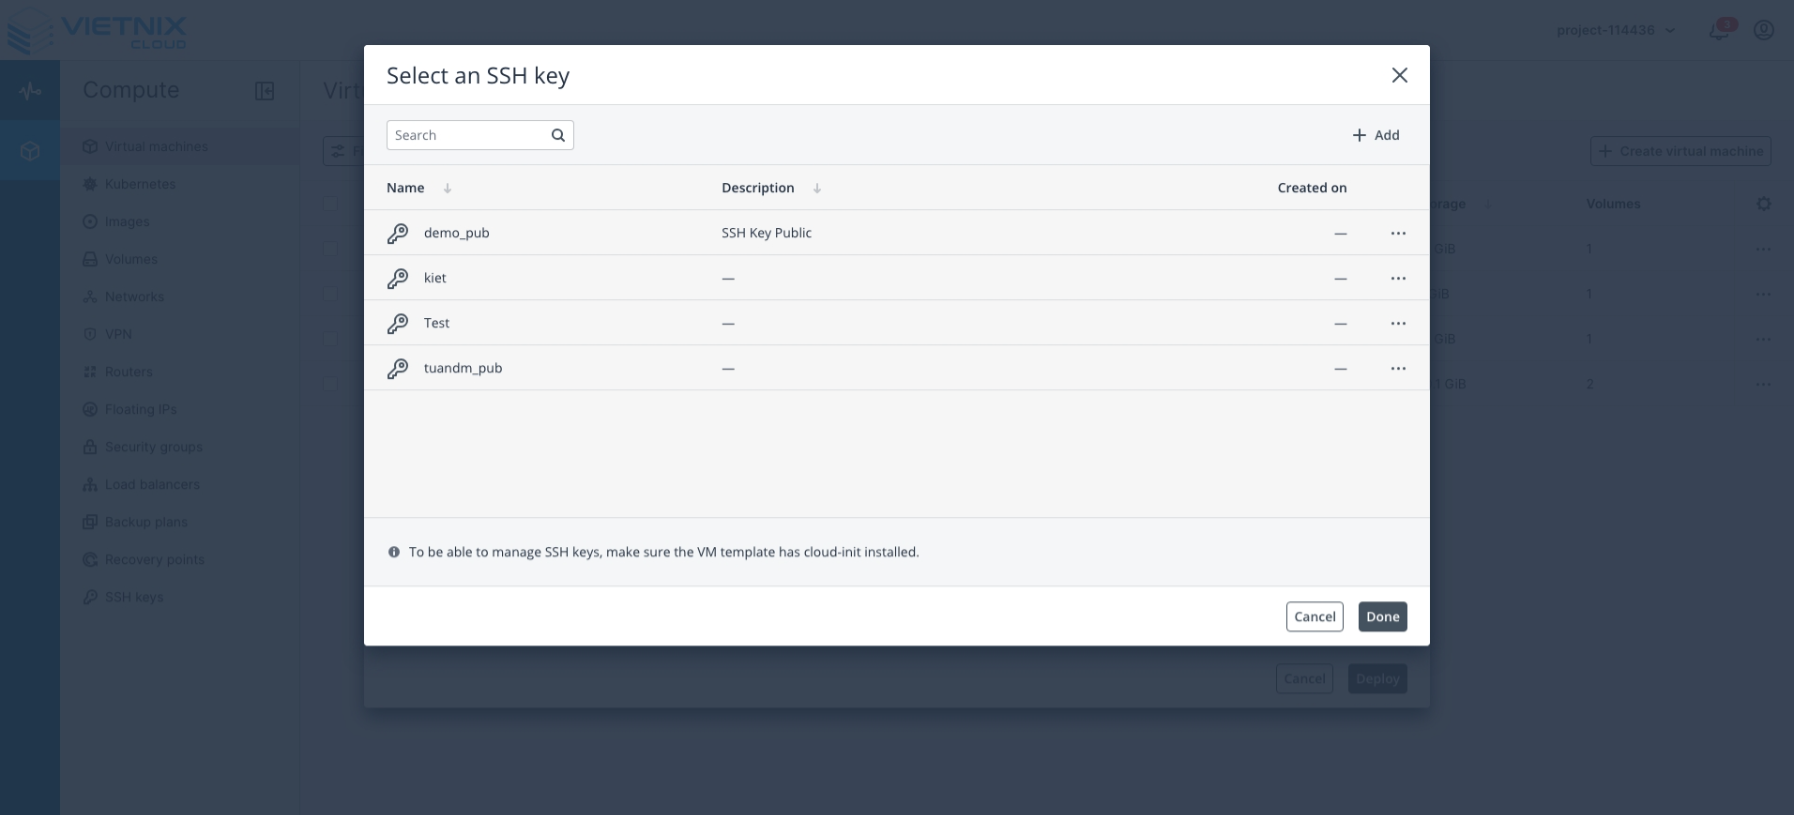
SSH Key: Select the SSH key for this VM. This step is required for SSH access.
-
-
Summary: Review the configuration of the virtual machine before deployment. Ensure all settings are correct.
 Info
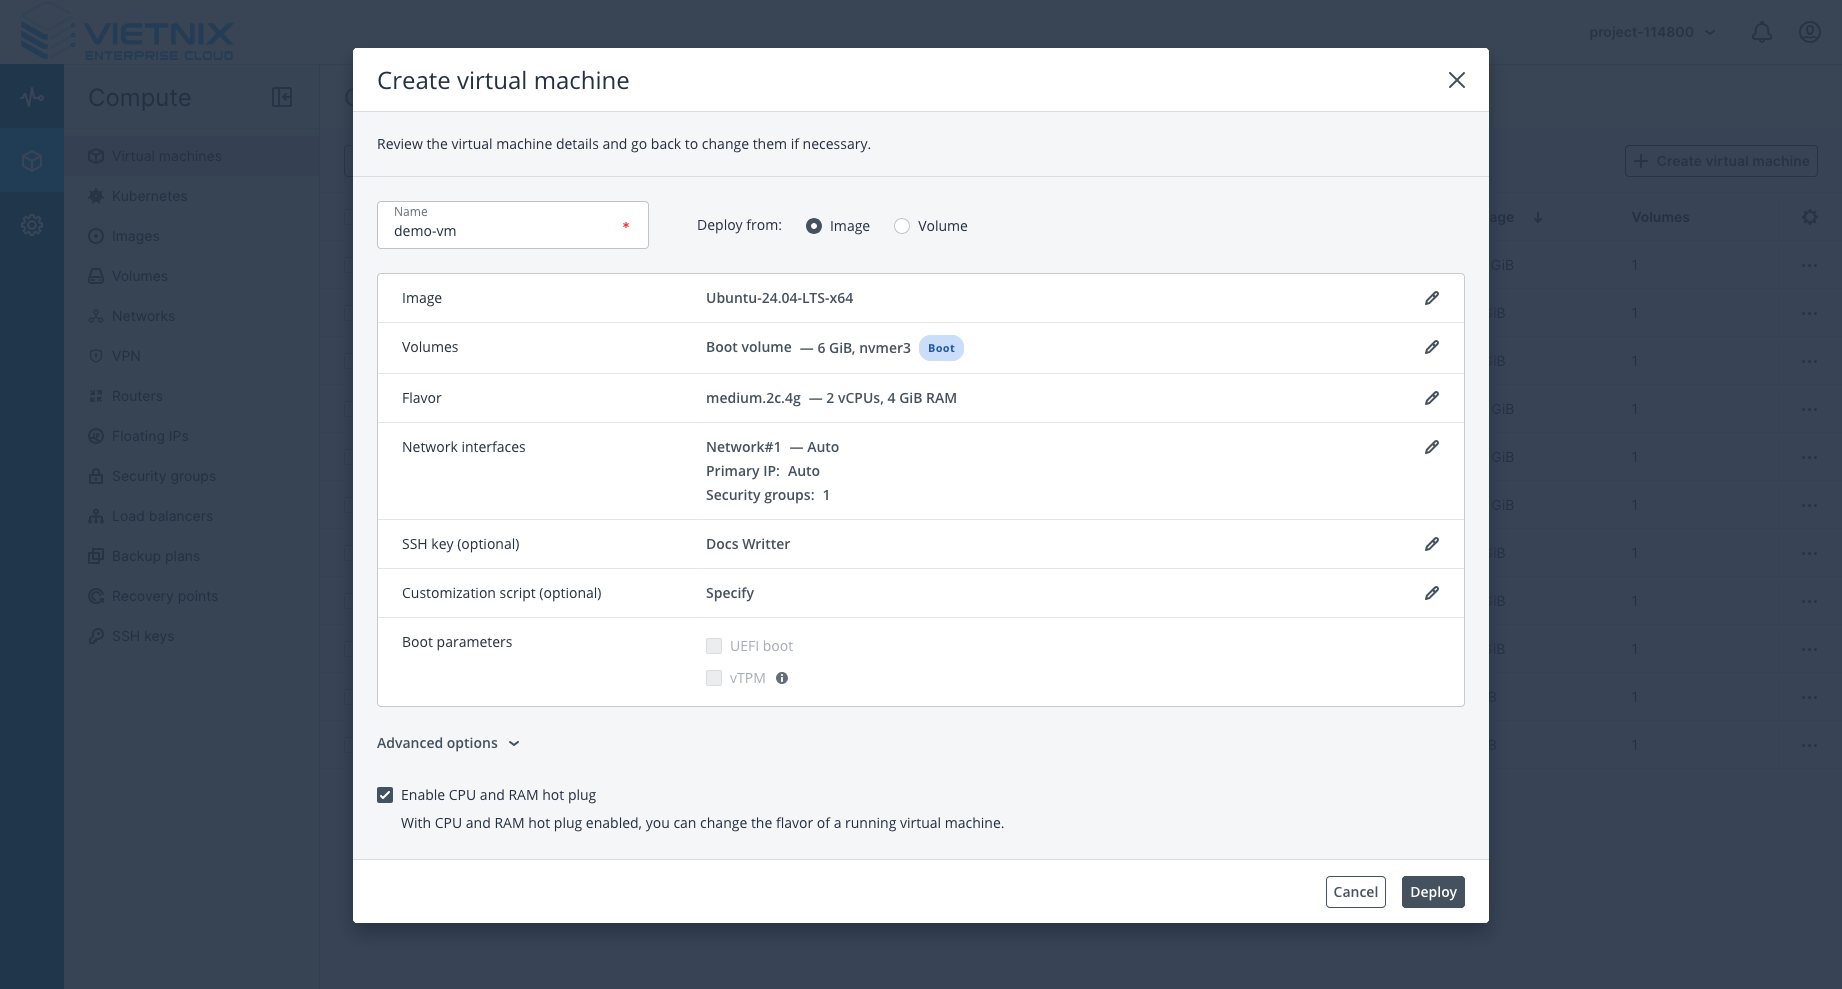
InfoAdditional information: You can open Advanced Options to see the CPU and RAM Hot Plug setting. When enabled, the VM can receive CPU and RAM changes while it is running, allowing you to resize resources without shutting down.
-
Click Deploy to start creating the virtual machine.
-
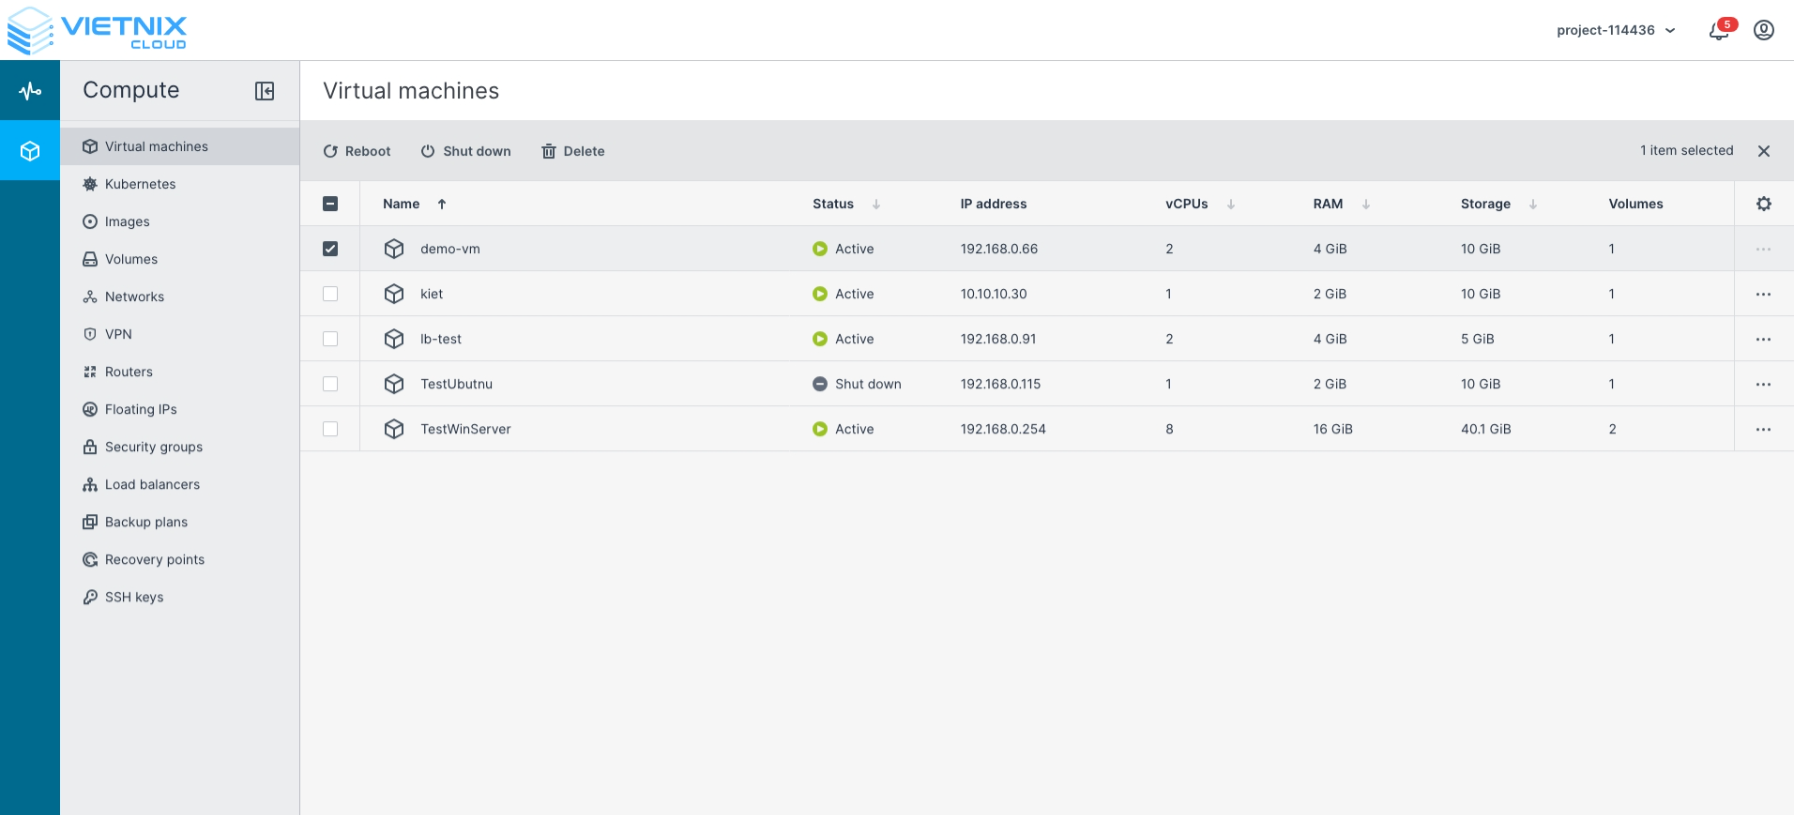
Monitor the progress of the VM creation.
-
Once the VM status changes to Active, your virtual machine is successfully created and ready to use.
Connect to Virtual Machines
-
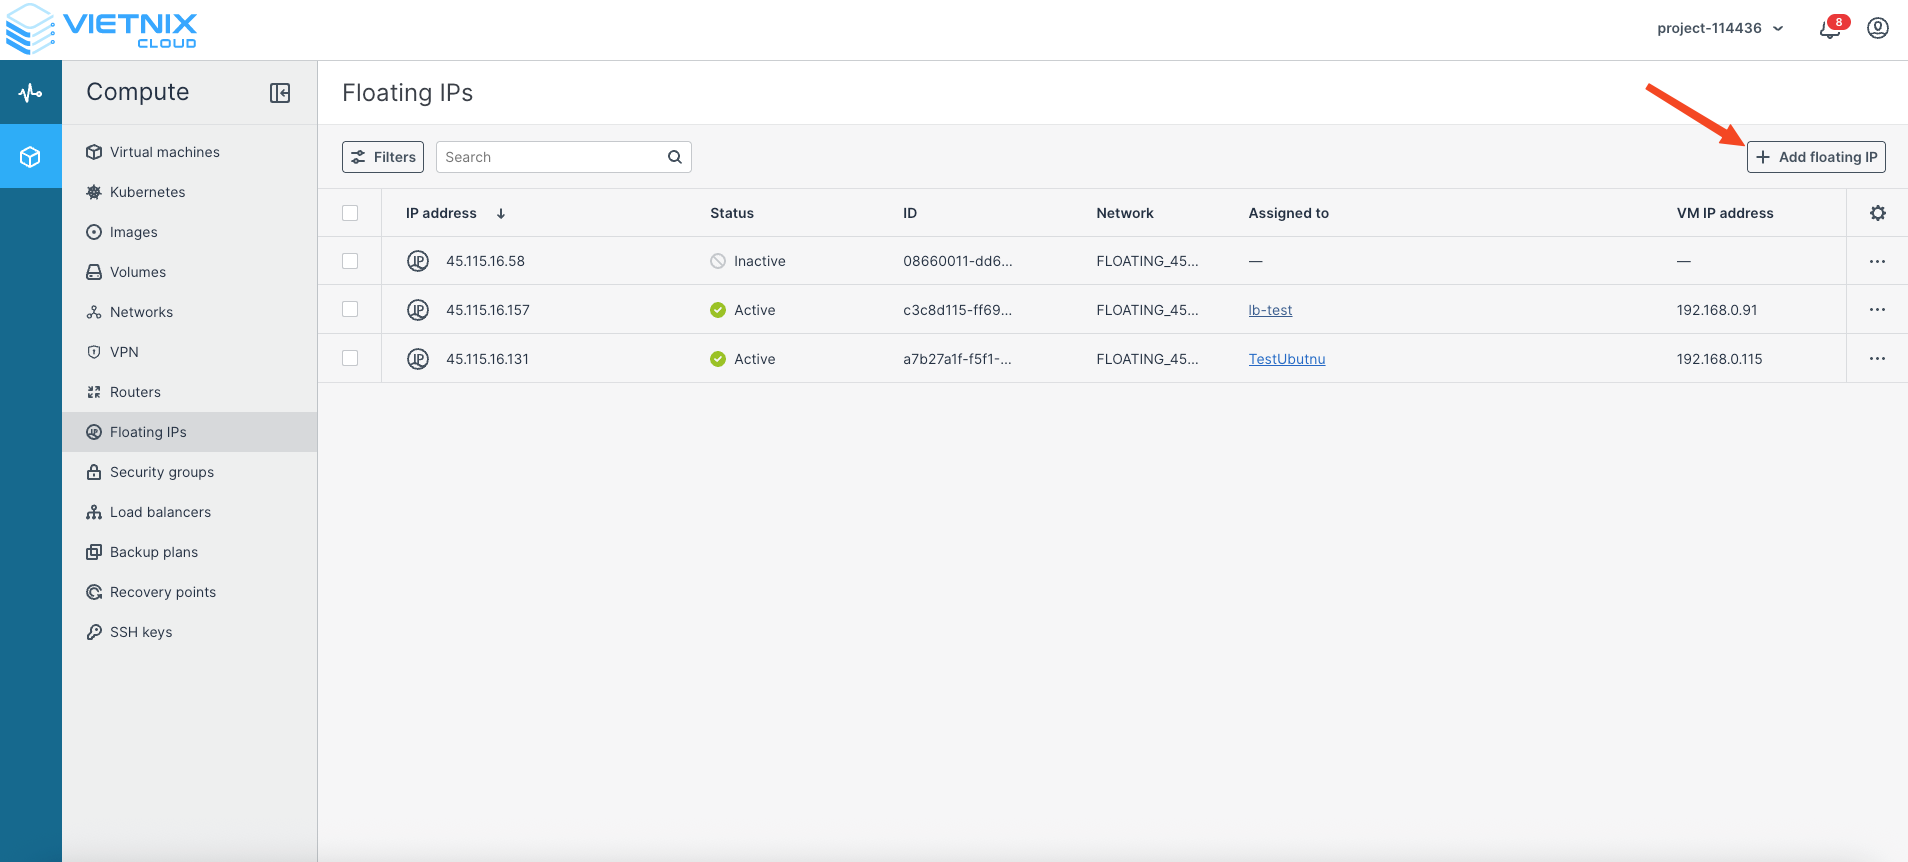
Navigate to Compute → Floating IPs.
-
Click Add Floating IP.
-
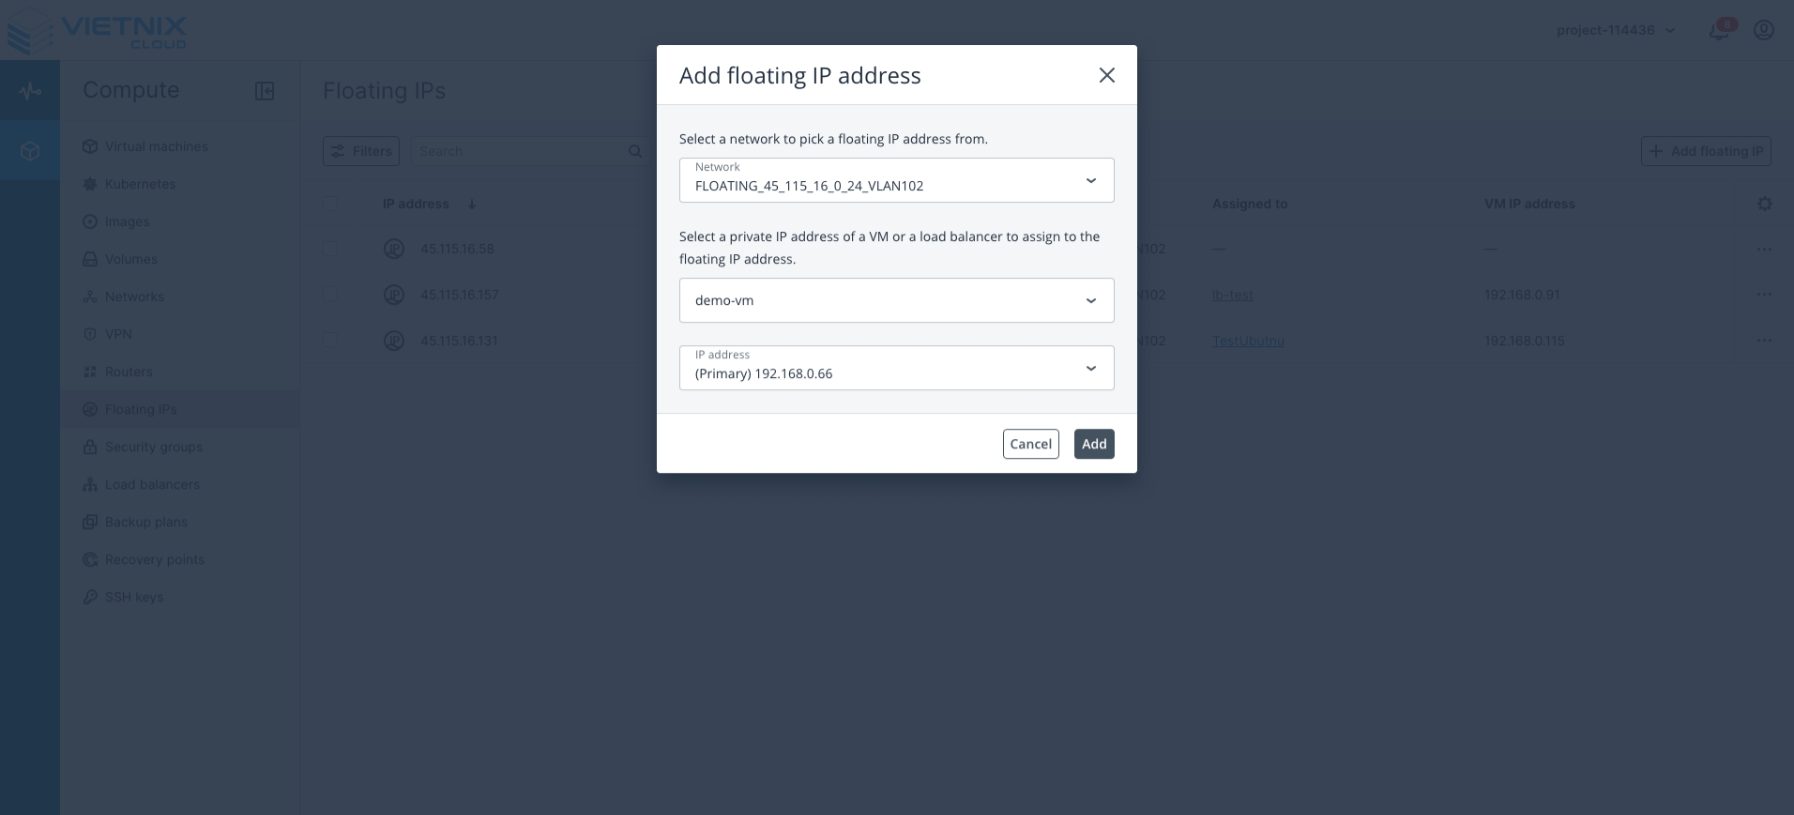
Configure the Floating IP settings:
- Network: Select the external network that will provide public access.
- VM or Load Balancer: Choose the virtual machine you created and want to connect to.
- IP Address: Select or assign an available IPv4 address for the VM.
-
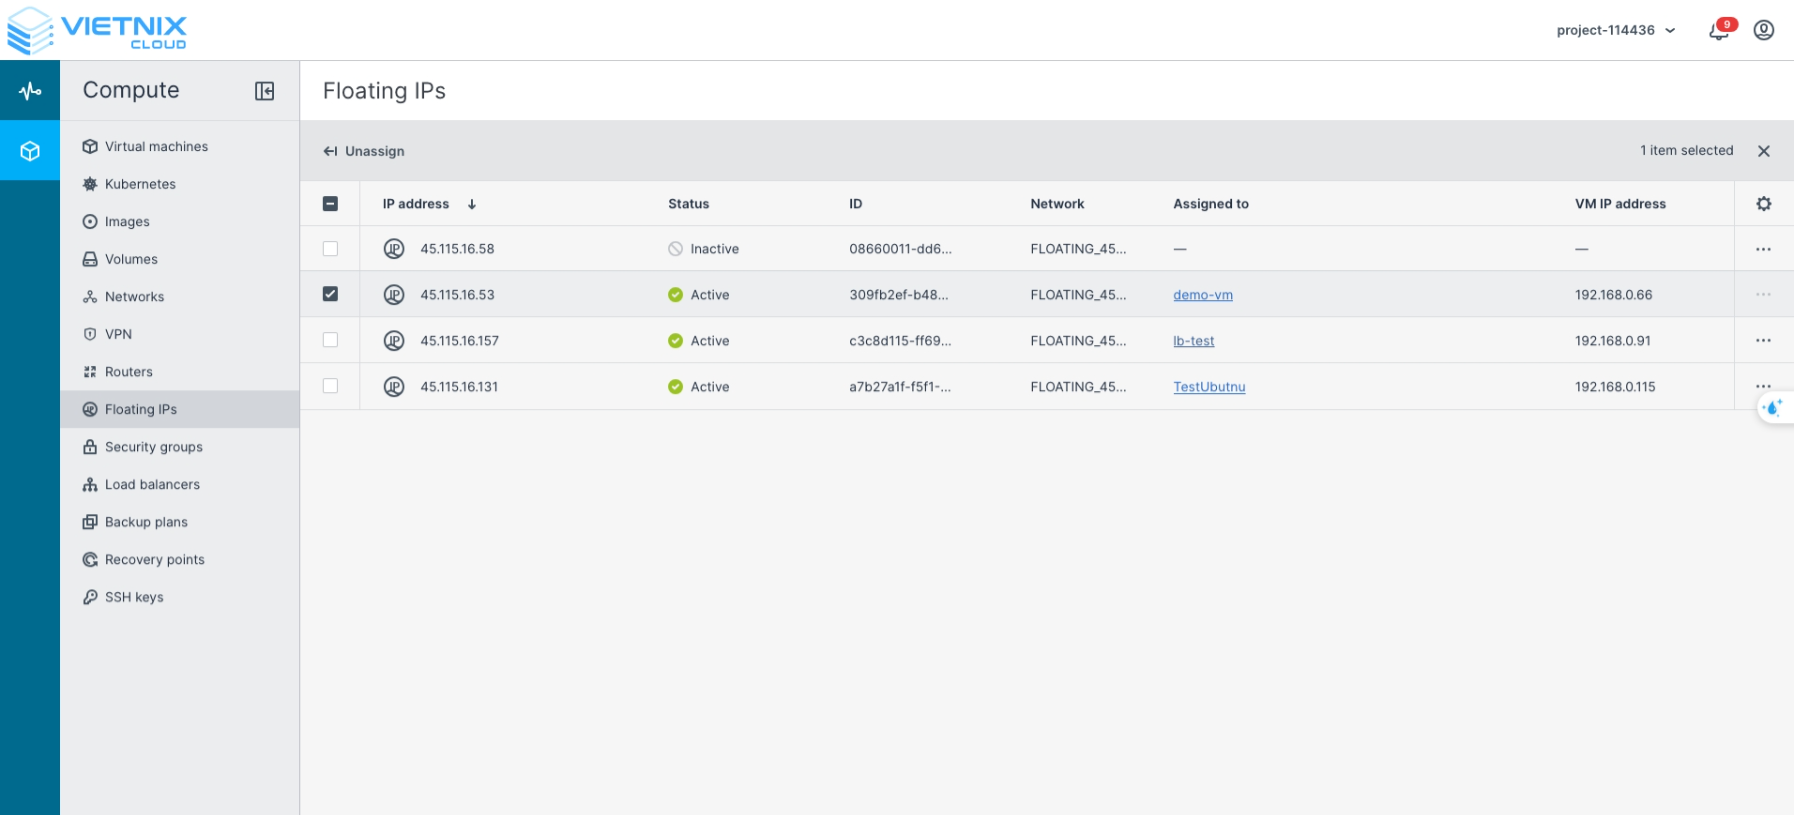
Once created, the status will change to Active, confirming the Floating IP has been successfully assigned. You can now use this IP address to connect to your VM.
-
Copy the assigned Floating IP address from the Floating IPs list.
-
Use the following command to connect to the virtual machine via SSH:
The default user is cloud-user.
ssh cloud-user@<Floating-IP> -i ~/.ssh/id_rsa
Debug Virtual Machine via Console (Optional)
You can directly monitor and debug a virtual machine using the Console interface in the Vietnix Cloud Dashboard.
Steps to Access Console
-
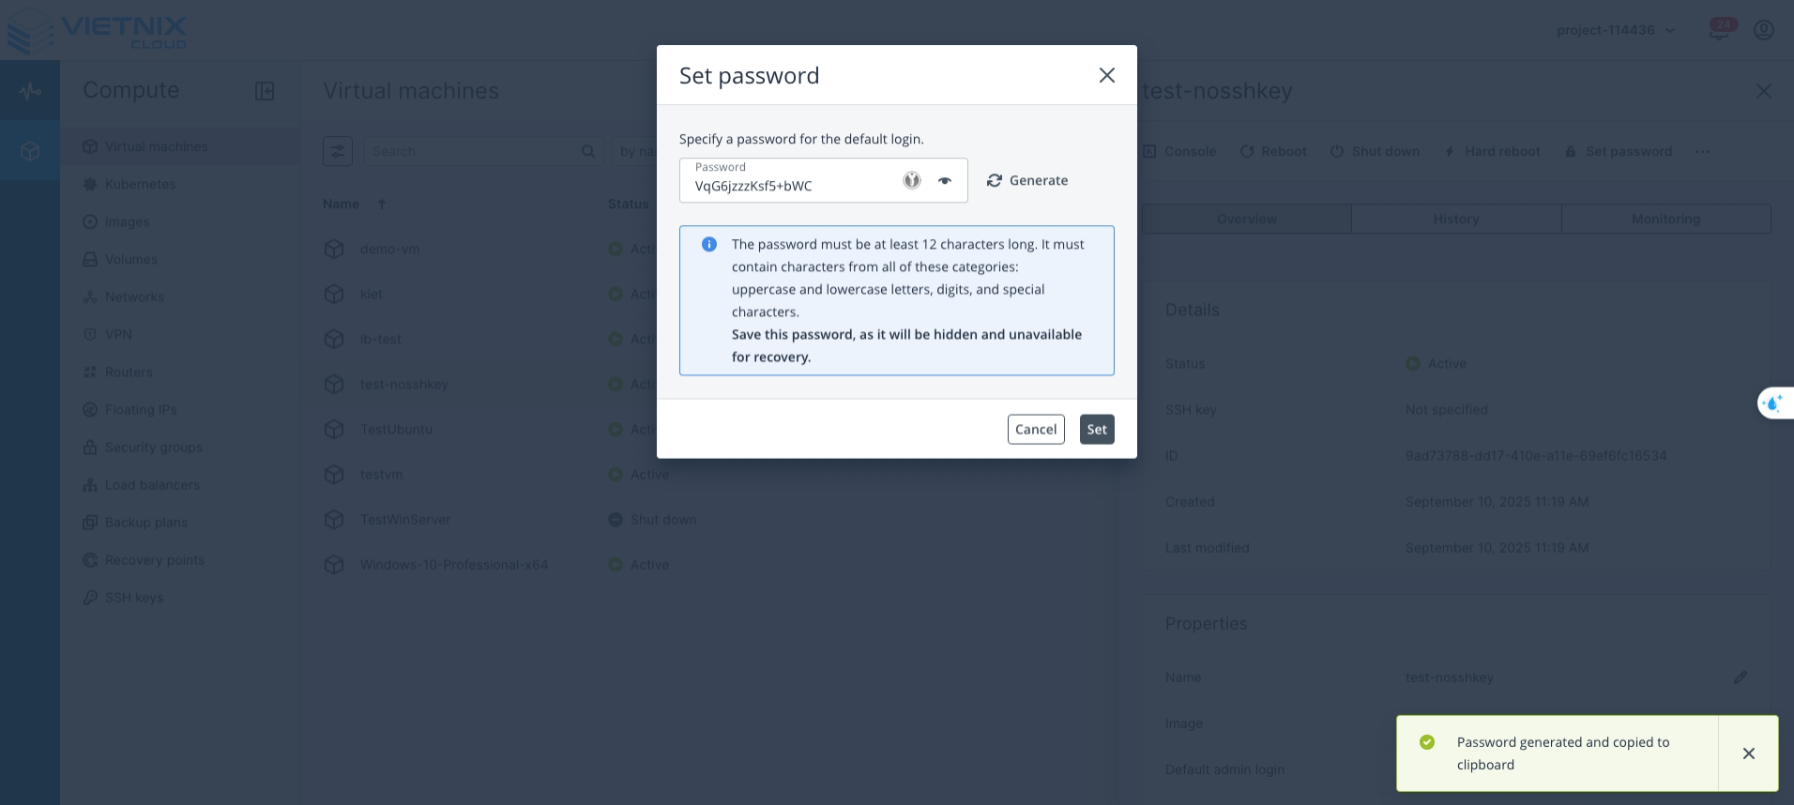
In the Virtual Machines section, select the VM you want to debug and click Set Password.
This password will be used for the root user when logging in via the Console.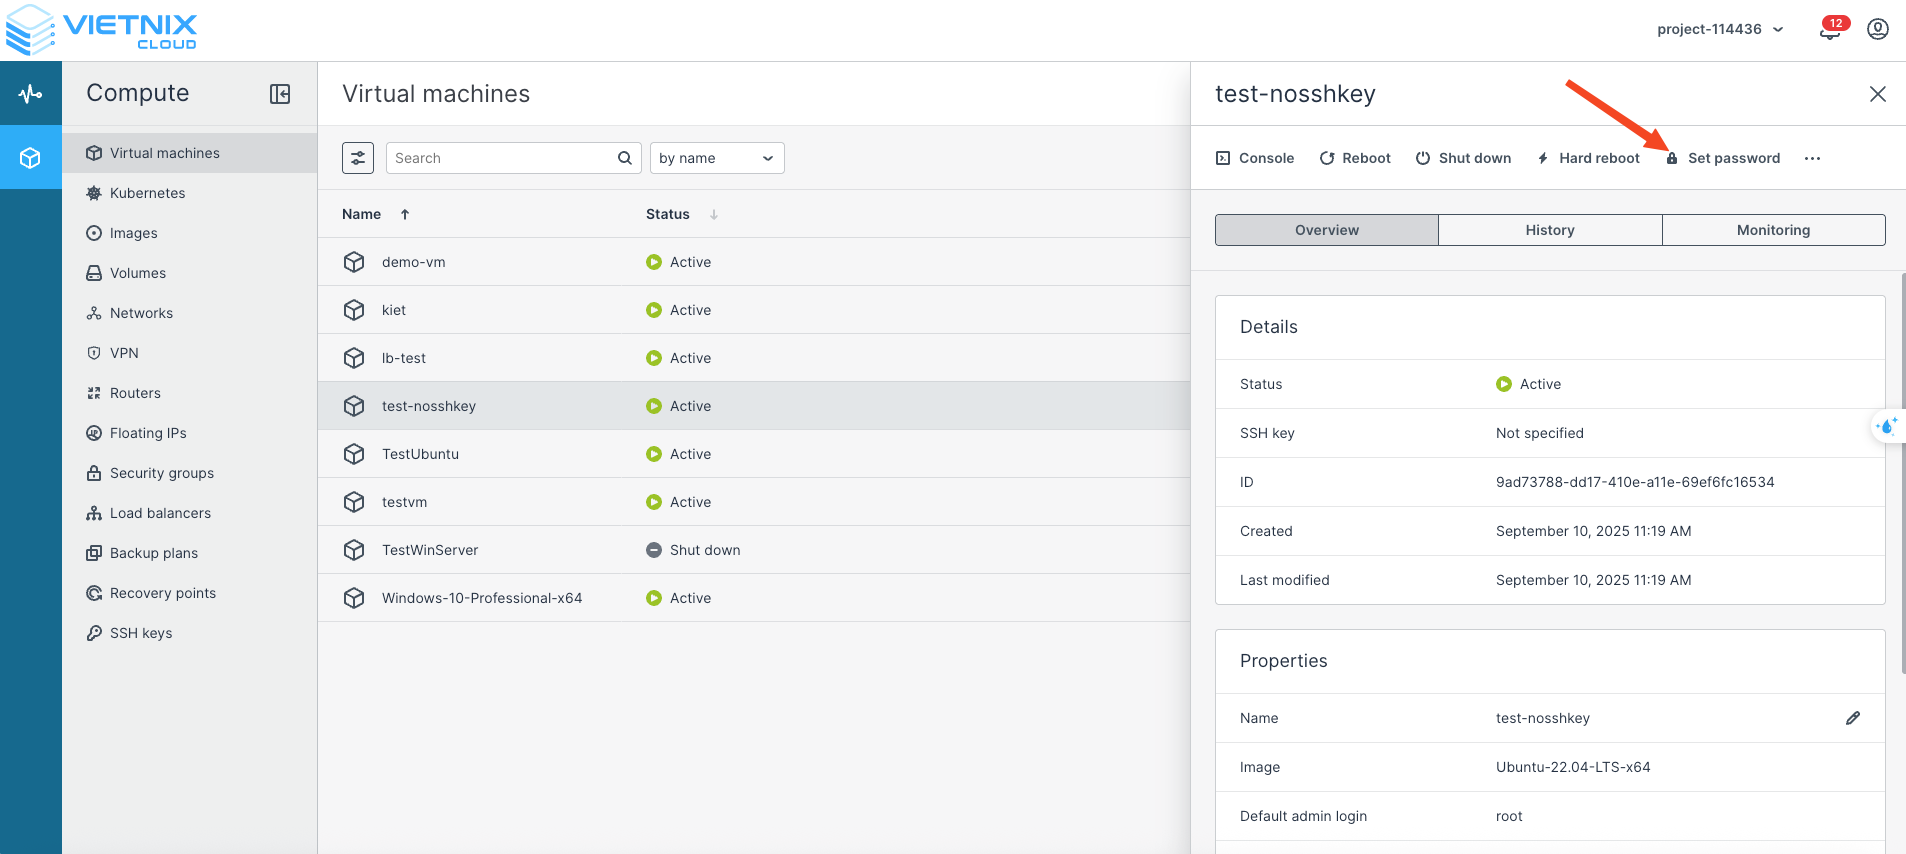
-
You can either set a custom password (following the password policy) or click Generate to automatically create one.
- Click the eye icon next to the password field to view it.
- Save the password in a secure location.
- Click Set to apply the password.
-
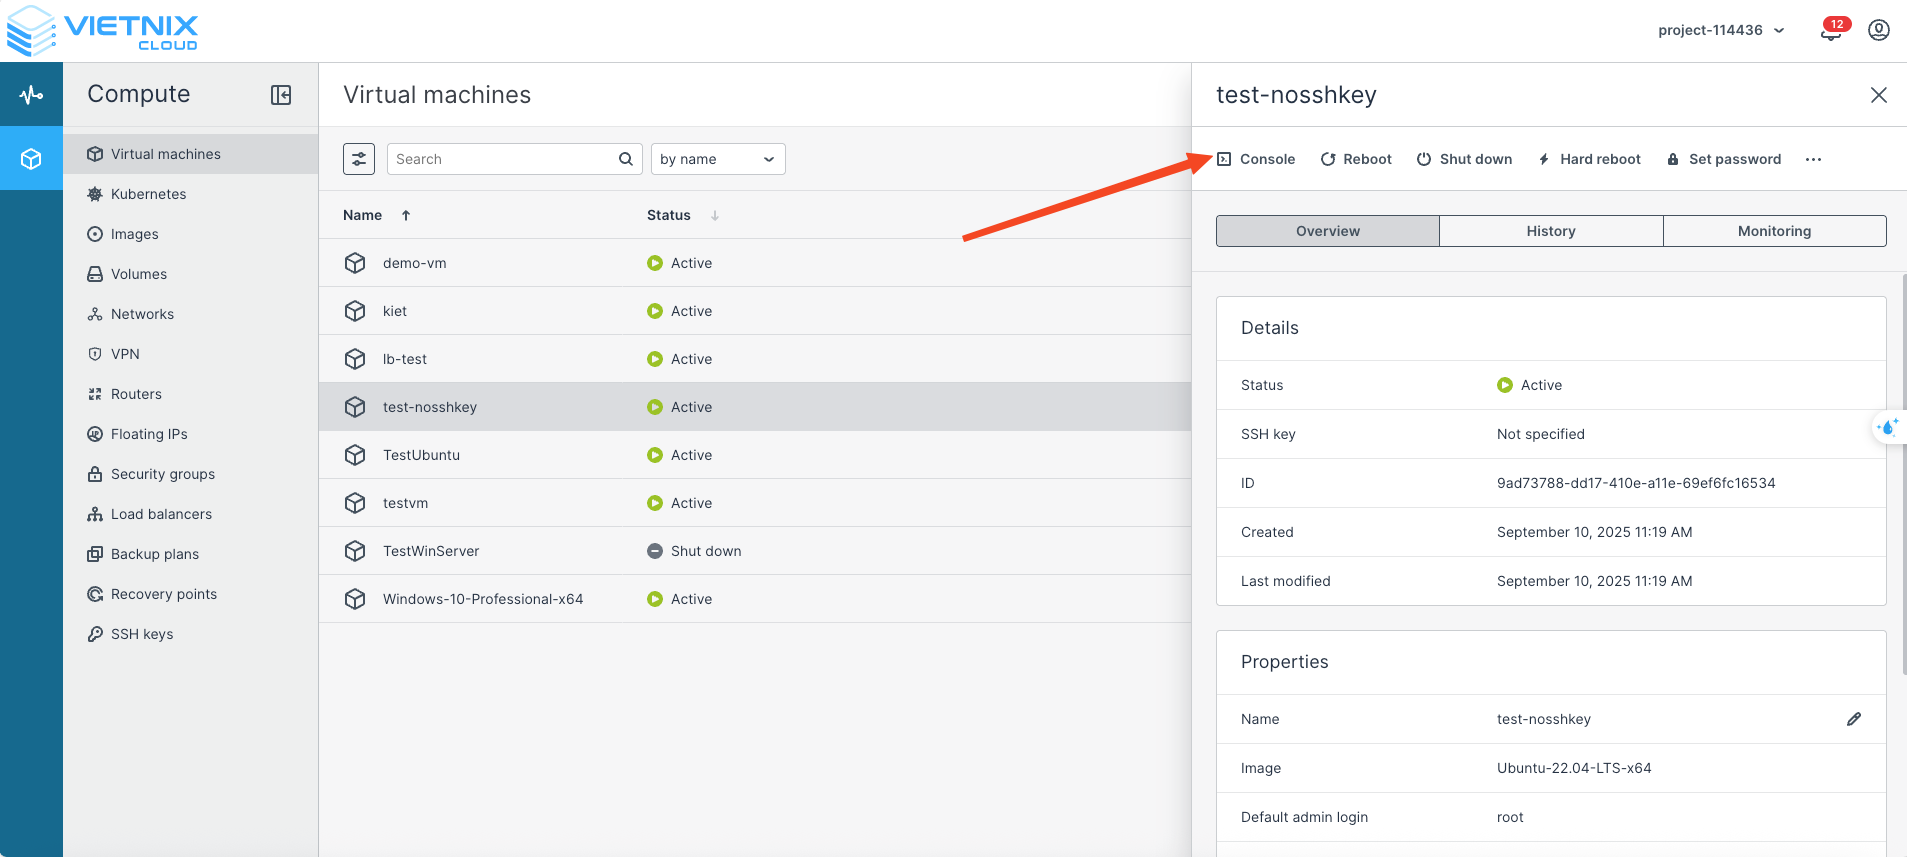
In the Virtual Machines section, select the VM again and click Console.
-
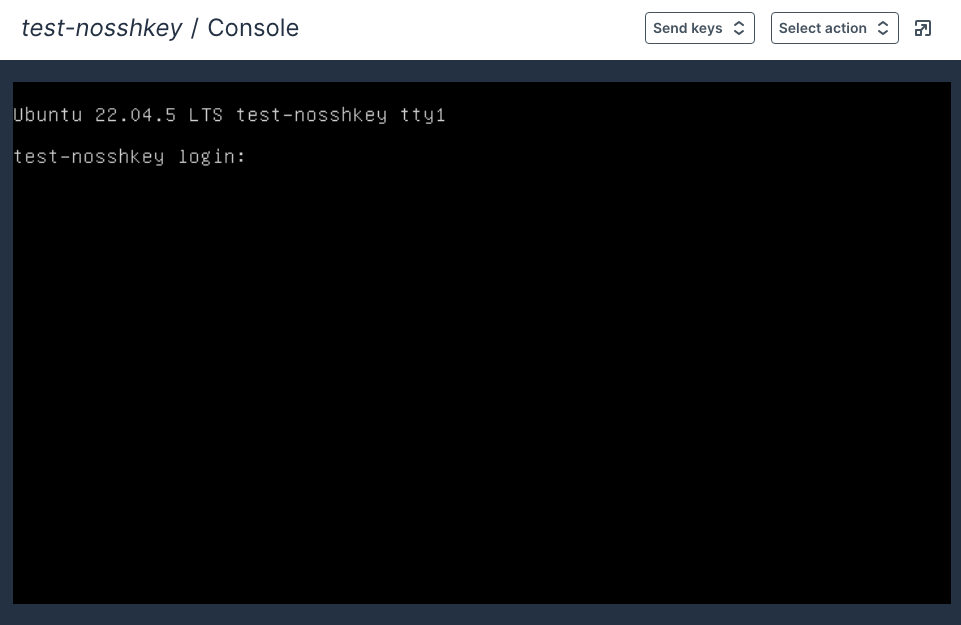
Enter the password you set earlier to log in as the root user and start debugging directly from the Console.
Note
- This method is only intended for debugging purposes.
- To access the VM via SSH, you must still configure and attach an SSH key as explained above.
You have now successfully created and connected to a virtual machine. The next guide will walk you through creating a Kubernetes cluster on Vietnix Cloud. Good luck!