Set DNS
You can set custom DNS for your instances in Vietnix Cloud to manage domain name resolution according to your preferences
Info
You can set DNS when create-network
Steps to Set DNS
-
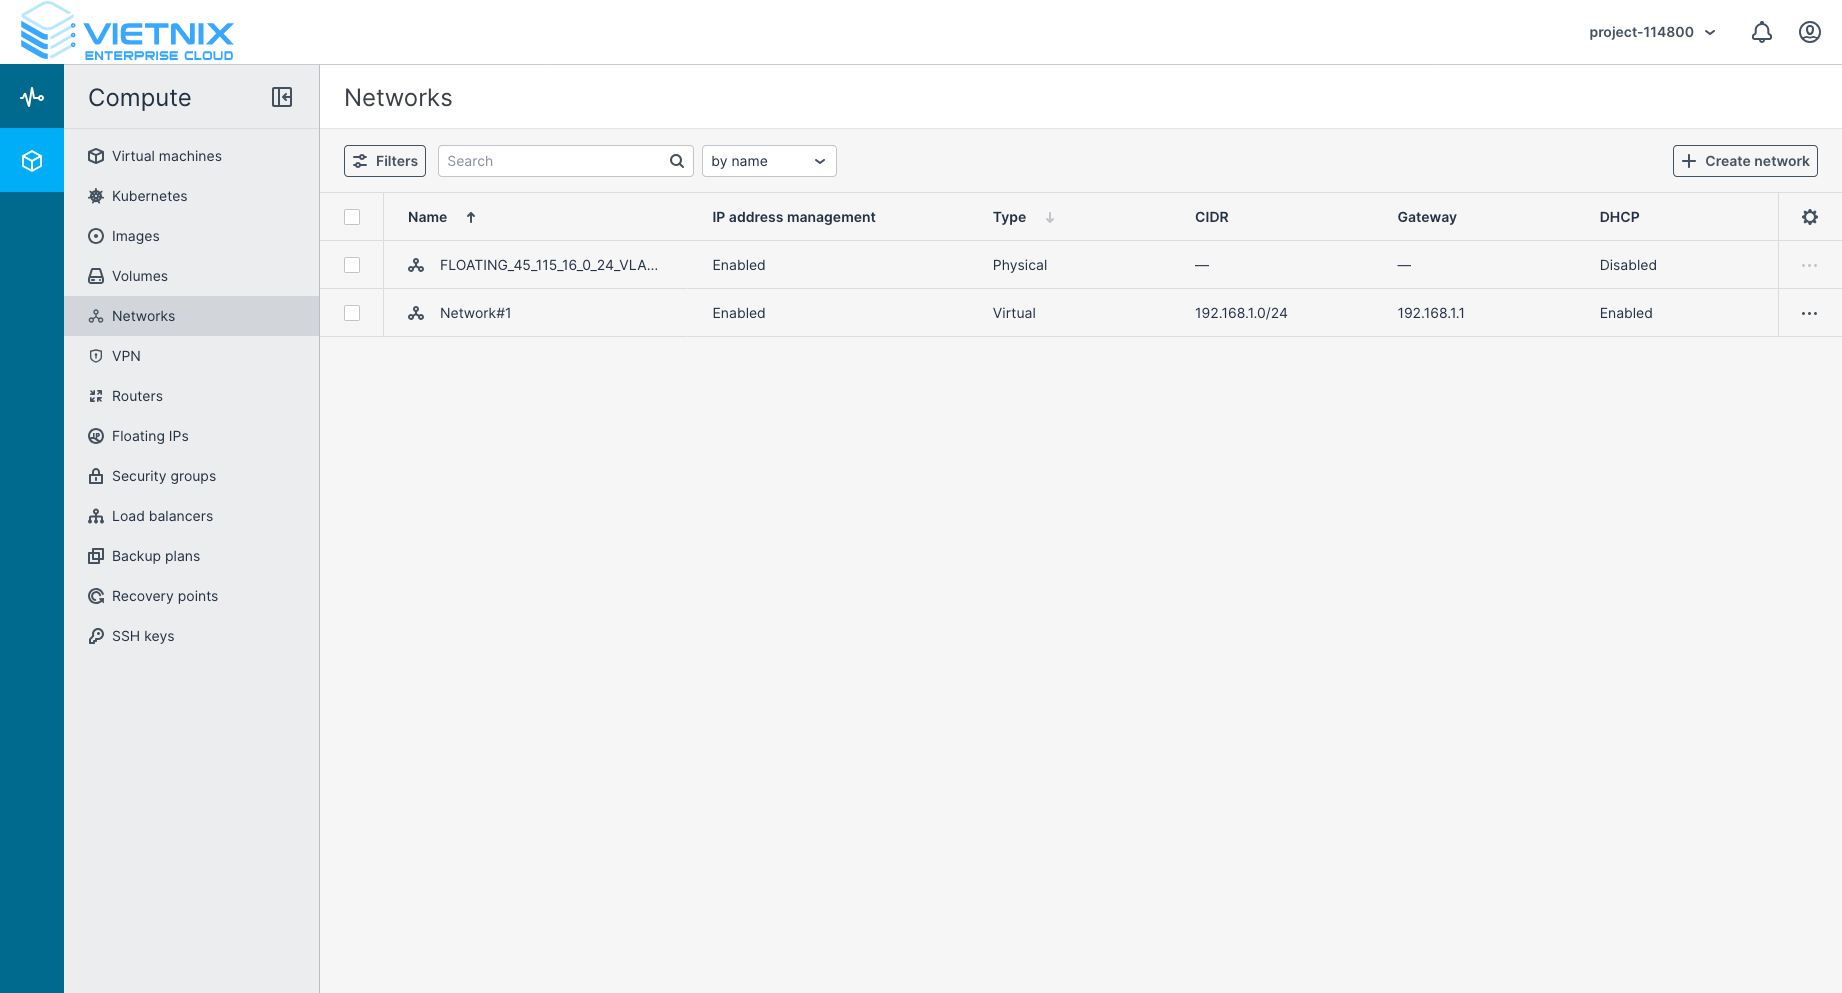
Log in to the Vietnix Cloud Console.
-
Navigate to the "Networks" section from the compute menu.
-
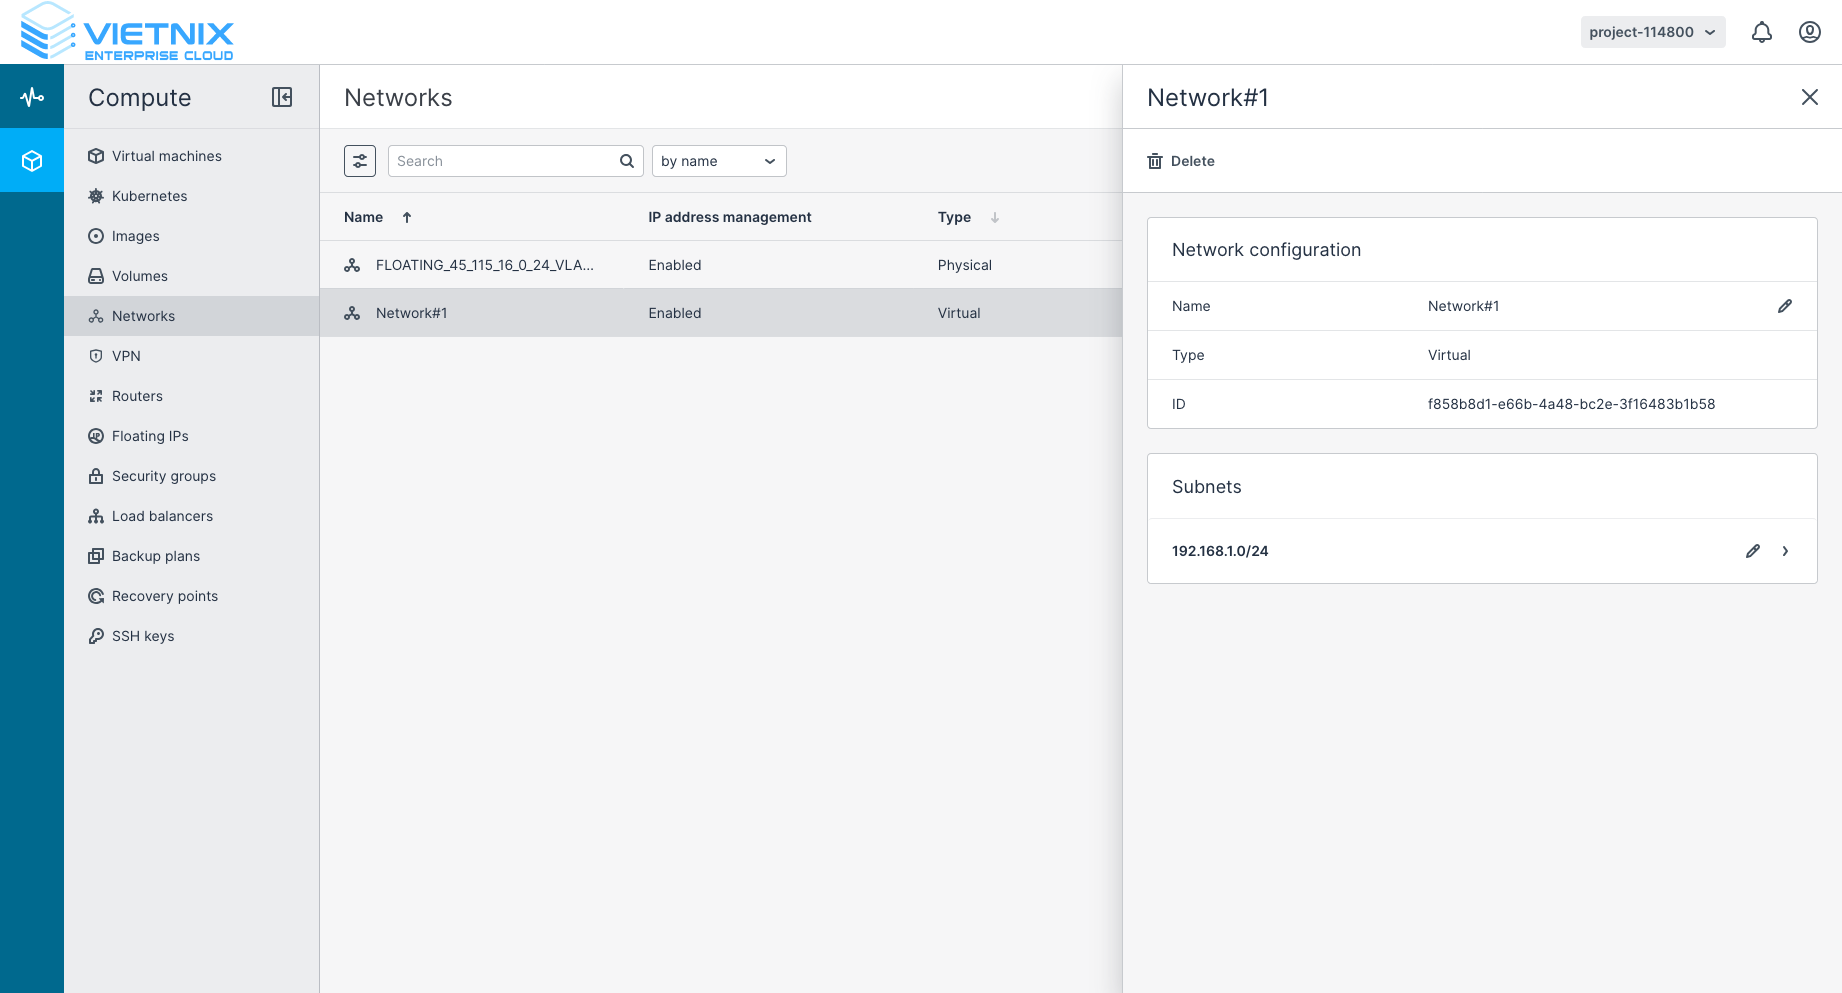
Select the network for which you want to set the DNS.
-
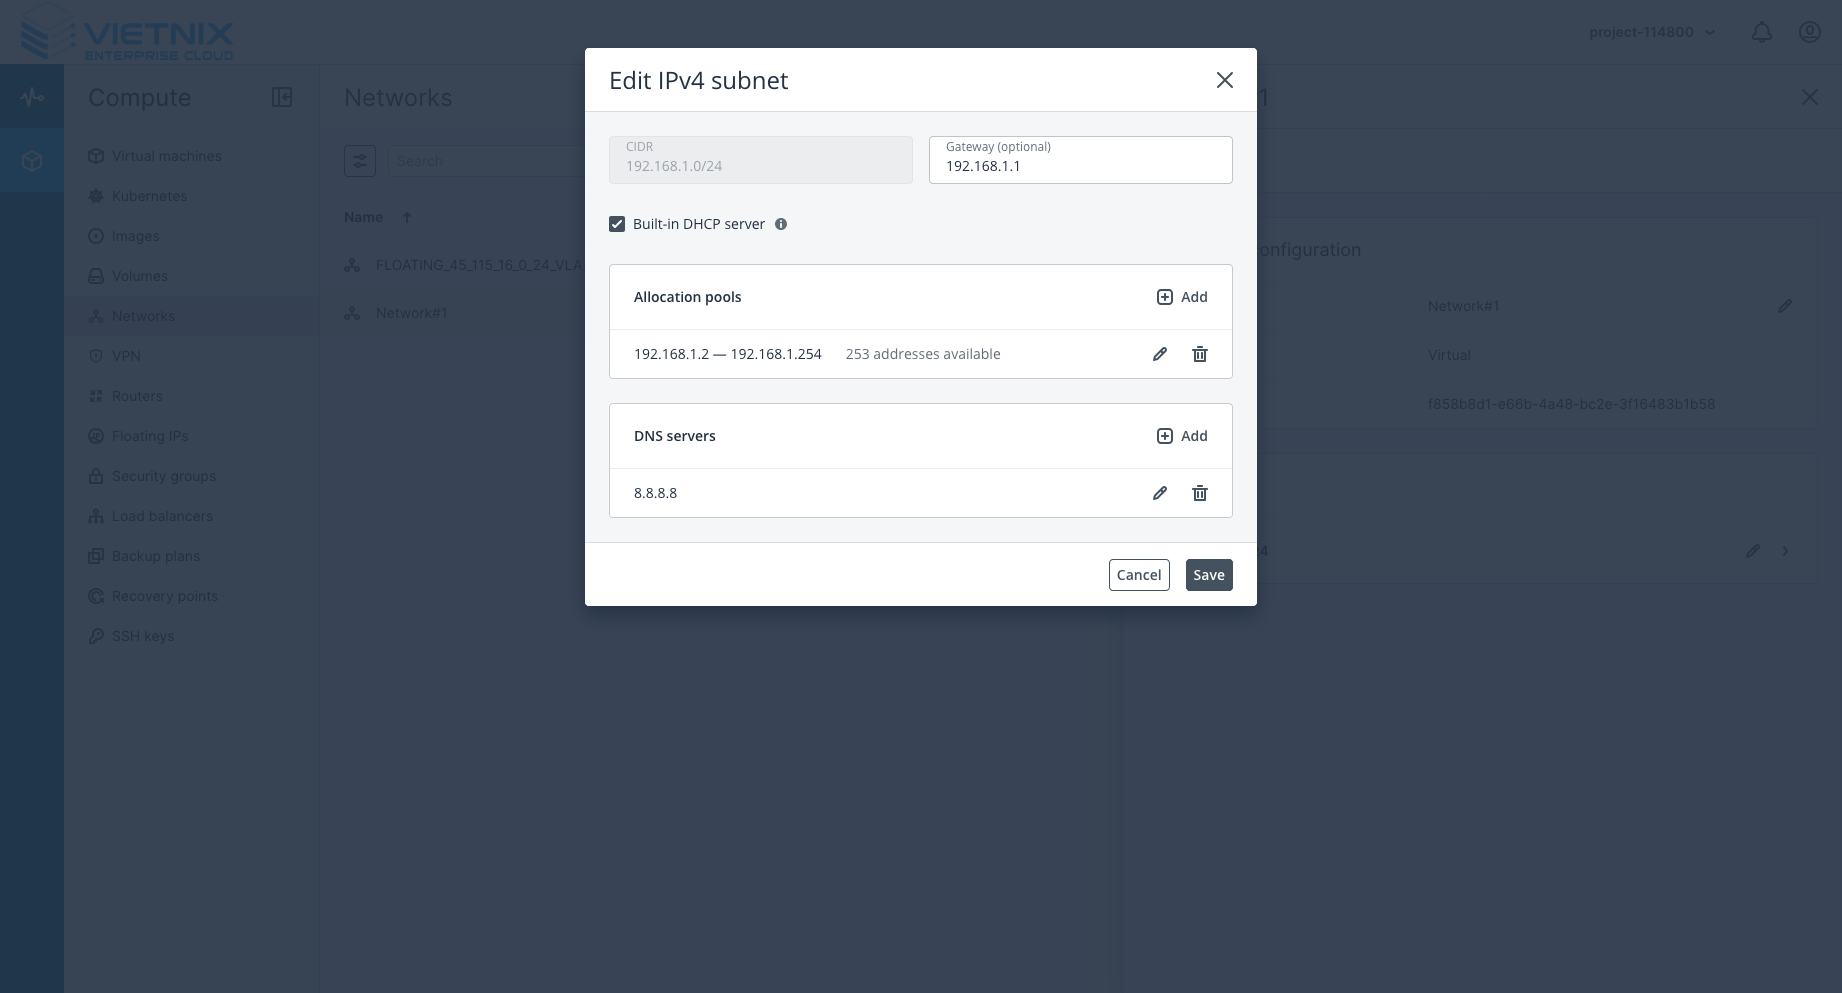
Click edit subnet settings.
-
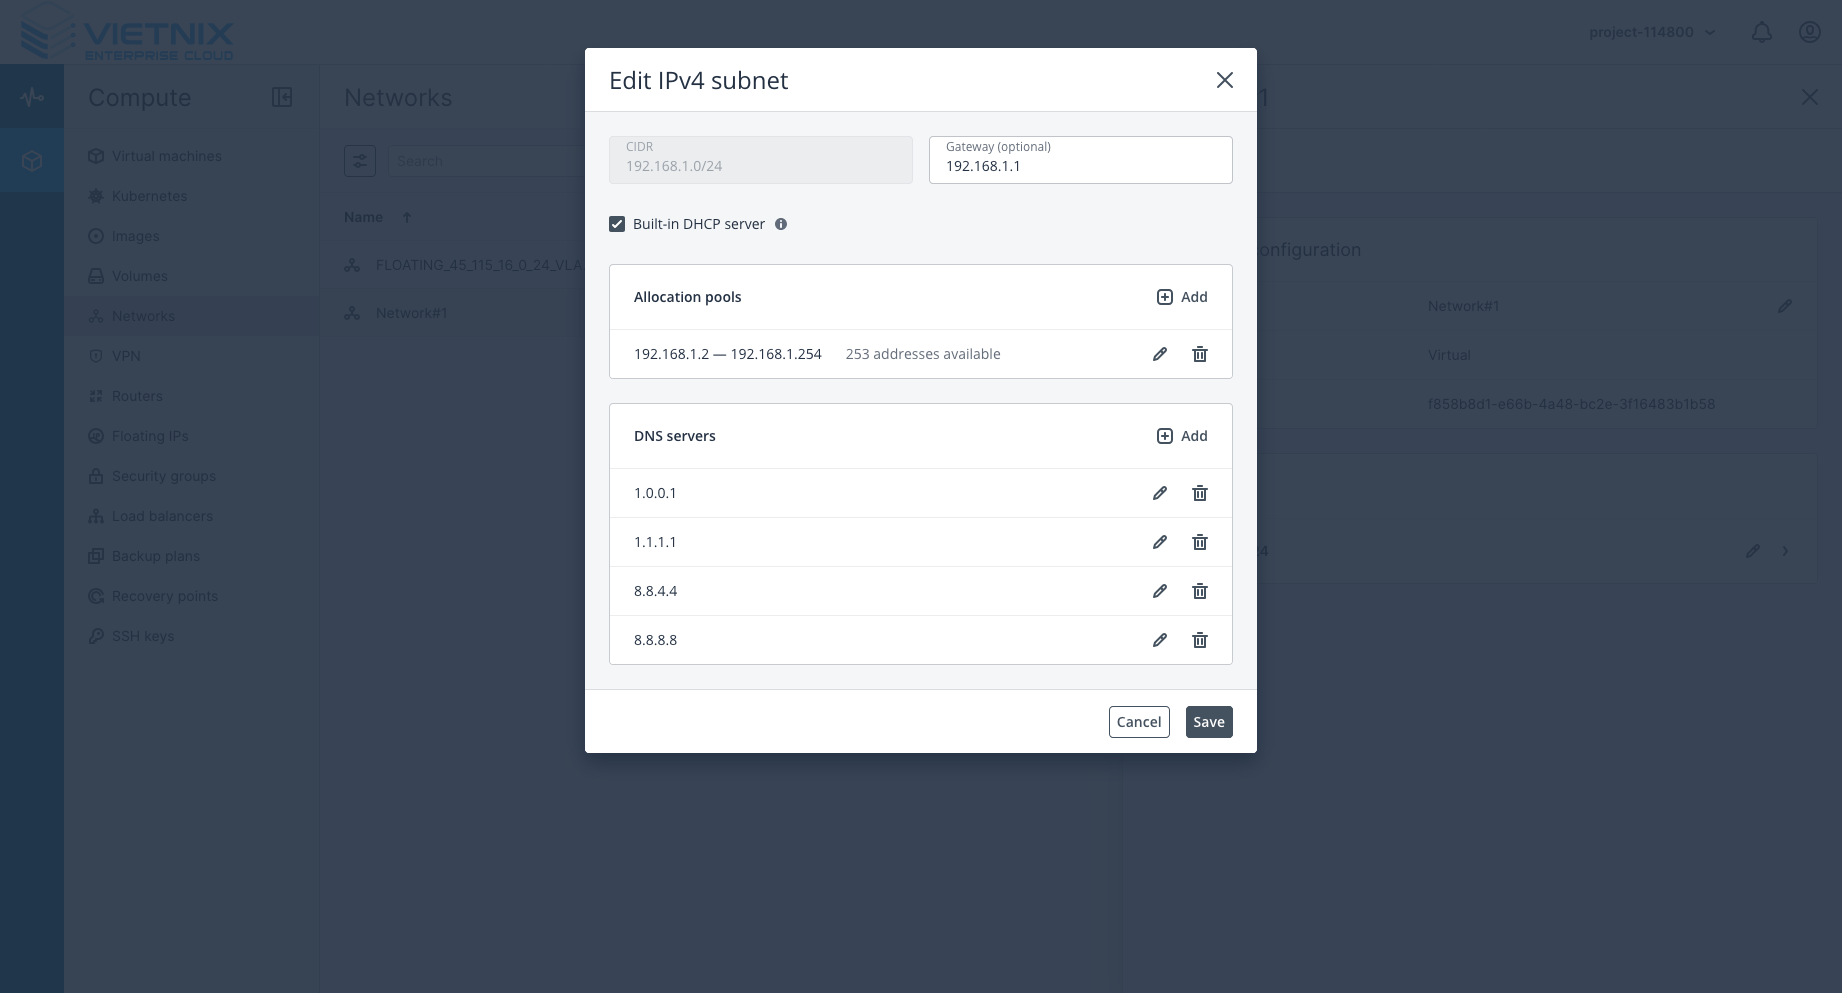
In the DNS settings, enter the desired DNS server addresses. You can use public DNS servers like Google DNS (8.8.8.8, 8.8.4.4) or Cloudflare DNS (1.1.1.1, 1.0.0.1).
-
Save the changes to apply the new DNS settings to the network.
Additional Information
- After setting the DNS, all instances connected to this network will use the specified DNS servers for domain name resolution. If your instances are already running, you may need to restart them for the changes to take effect.
- You can always update the DNS settings by following the same steps outlined above.
- You can change DNS via file
/etc/resolv.confon your instance if needed. But this change will be lost after reboot. We recommend setting DNS at the network level for persistent configuration.