Attach Volume
Attach Volume to VM
Attaching a volume to a virtual machine (VM) in Vietnix Cloud allows you to expand the storage capacity of your instance. This guide will walk you through the steps to attach a volume to your VM.
Prerequisites
- A created-volume in Vietnix Cloud
- An instance (VM) to attach the volume to
Steps to Attach Volume to VM
- Navigate to the Compute section and select Volumes.

- Find the volume you want to attach and click on it.
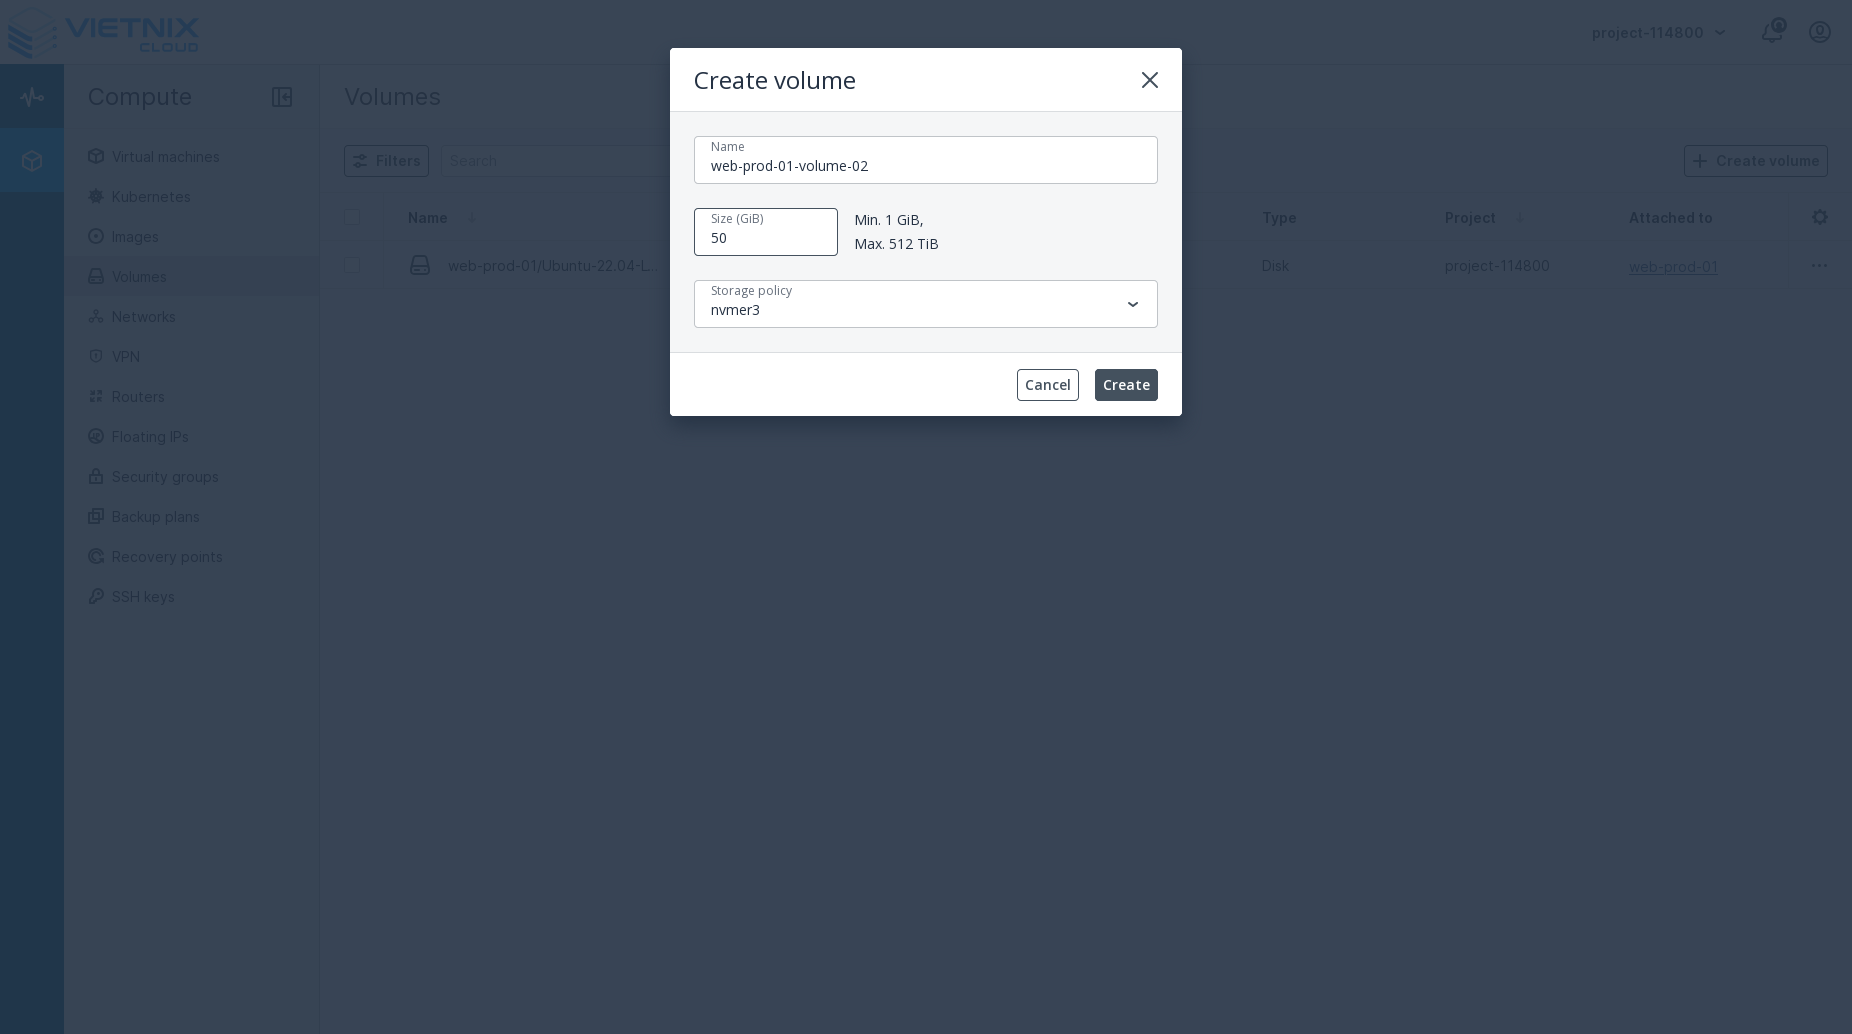
- Click the Attach Volume button.
- In the dialog, select the instance (VM) you want to attach the volume to from the dropdown menu.
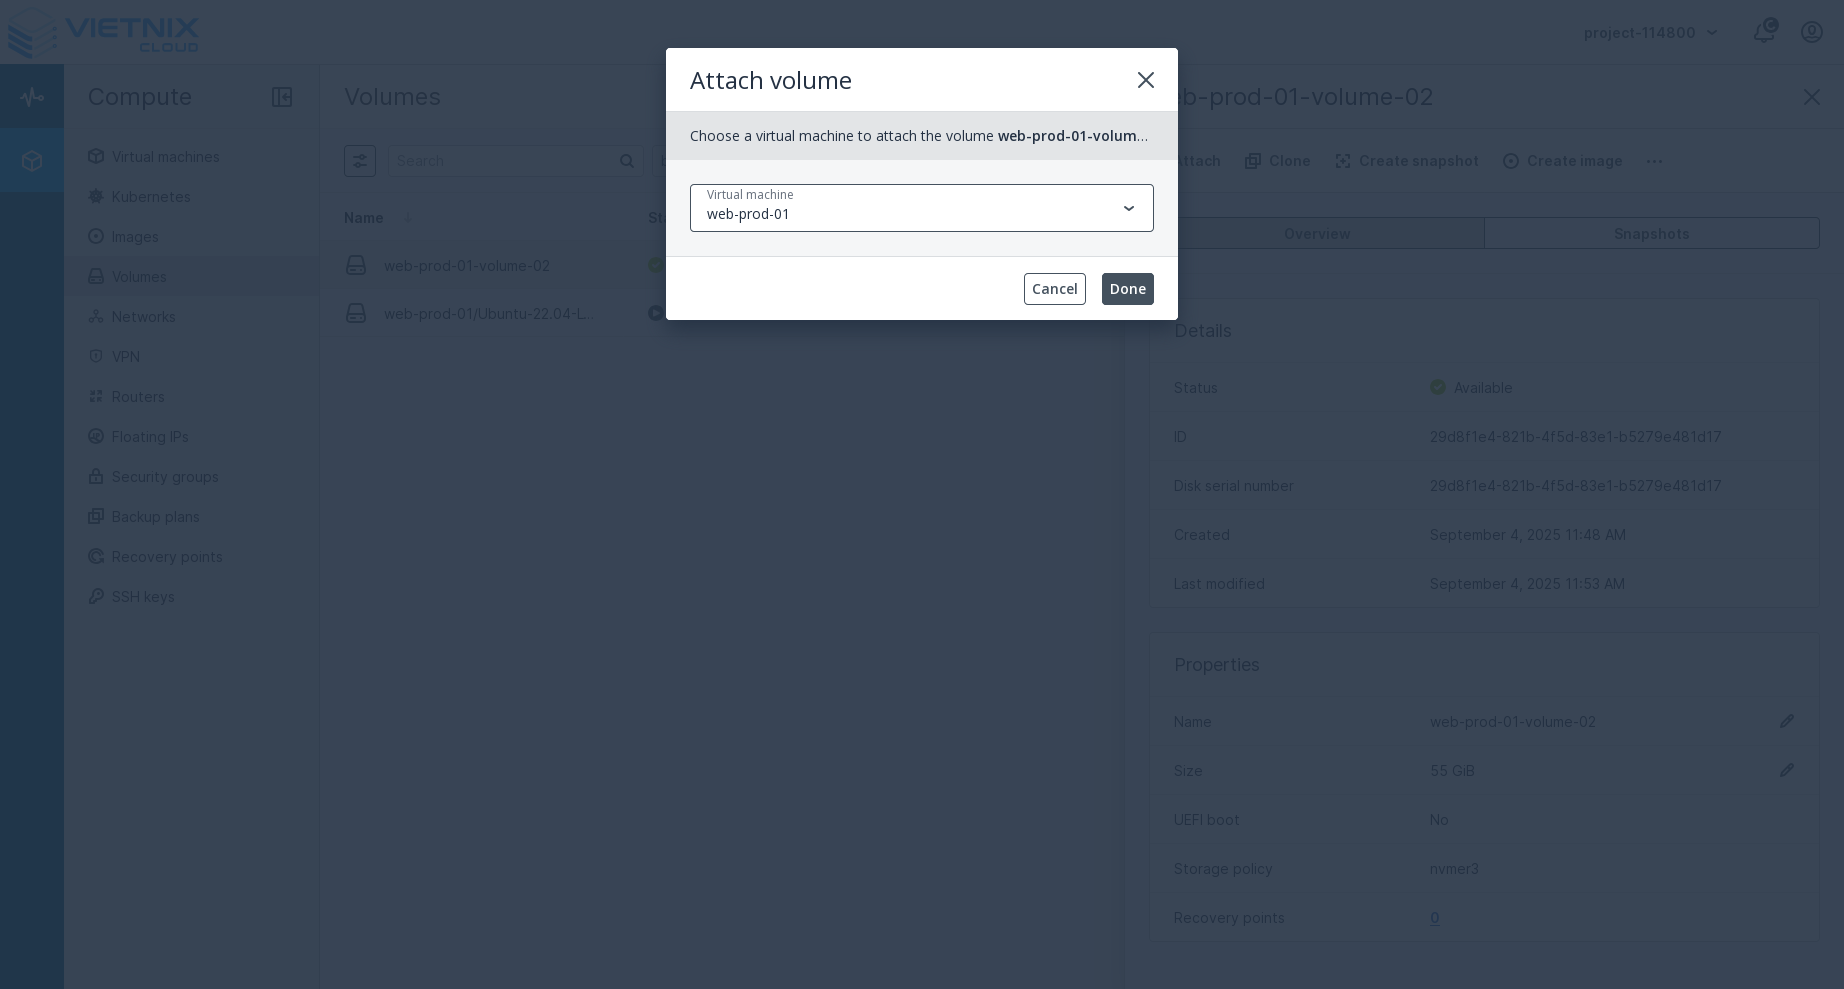
- Click Done to attach the volume.
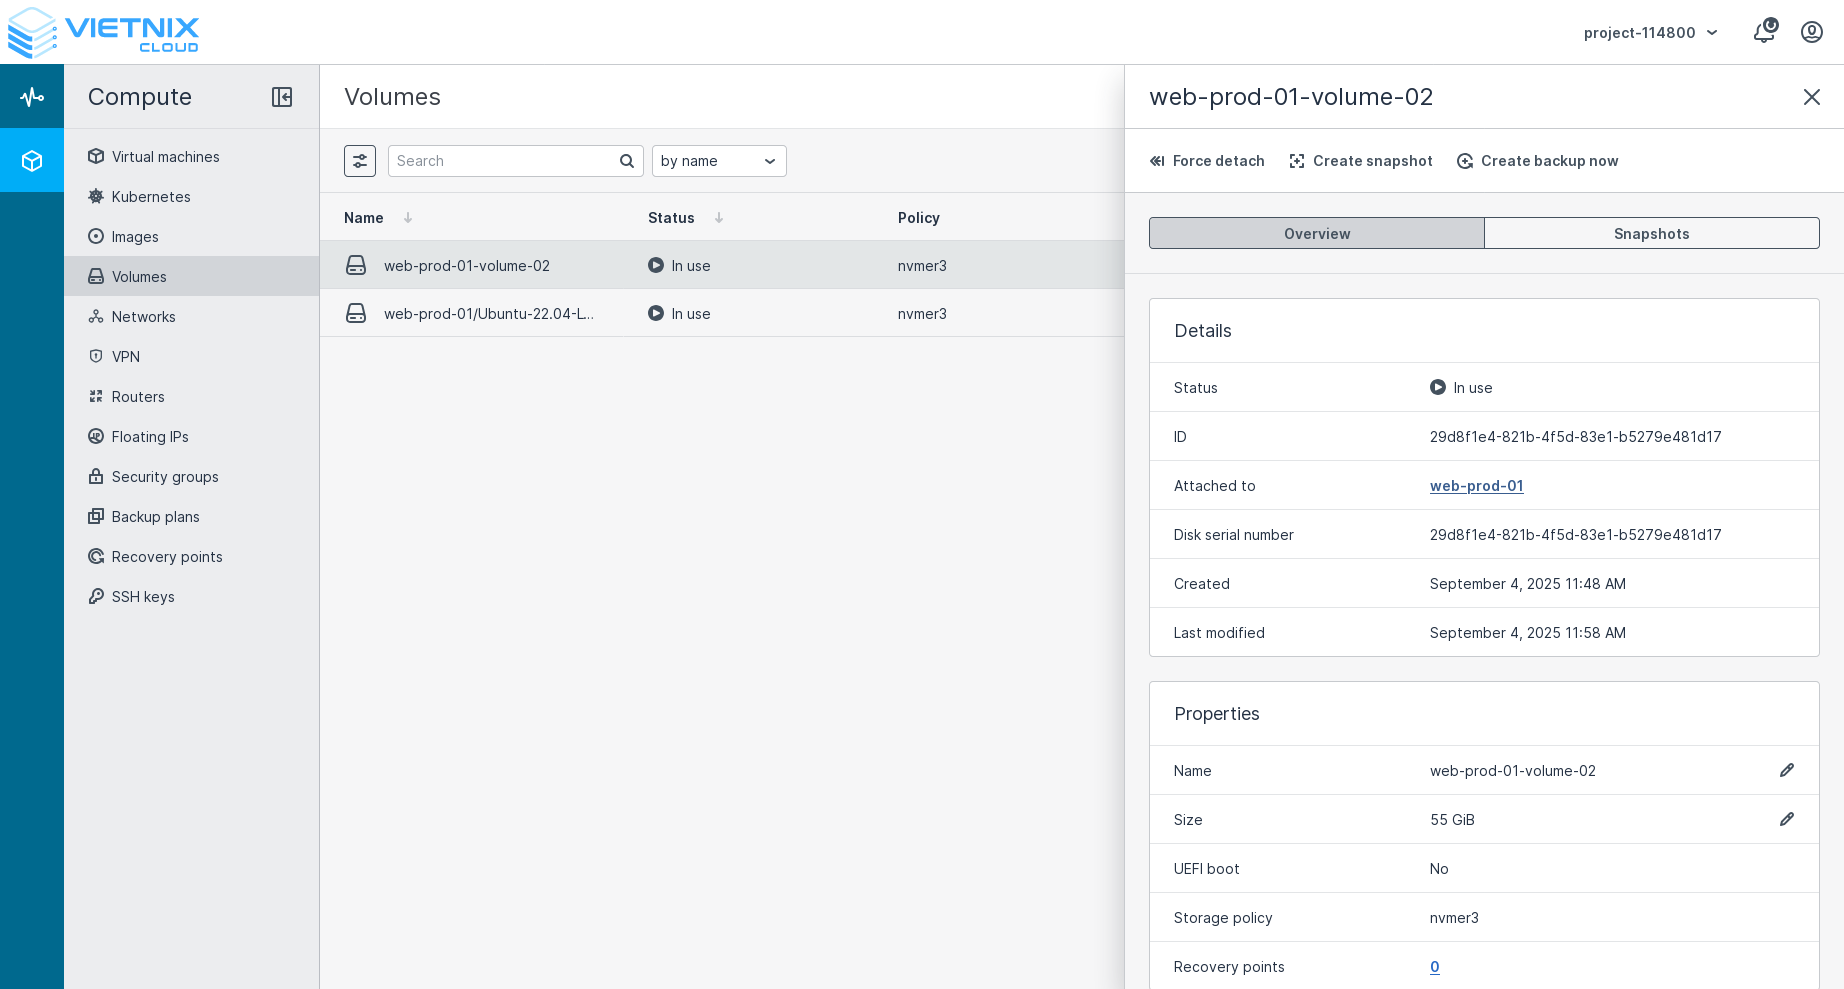
- The volume will now be attached to the selected instance. You can verify this by checking the instance's details or by using SSH to log in to the instance and running the
lsblkcommand to see the attached volume.
Mount Volume inside VM
After attaching a volume to your instance, you need to mount it to make it accessible. Follow these steps to mount the volume.
Requisites
- A formatted volume attached to your instance
- SSH access to your instance
- Root or sudo privileges
Steps to Mount Volume inside VM
Step 1: Identify the Volume
First, identify the volume device name:
# List all block devices
lsblk

# Or use fdisk to list devices
sudo fdisk -l
Step 2: Create Mount Point
Create a directory where you want to mount the volume:
# Create mount directory
sudo mkdir /mnt/myvolume

# Or use any directory you prefer
sudo mkdir /data
sudo mkdir /home/user/storage
Step 3: Mount the Volume
Mount the volume to the created directory:
# Mount the volume
sudo mount /dev/vdb1 /mnt/myvolume

# Verify the mount
df -h
Step 4: Set Permissions
Set appropriate permissions for the mounted volume:
# Change ownership
sudo chown user:user /mnt/myvolume

# Set permissions
sudo chmod 755 /mnt/myvolume
Auto-mount on Boot
To automatically mount the volume when the system boots:
Step 1: Get Volume UUID
# Get the UUID of the volume
sudo blkid /dev/vdb1
Step 2: Add to fstab
Edit the /etc/fstab file:
sudo nano /etc/fstab
Add this line (replace UUID with actual UUID):
UUID=your-uuid-here /mnt/myvolume ext4 defaults 0 2
Step 3: Test fstab
Test the fstab configuration:
# Test mount without actually mounting
sudo mount -a

# If successful, the volume will be mounted
df -h
Mount Options
You can specify different mount options:
Default Options
sudo mount /dev/vdb1 /mnt/myvolume
With Specific Options
# Mount with specific options
sudo mount -o rw,user,exec /dev/vdb1 /mnt/myvolume

# Mount with noatime (faster access times)
sudo mount -o noatime /dev/vdb1 /mnt/myvolume
Common Mount Options
rw: Read-write accessro: Read-only accessnoatime: Don't update access timesuser: Allow non-root users to mountexec: Allow execution of binariesnoexec: Prevent execution of binaries
Unmounting Volume
To unmount a volume:
# Unmount the volume
sudo umount /mnt/myvolume

# Or unmount by device
sudo umount /dev/vdb1
Troubleshooting
Common Issues
- Device busy: Make sure no processes are using the volume
- Permission denied: Check file system permissions
- Wrong file system: Verify the file system type
Commands for Troubleshooting
# Check what's using the volume
sudo lsof /mnt/myvolume

# Check mount status
mount | grep vdb

# Check file system
sudo fsck /dev/vdb1

# Force unmount (use with caution)
sudo umount -f /mnt/myvolume
Best Practices
- Use UUID: Always use UUID in fstab instead of device names
- Backup fstab: Make a backup before editing fstab
- Test mounts: Always test mount commands before adding to fstab
- Proper permissions: Set appropriate ownership and permissions
If you encounter any issues, contact our support team at support.vietnix.vn
New Days New Knowledge
- Create Volume - Learn how to create a new volume in Vietnix Cloud
- Extend Volume - Learn how to extend the size of an existing
- Format Volume - Learn how to format a volume for use
- Create Snapshot - Learn how to create a snapshot of a