VPN Site-to-Site Between Vietnix Cloud and AWS
Prerequisites
Before getting started, make sure you have:
- An AWS account with permissions to create VPC, EC2, and VPN.
- A Vietnix Enterprise Cloud account.
Step to set up VPN Site-to-Site in Vietnix Cloud
In this lab, we will setup a VPN Site-to-Site connection between a Vietnix Enterprise Cloud and AWS VPC.
With AWS VPC
Step 1: Create a VPC in AWS
-
Select Create VPC -> VPC and more.
-
Configure the following:
- Subnet:
10.0.0.0/16
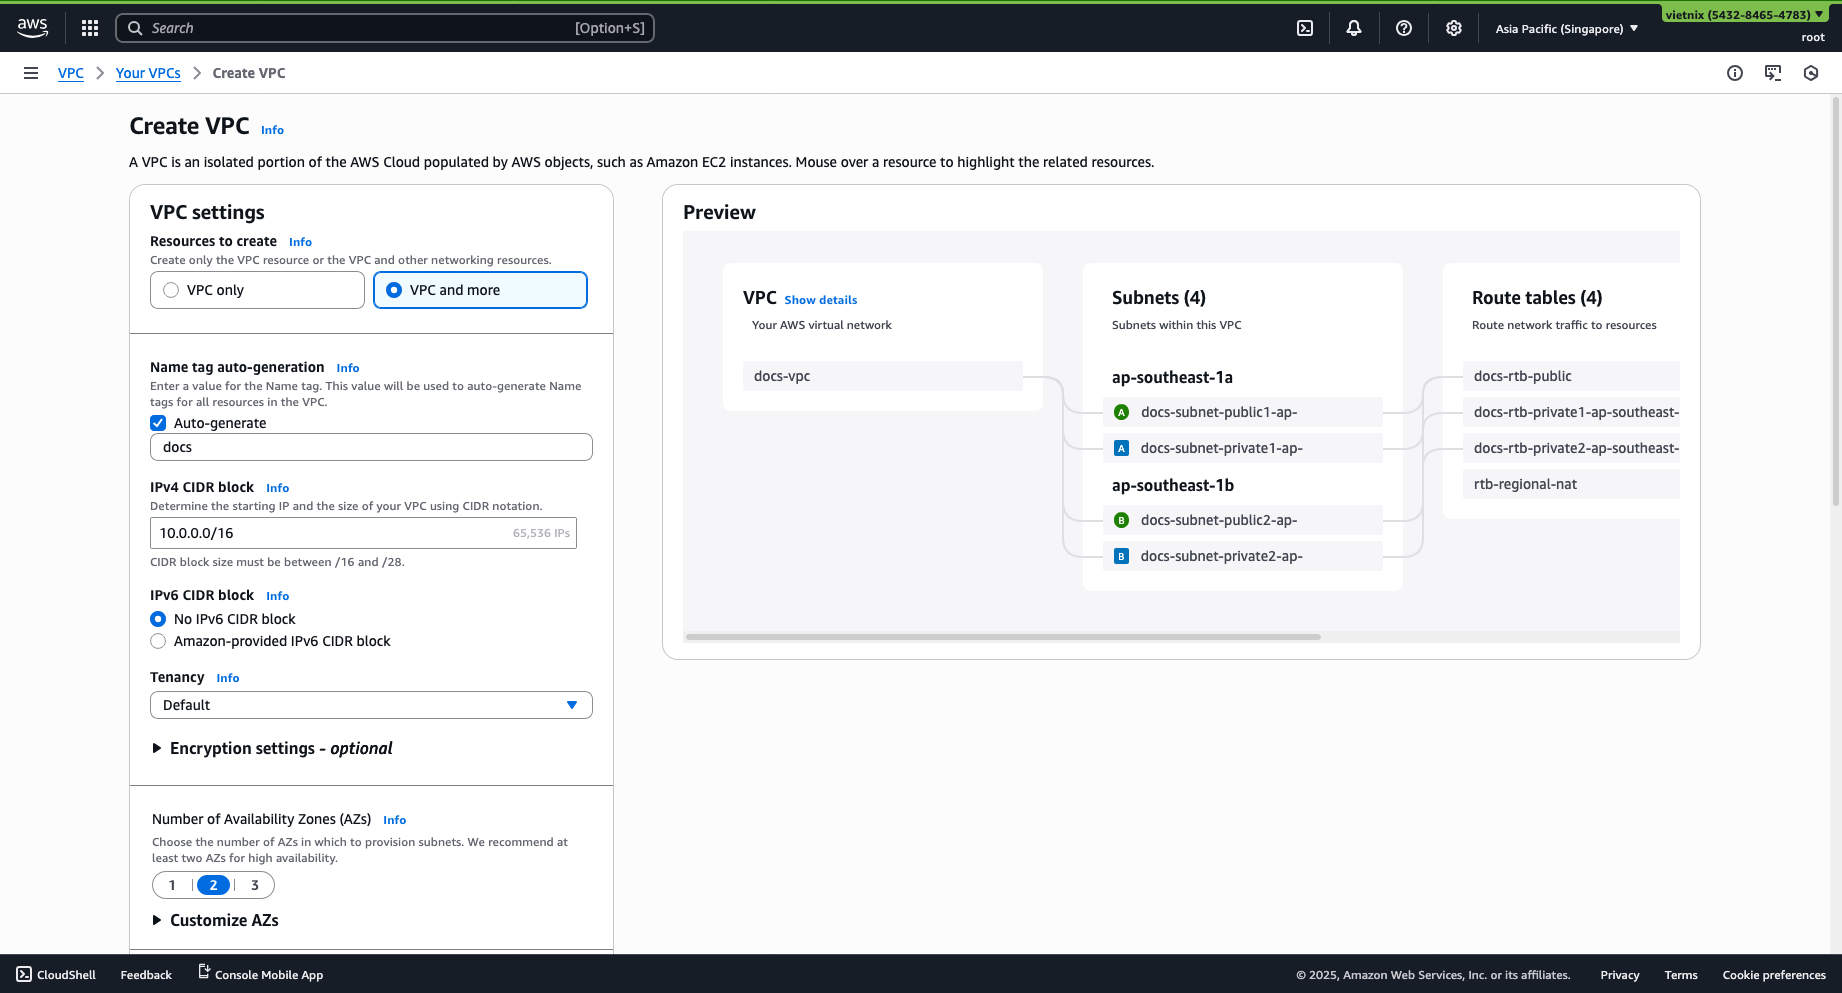
- NAT gateways: Select regional
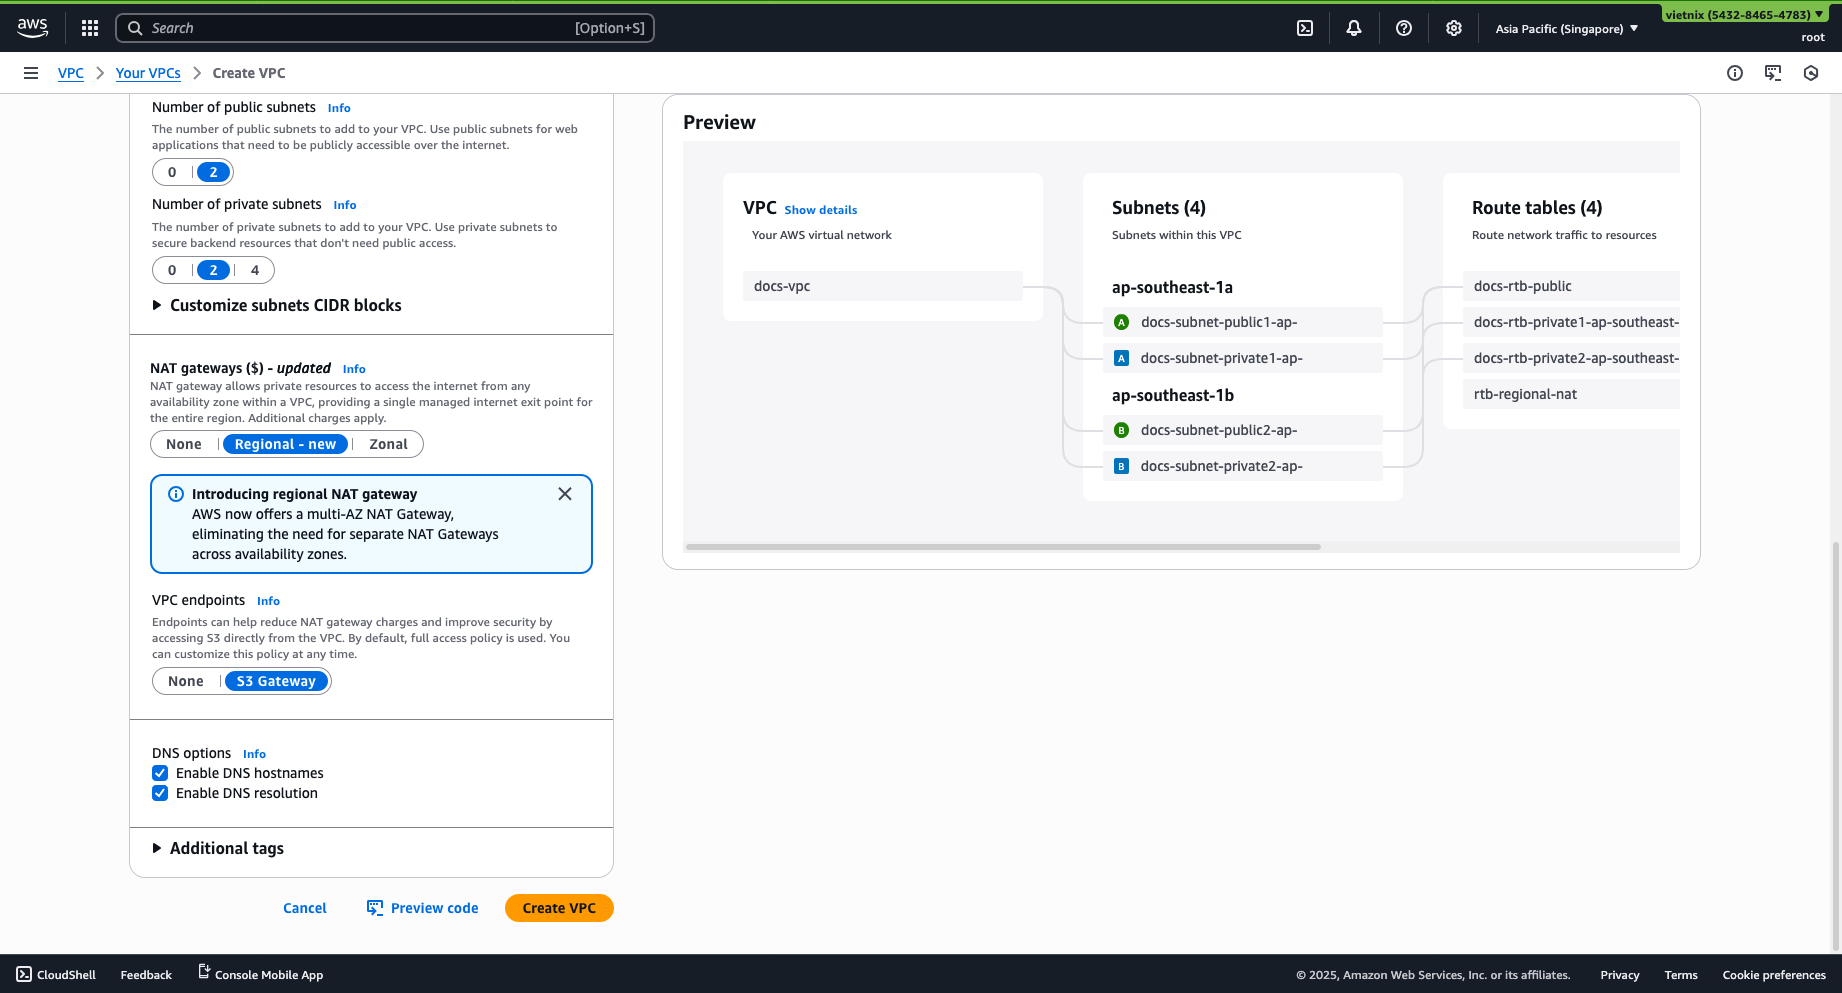
- Subnet:
Step 2: Setup Customer Gateway and Virtual Private Gateway
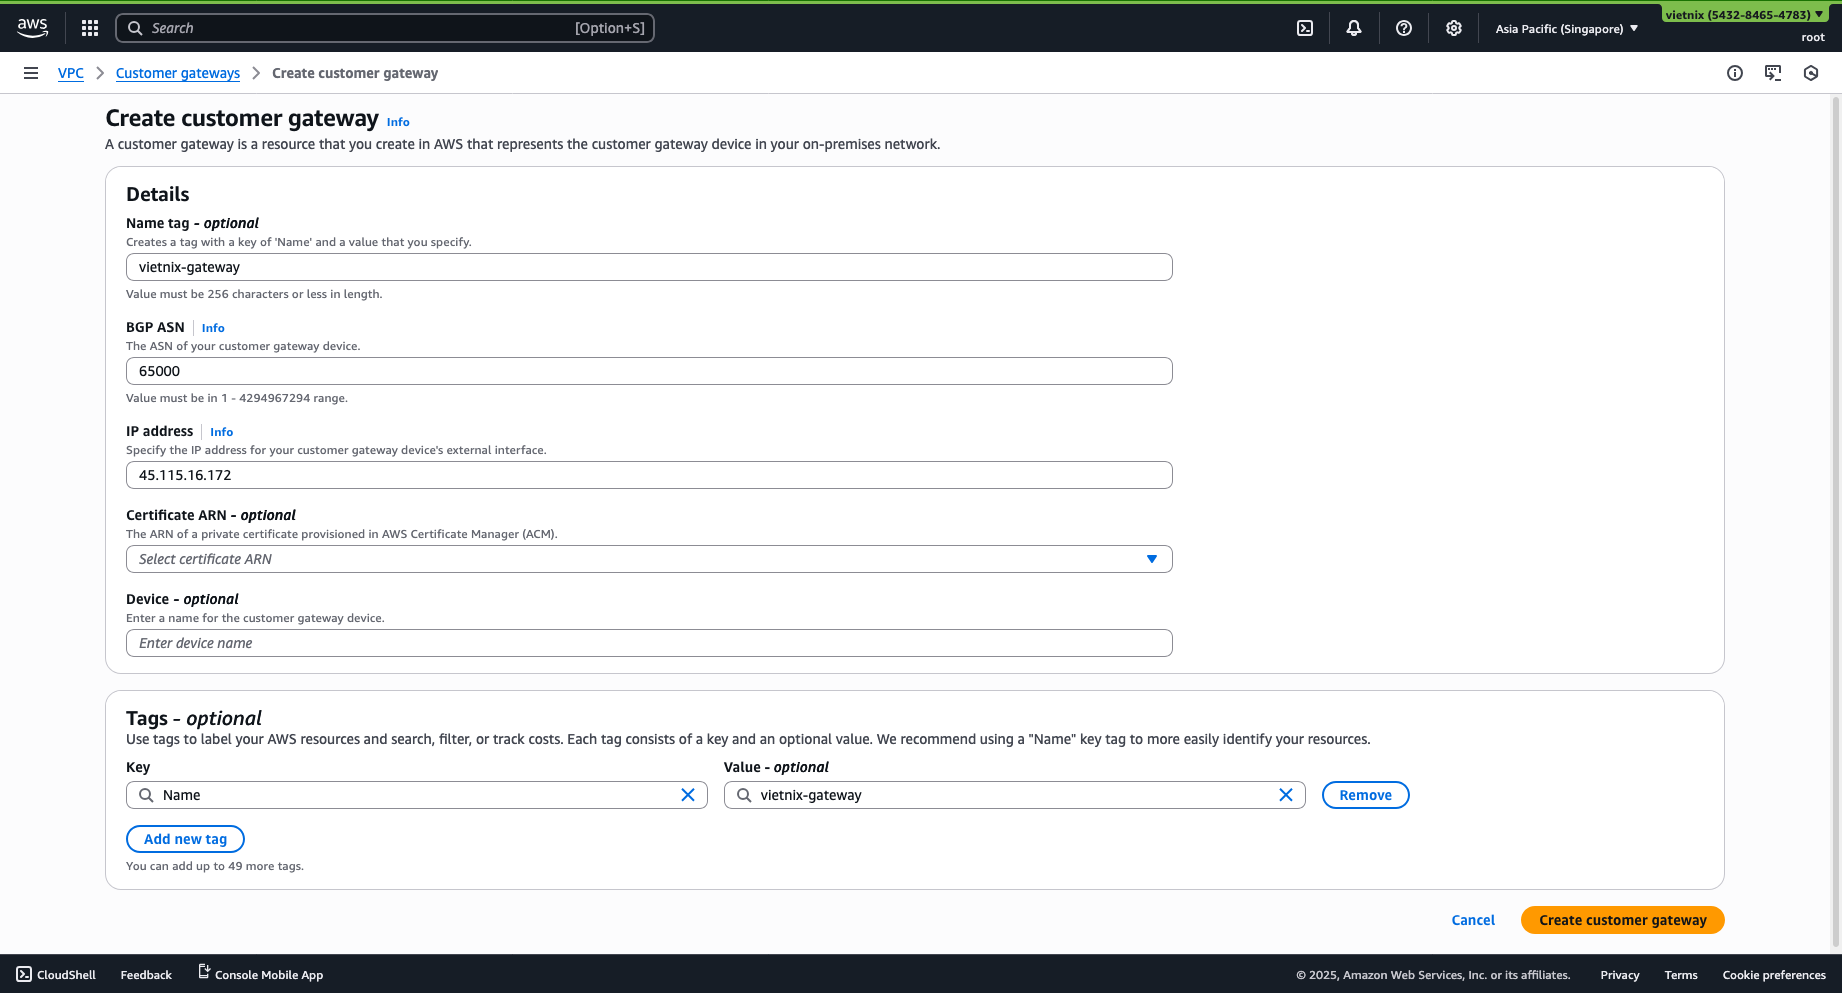
- Create a Customer Gateway with the IP address being the external gateway of Vietnix Cloud (Can be found in Router -> Interface).
- Create a Virtual Private Gateway and attach it to the VPC.
Step 3: VPN Site-to-Site
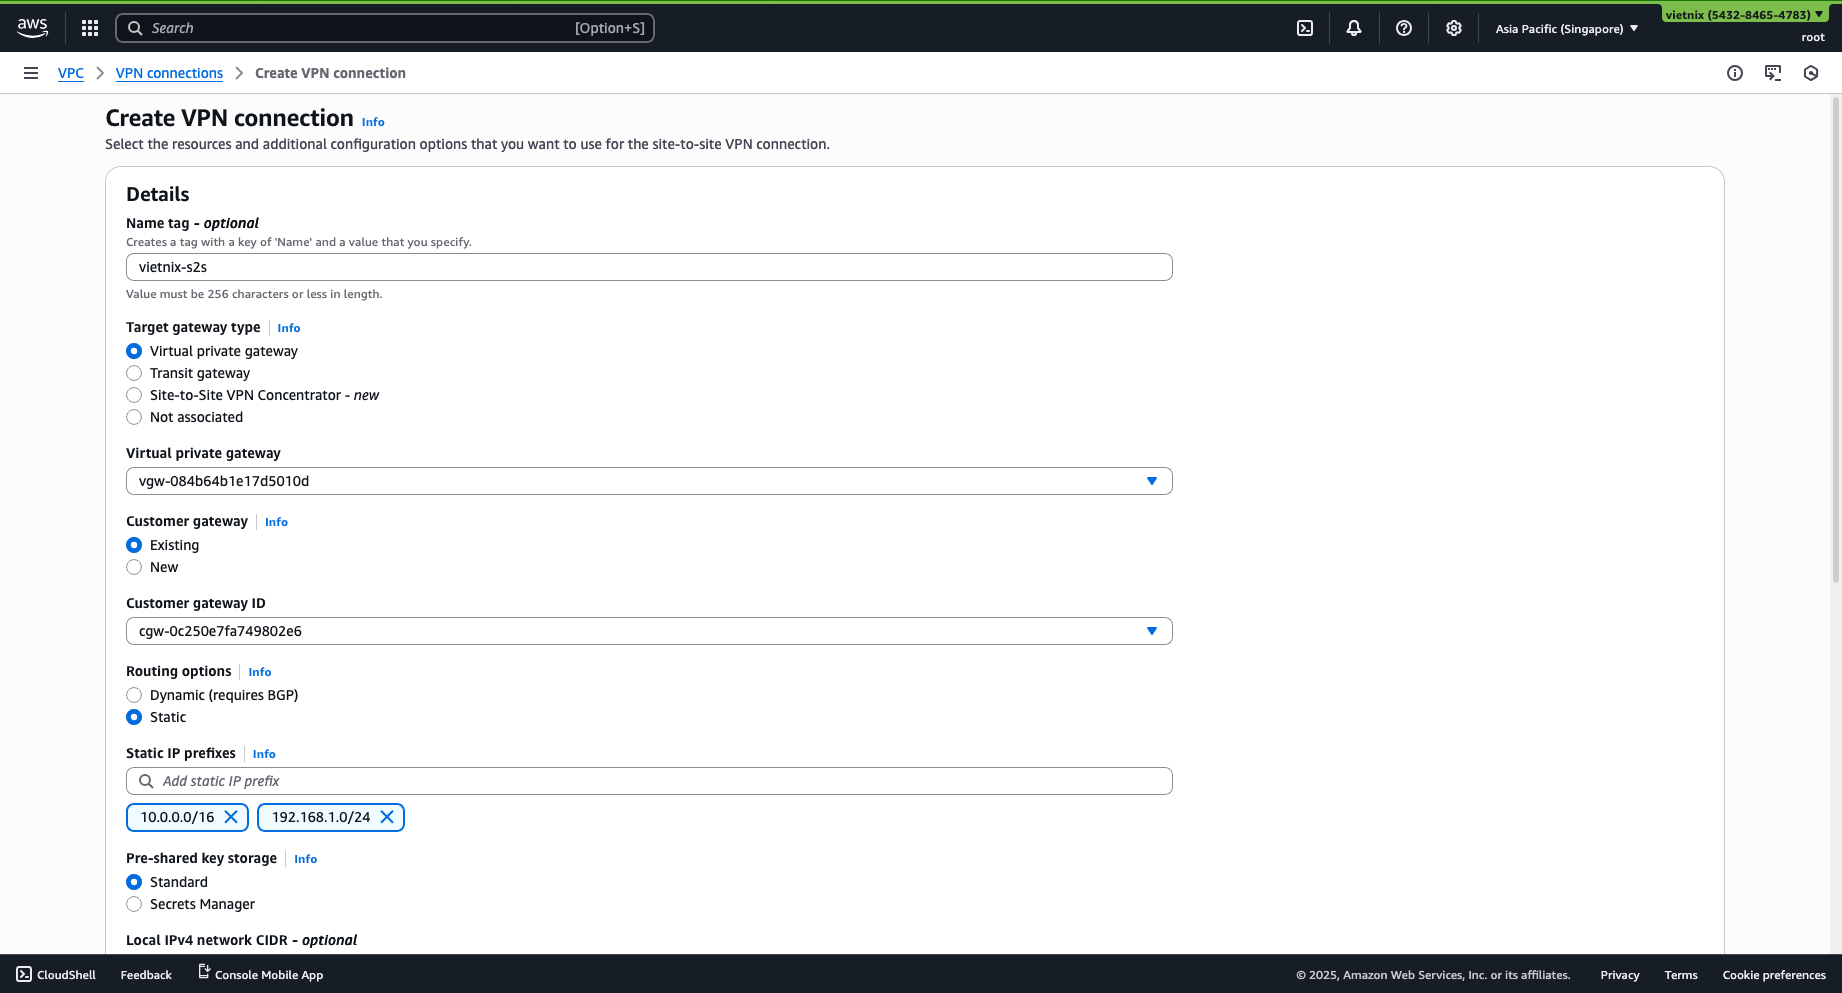
- Create a Site-to-Site VPN with the Virtual Private Gateway option.
- Choose the Virtual Private Gateway and Customer Gateway you just created.
- Configure the following:
- Static IP prefixes: Range IP of the 2 networks, e.g.,
10.0.0.0/16,192.168.1.0/24. - Pre-shared key storage: Standard.
- Local IPv4 network CIDR: The IPv4 CIDR range on the customer gateway (Vietnix subnet) ->
192.168.1.0/24. - Remote IPv4 network CIDR: The IPv4 CIDR range on the AWS side (AWS VPC subnet) ->
10.0.0.0/16.
- Static IP prefixes: Range IP of the 2 networks, e.g.,
Step 4: Tunnel Options
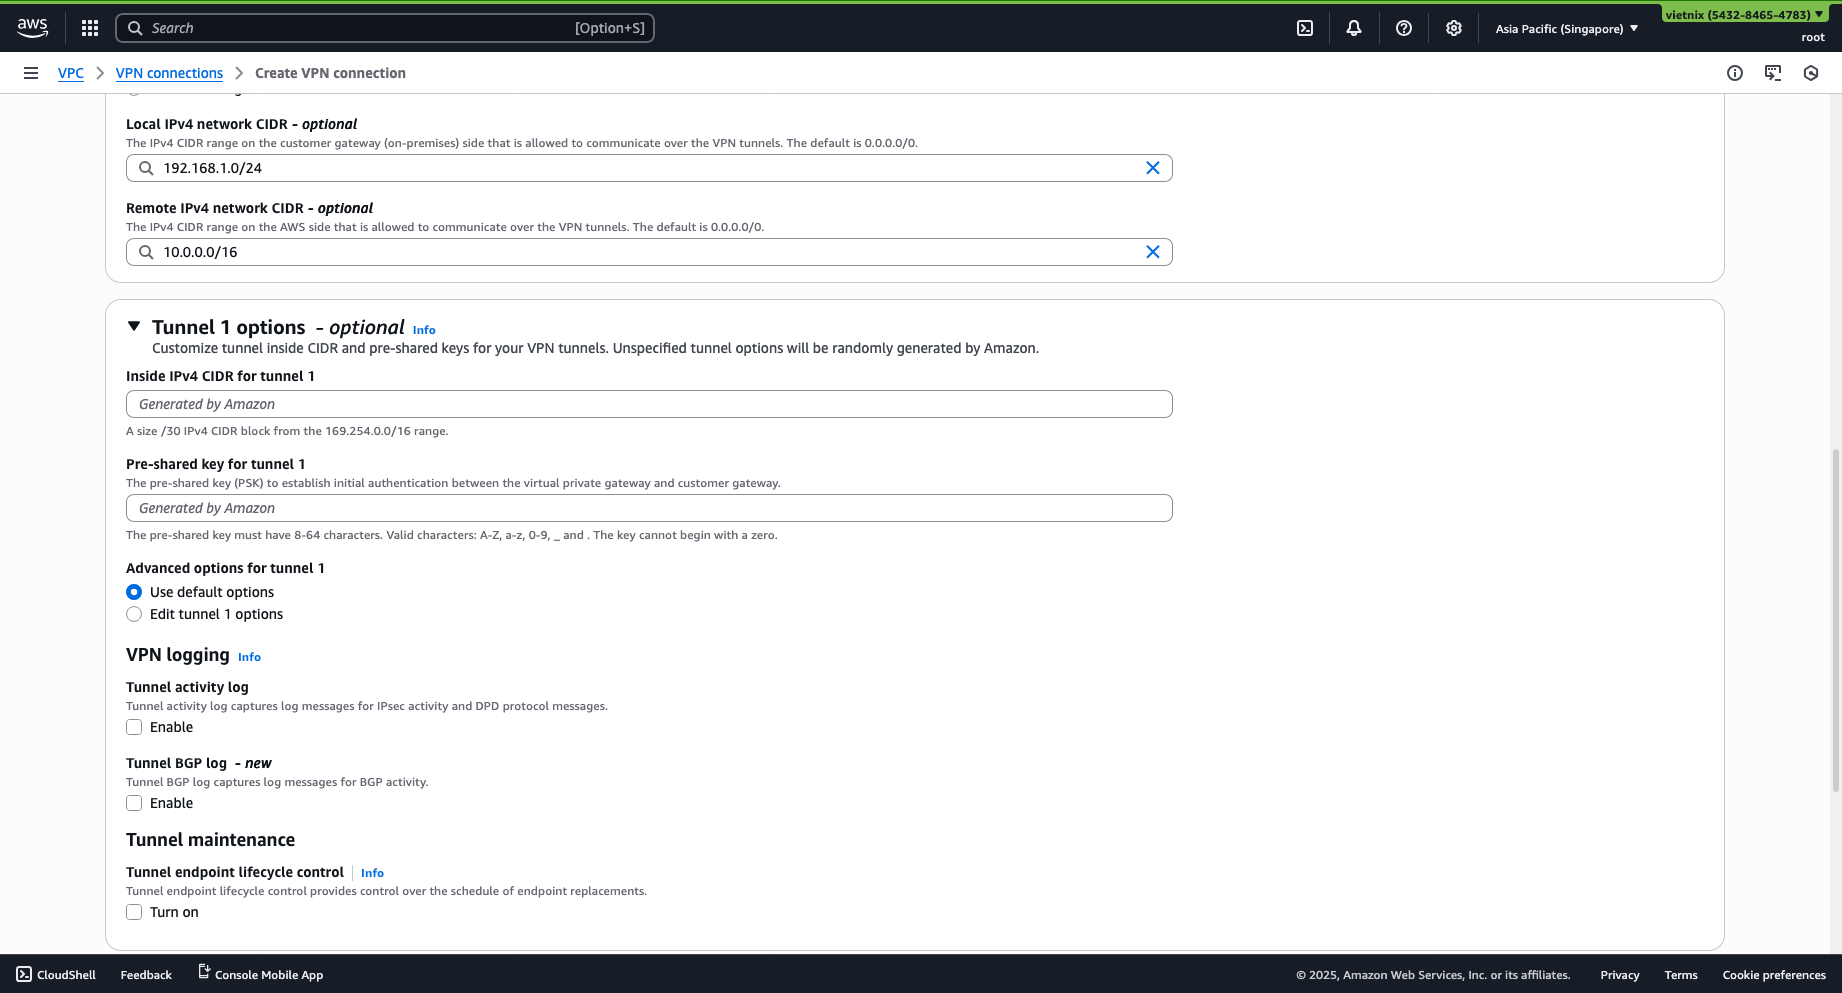
-
Specify the Pre-shared Key (Must be the same as with Vietnix Cloud, so generate and COPY IT FOR LATER USE).
-
Other options are optional.
-
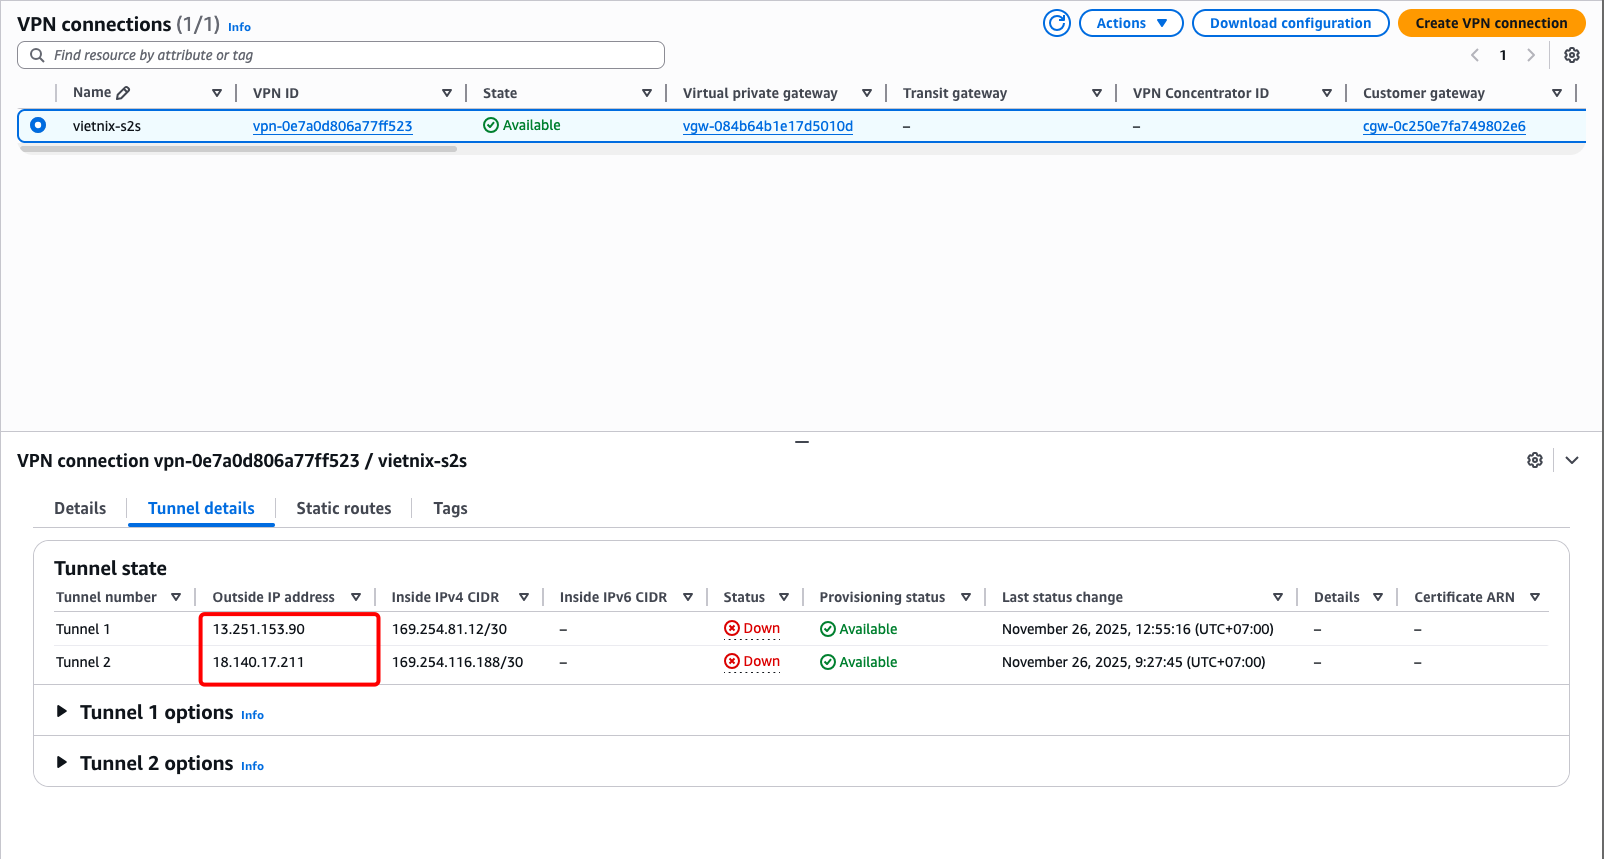
After creation, get the Outside IP address of Tunnel 1 or 2 to use as the Peer IP.
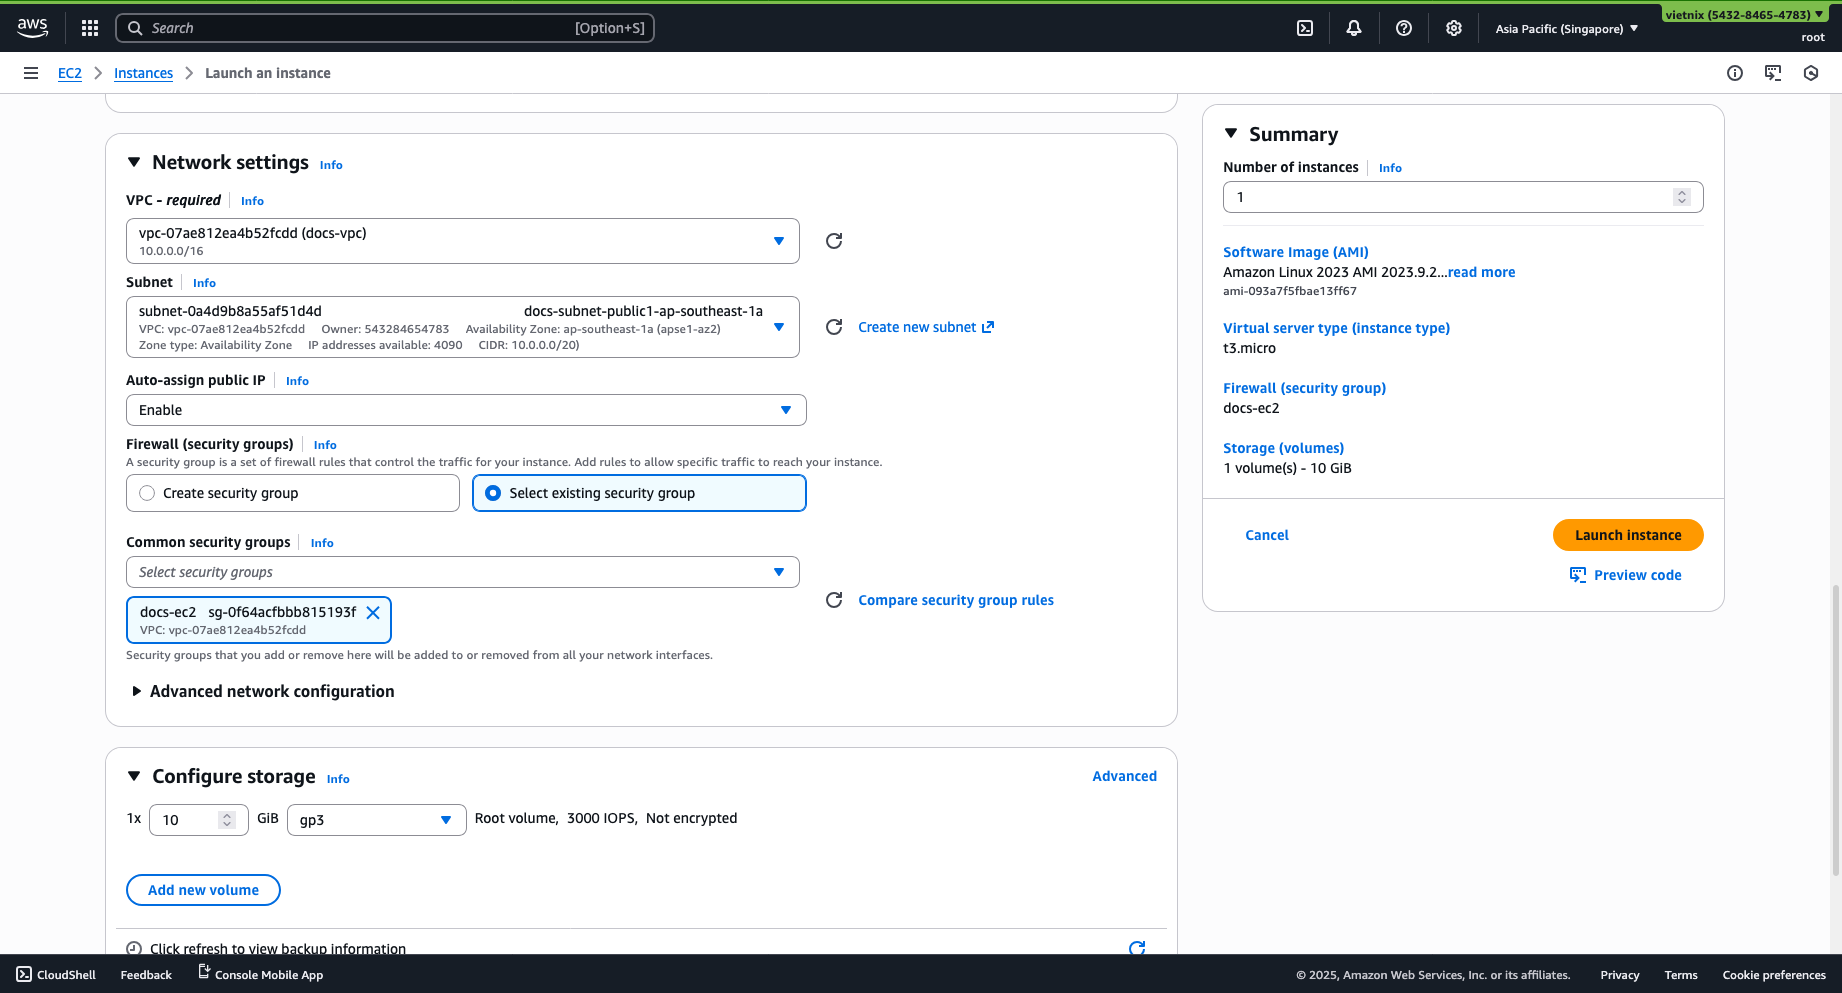
Step 5: EC2 Instance Setup
Launch new instance:
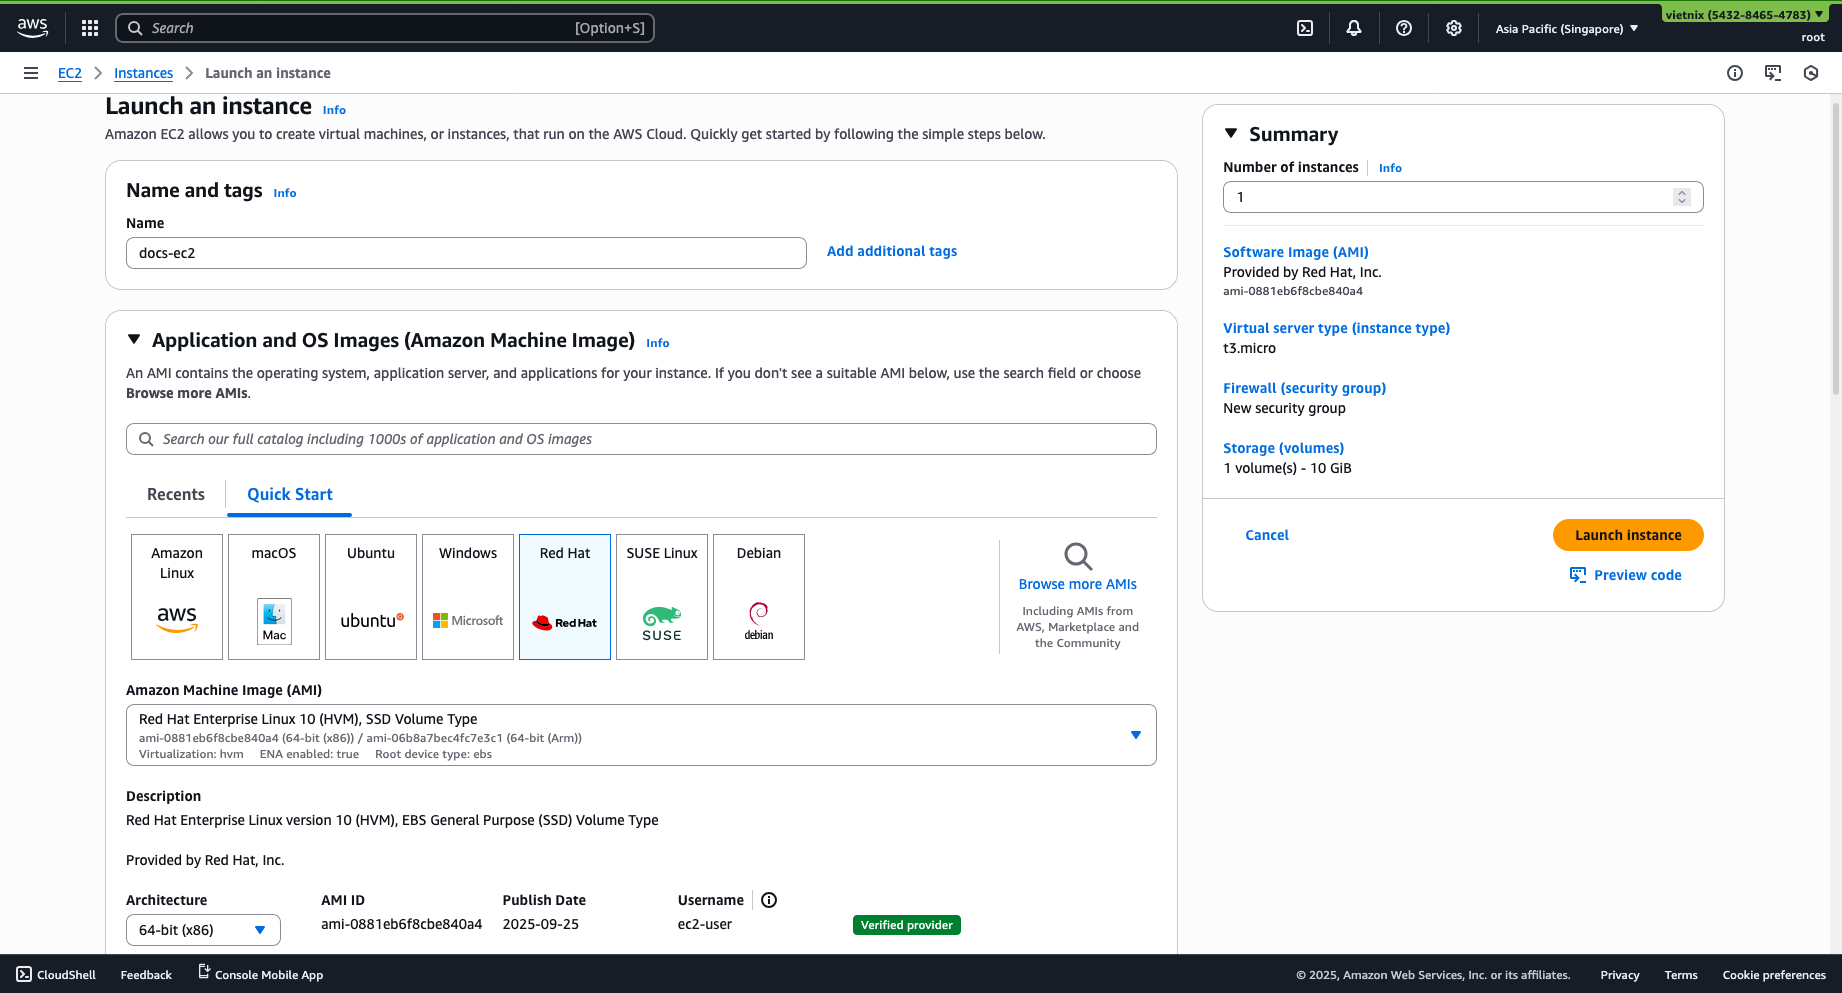
- Choose your name, OS image, and instance type (Optional).
- Remember to add a keypair for SSH.
Edit Network settings:
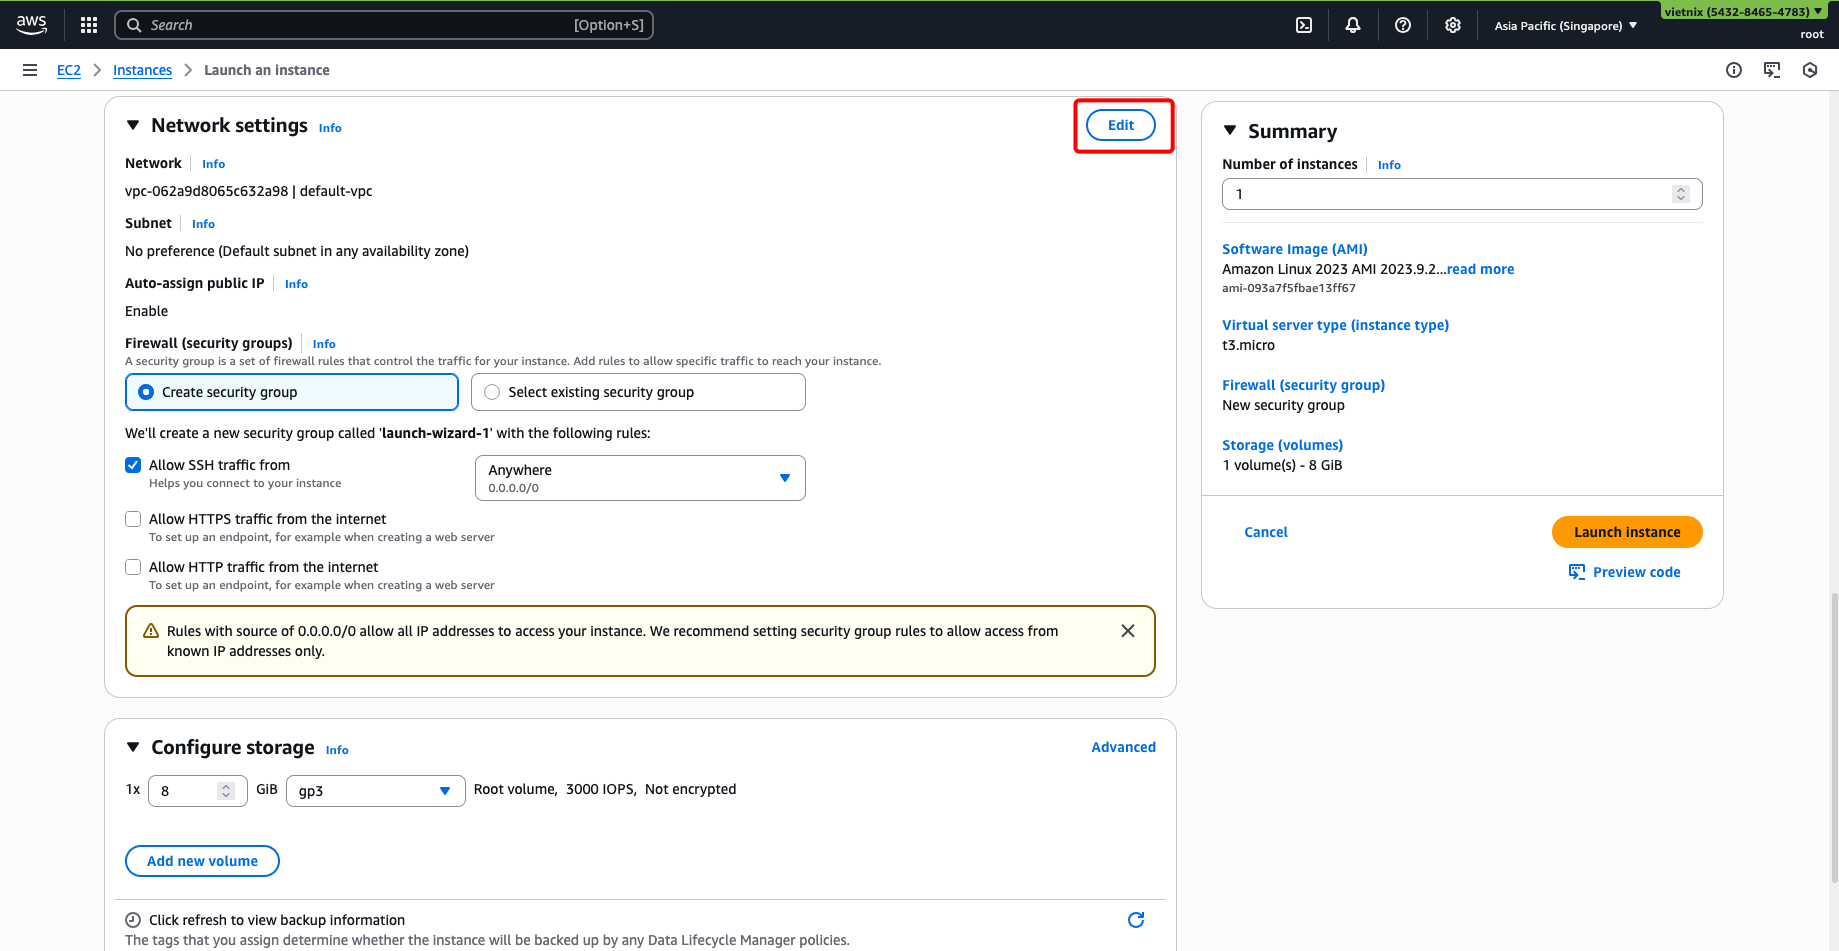
-
Select your VPC and choose a subnet (should choose a public subnet for easier SSH access).
-
Enable Auto-assign public IP.
-
Create or select a suitable security group.
-
Storage config is optional.
Step 6: Route Table Configuration
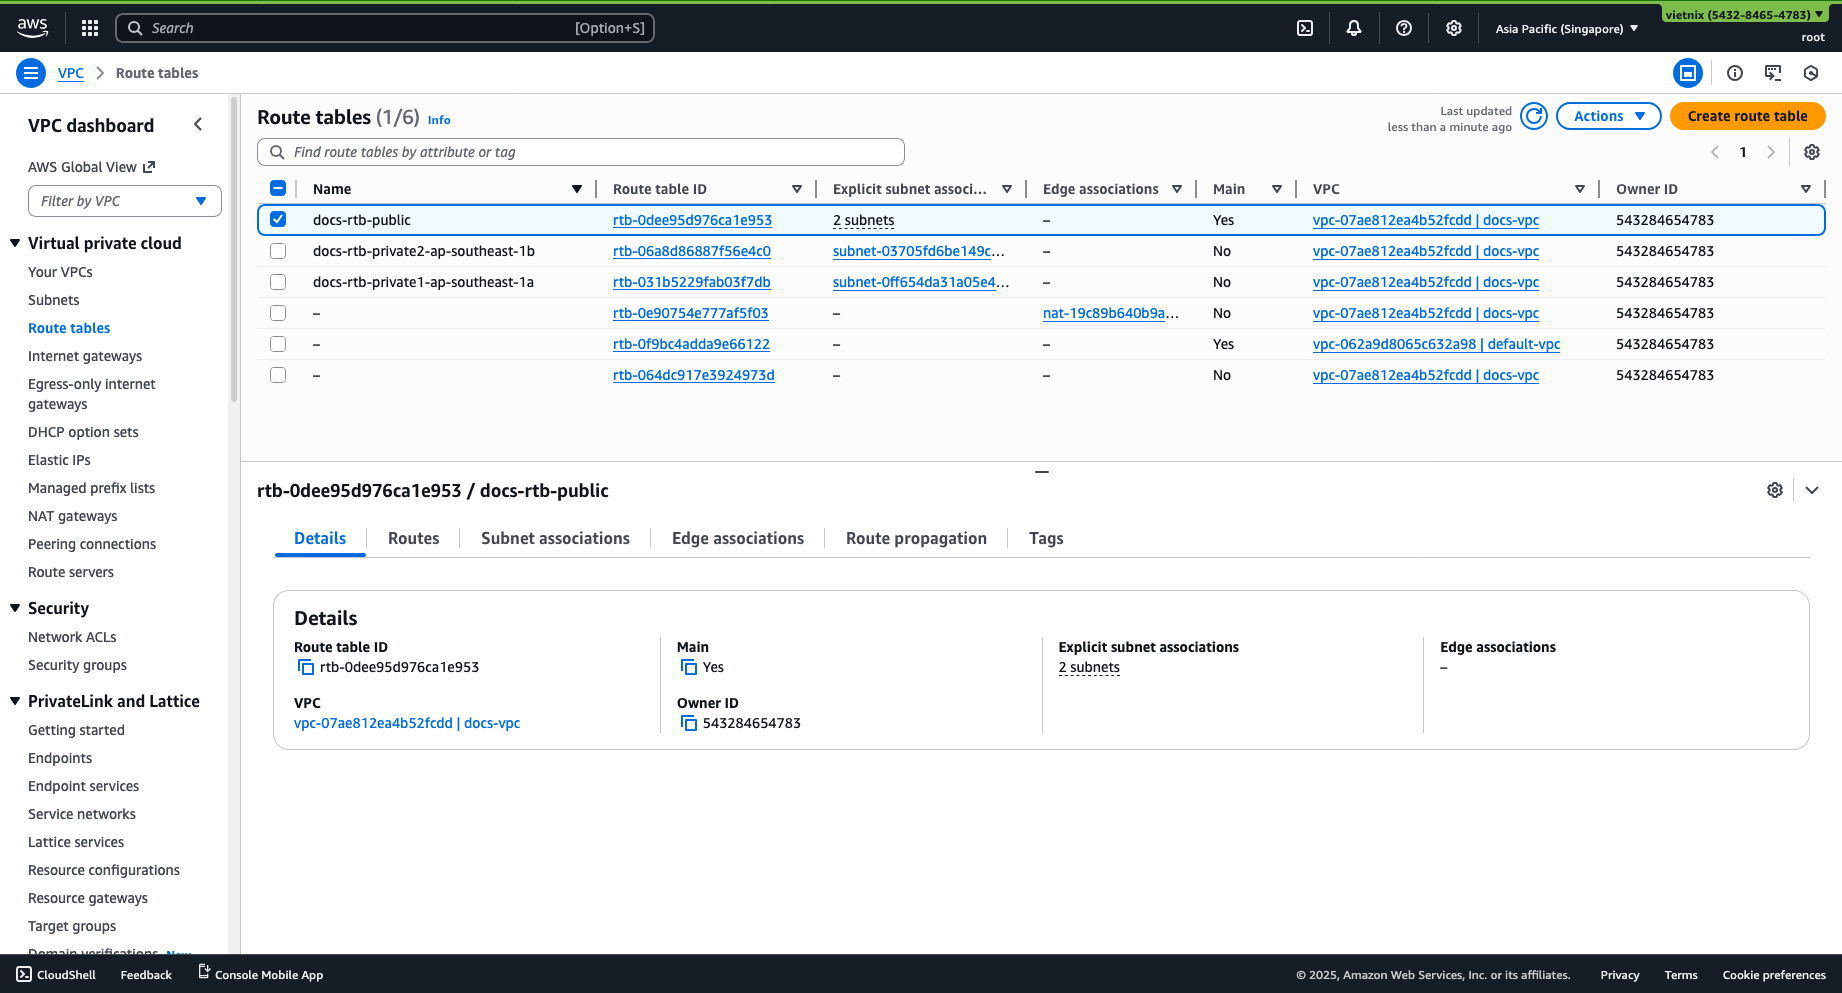
-
Go to VPC -> Route table.
-
Select the route table associated with your subnet where your EC2 instance resides (e.g.,
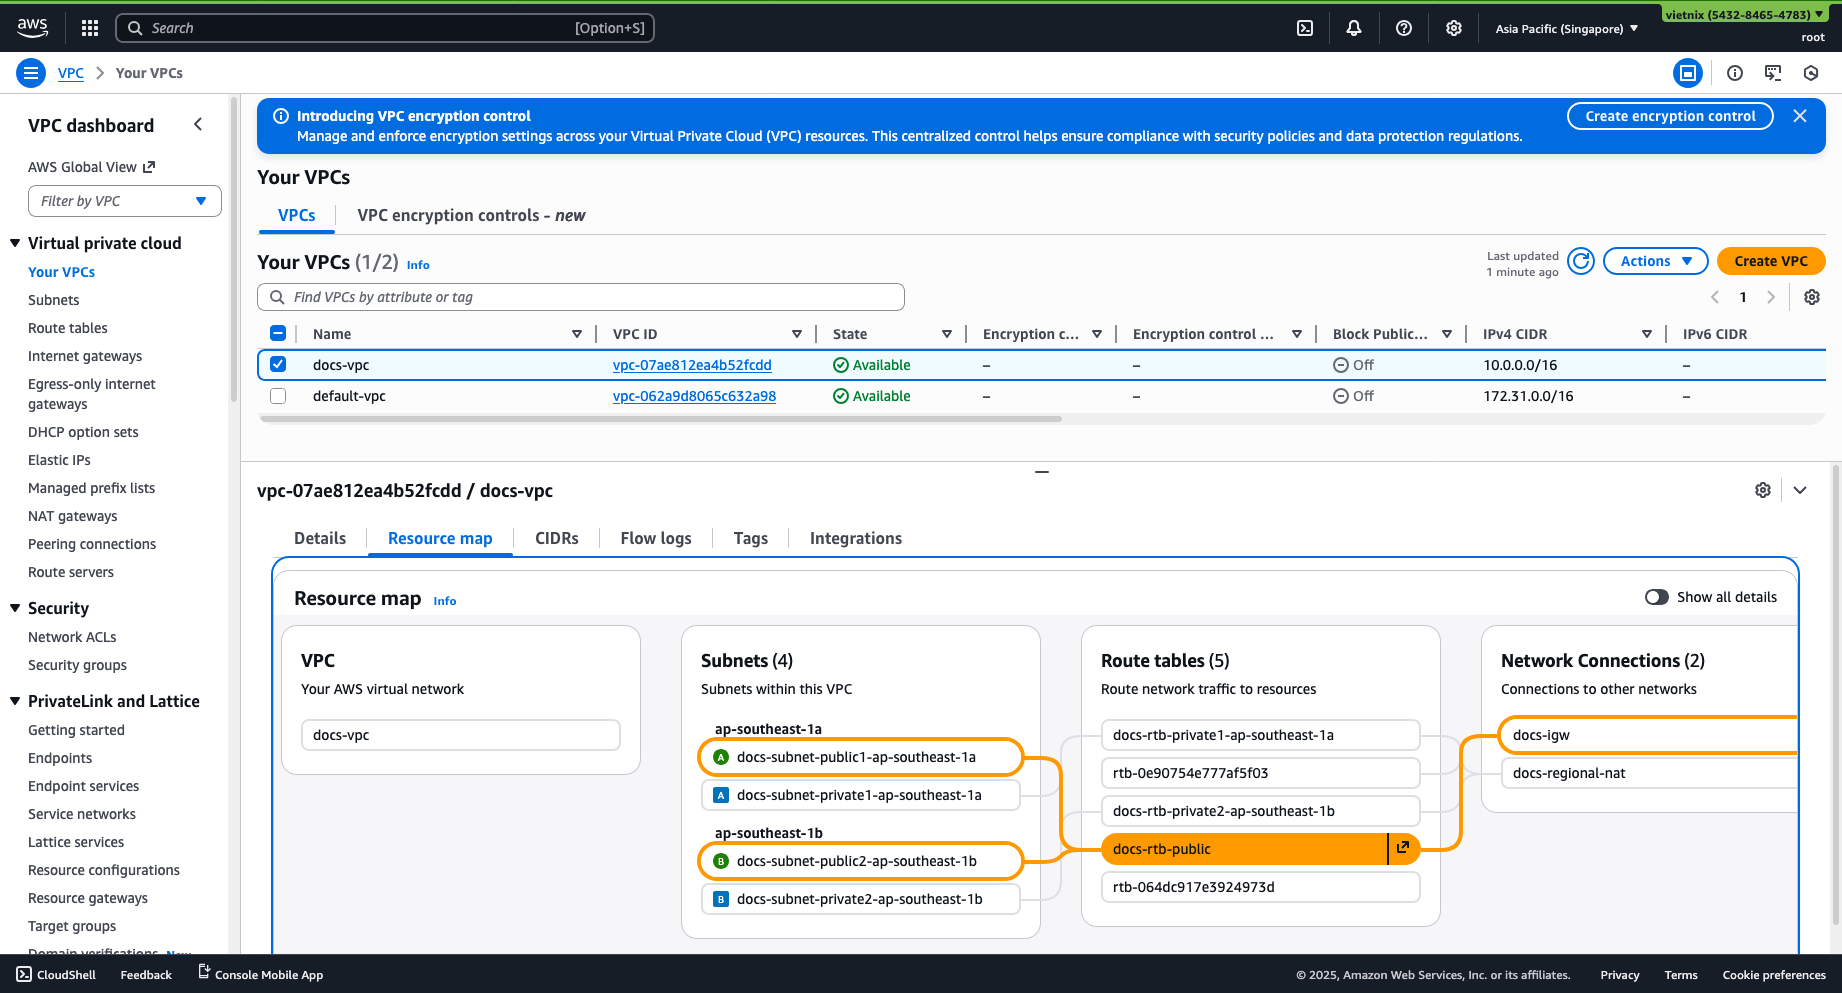
rtb-public).TipsTo check which route table routes your subnet, go to your VPC -> Select VPC -> Resource map.*
-
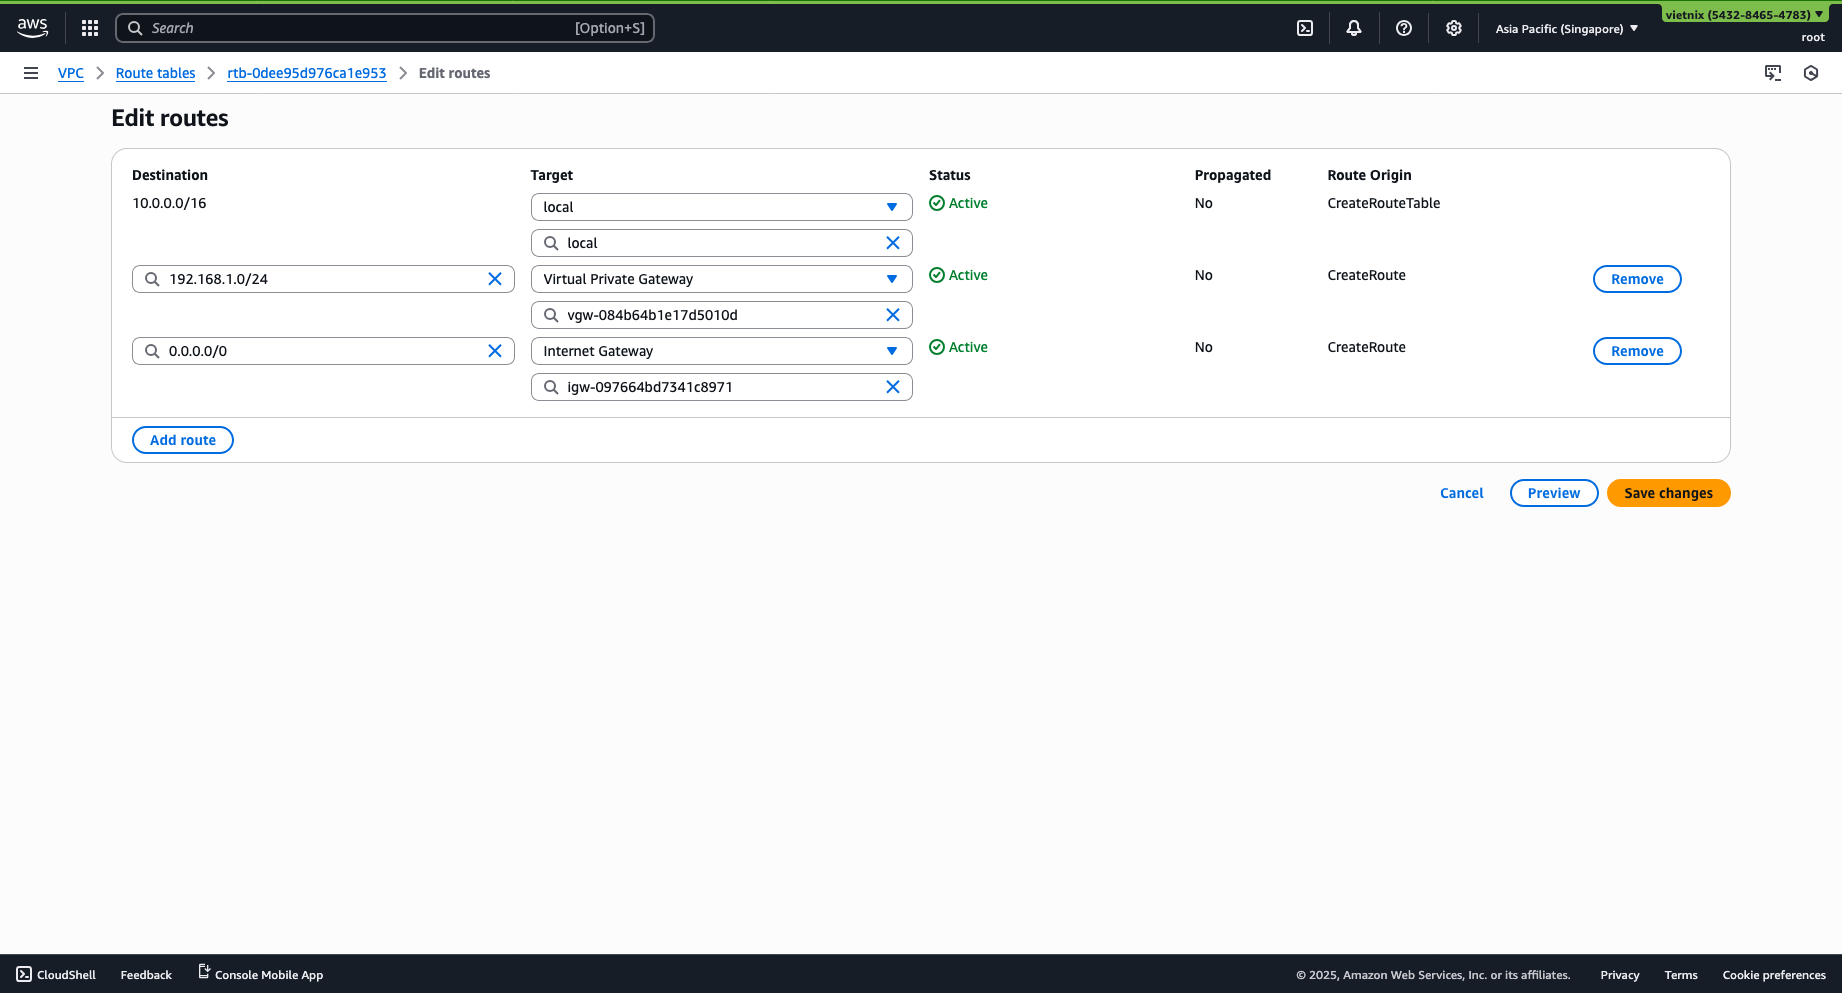
Select Routes -> Edit routes.
-
Add a route:
- Destination: Vietnix subnet (
192.168.1.0/24) - Target: Virtual Private Gateway (Select the gateway used to create the VPN)
- Destination: Vietnix subnet (
-
Click Save changes.
With Vietnix Enterprise Cloud
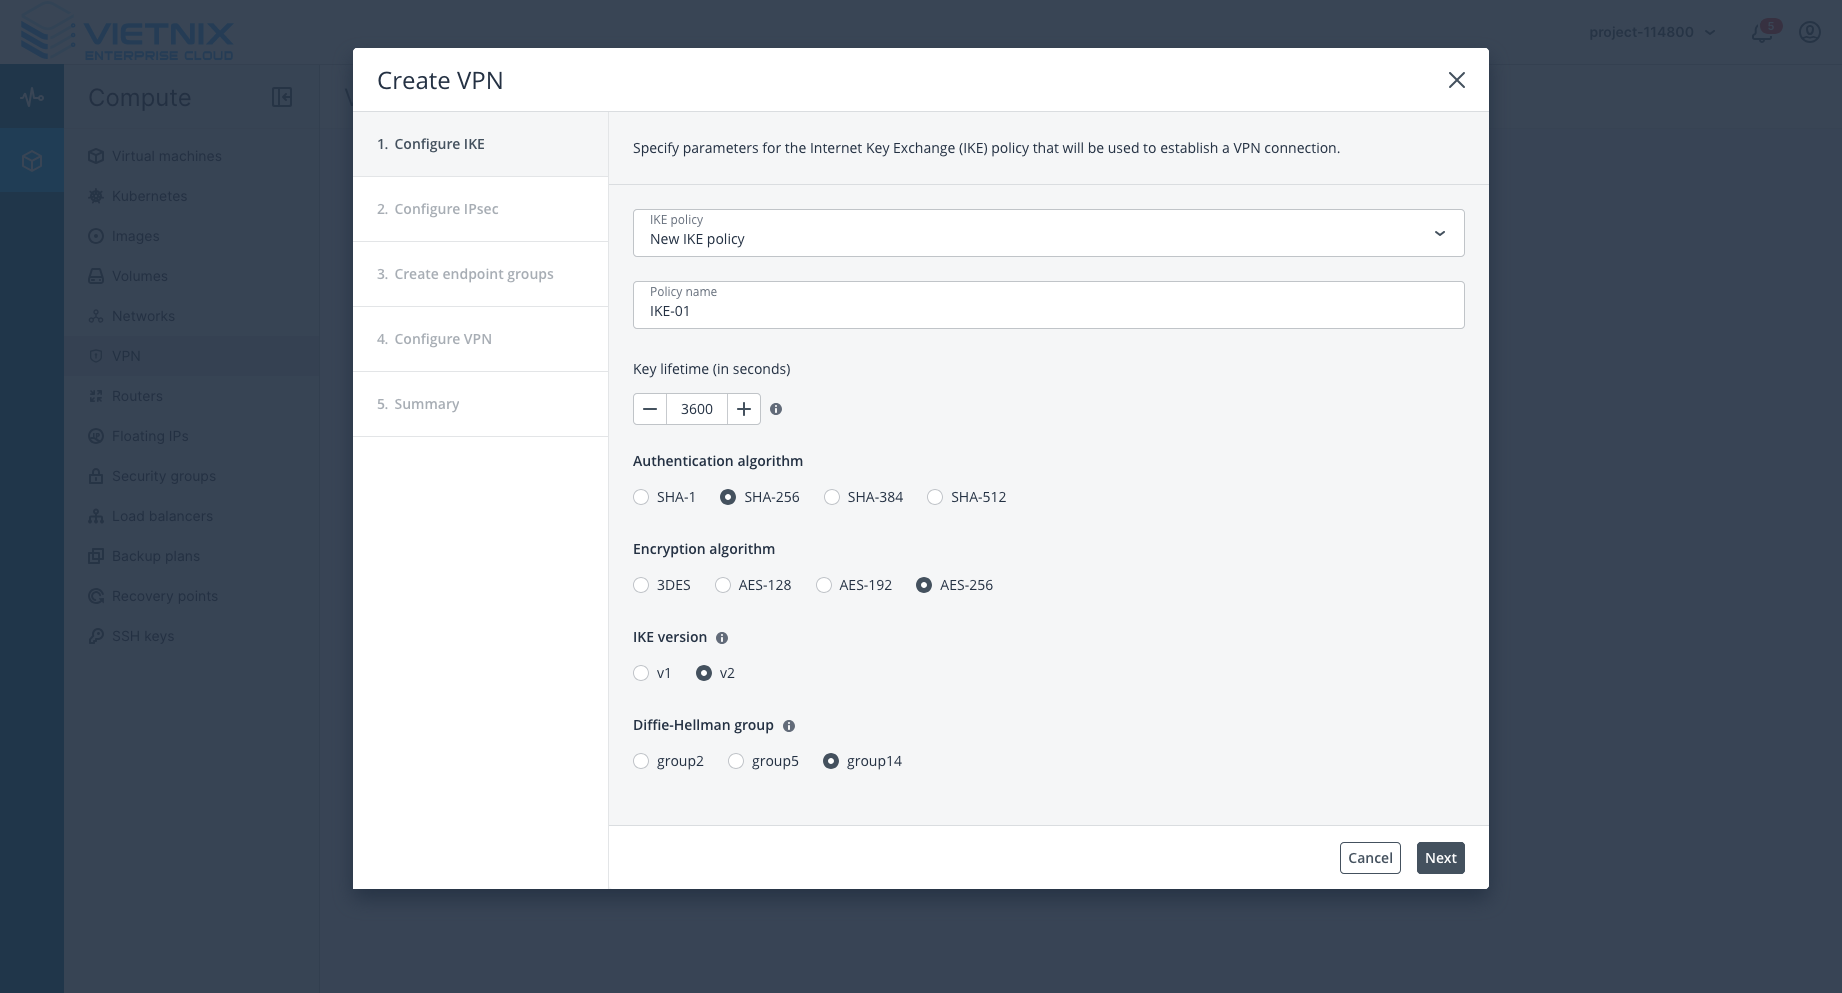
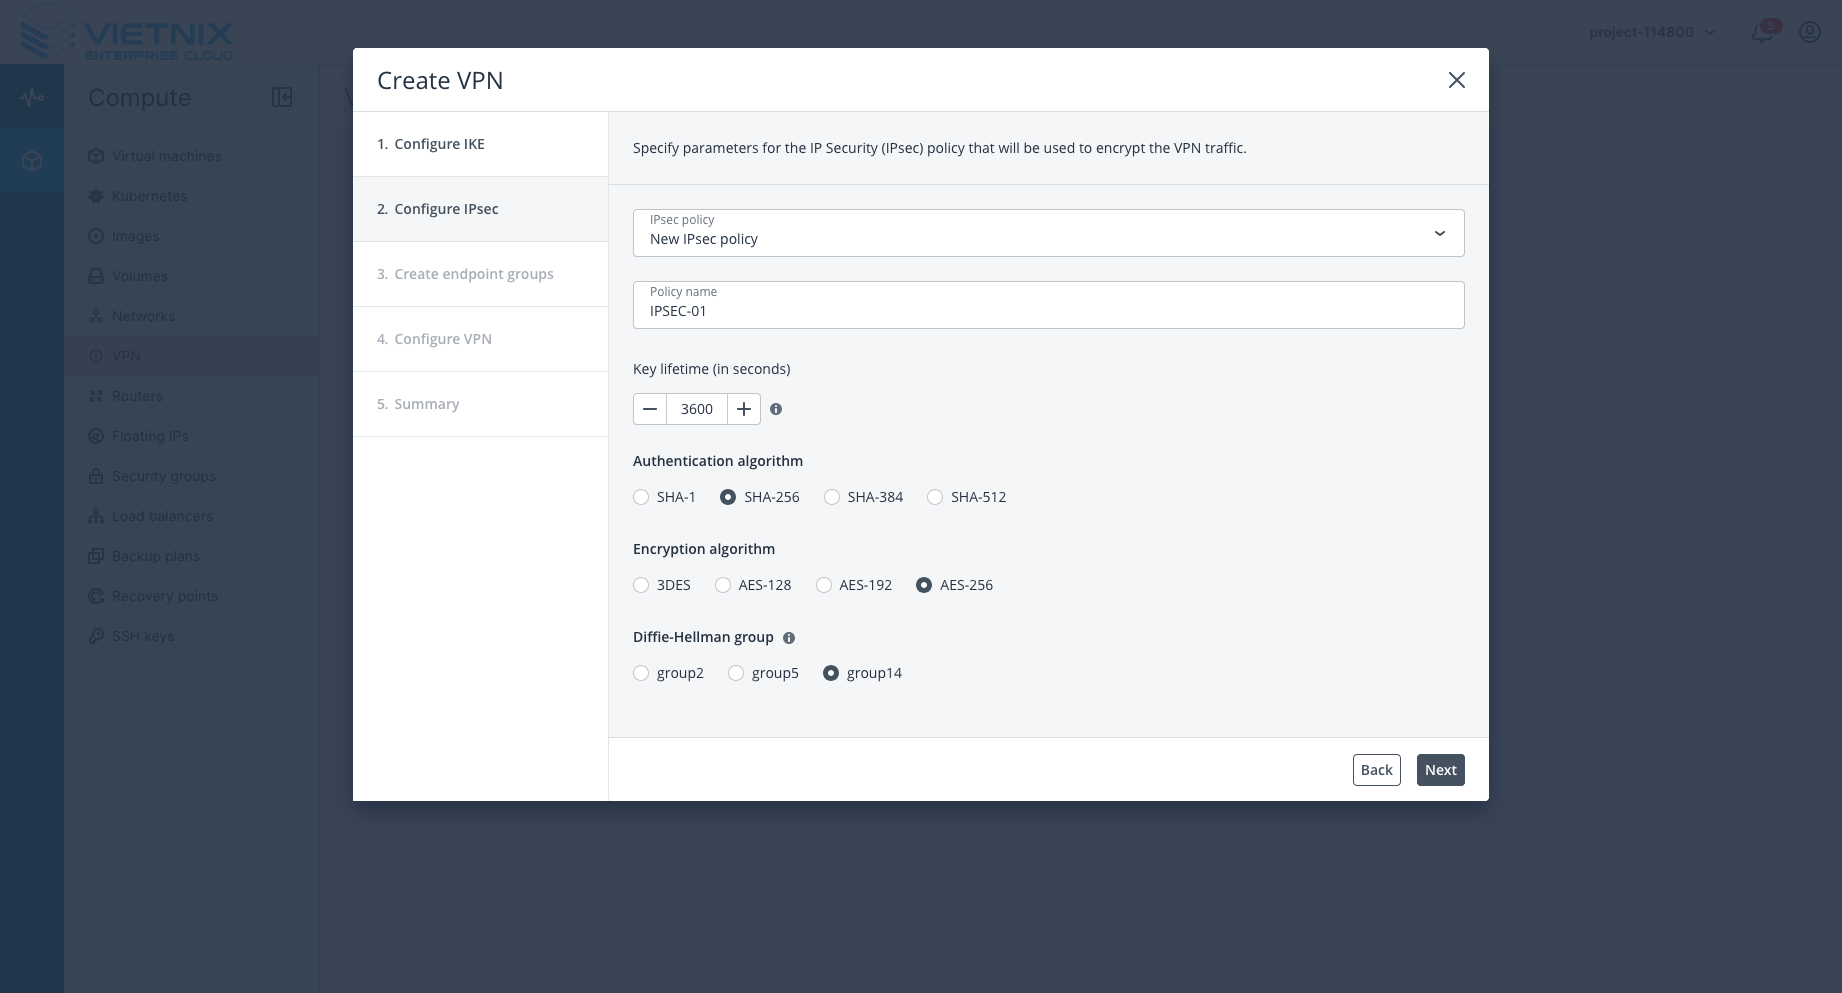
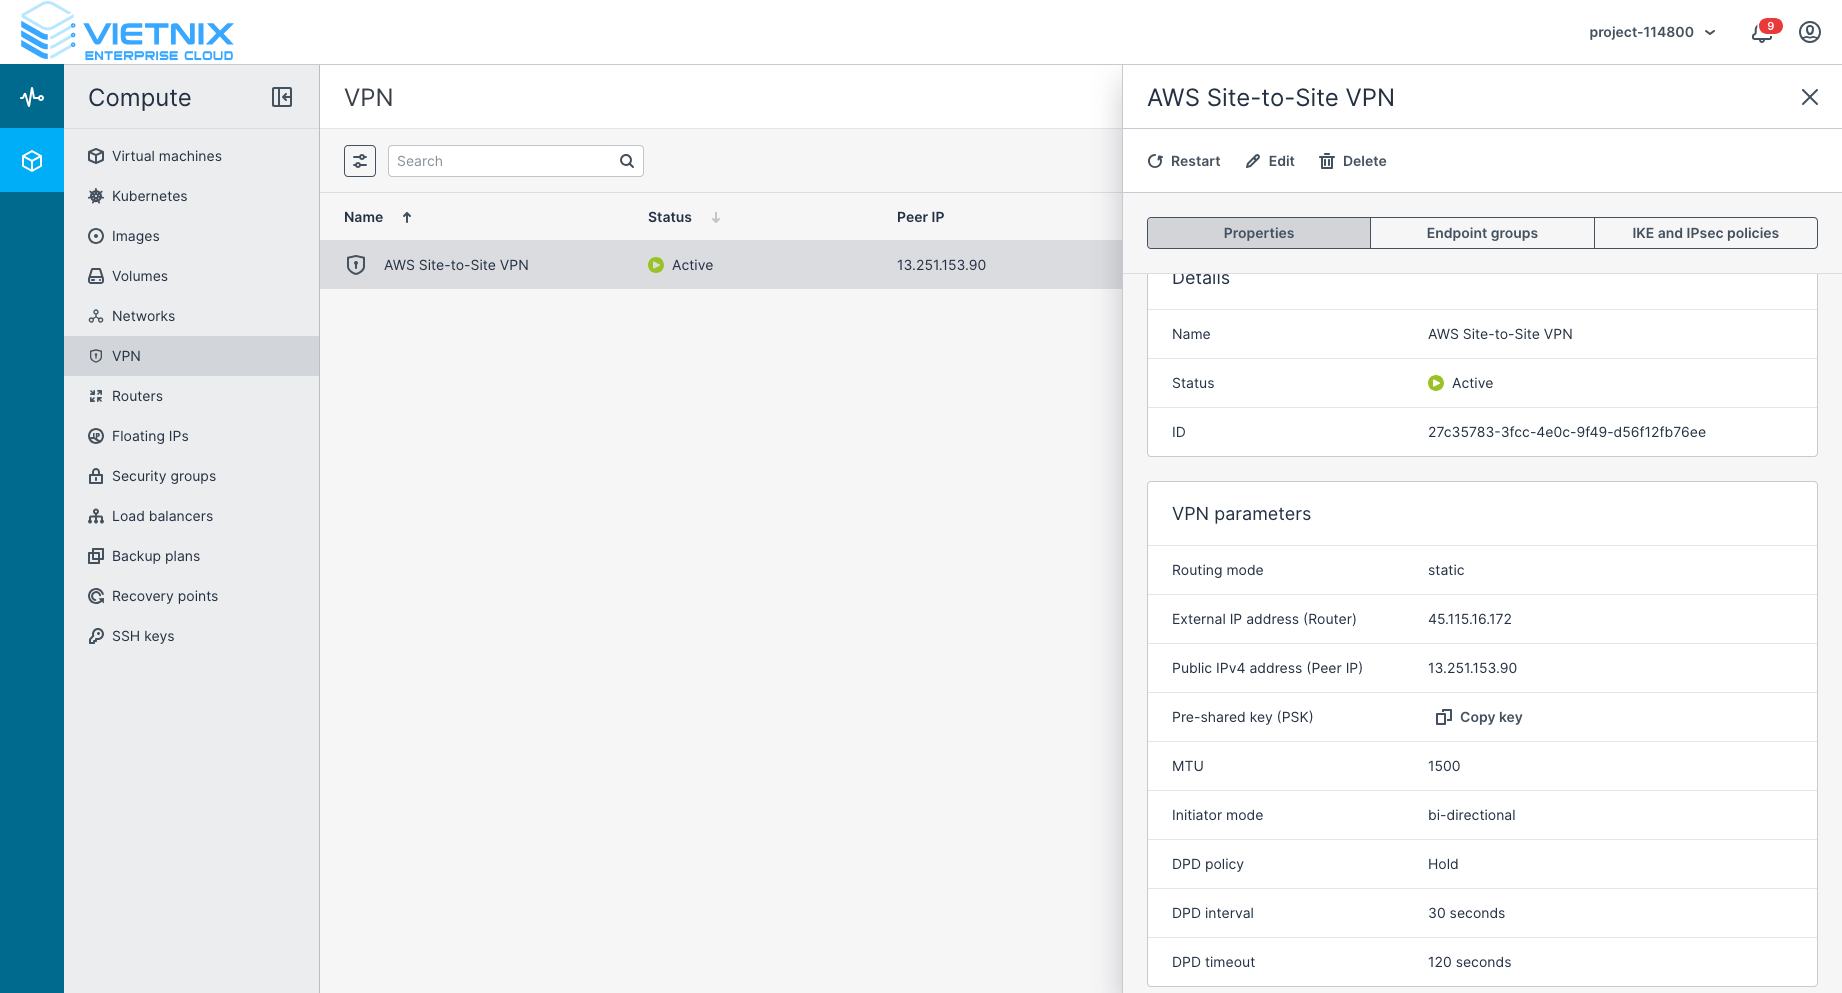
Step 1: Add VPN
-
Add a new VPN.
-
Choose Diffie-Hellman group:
group14orgroup2(AWS does not support group 5). -
IKE and IPSEC names are optional.
Step 2: Input Endpoint Group
-
Local endpoint: Vietnix’s private subnet (
192.168.1.0/24). -
Remote endpoint: AWS VPC IP (
10.0.0.0/16).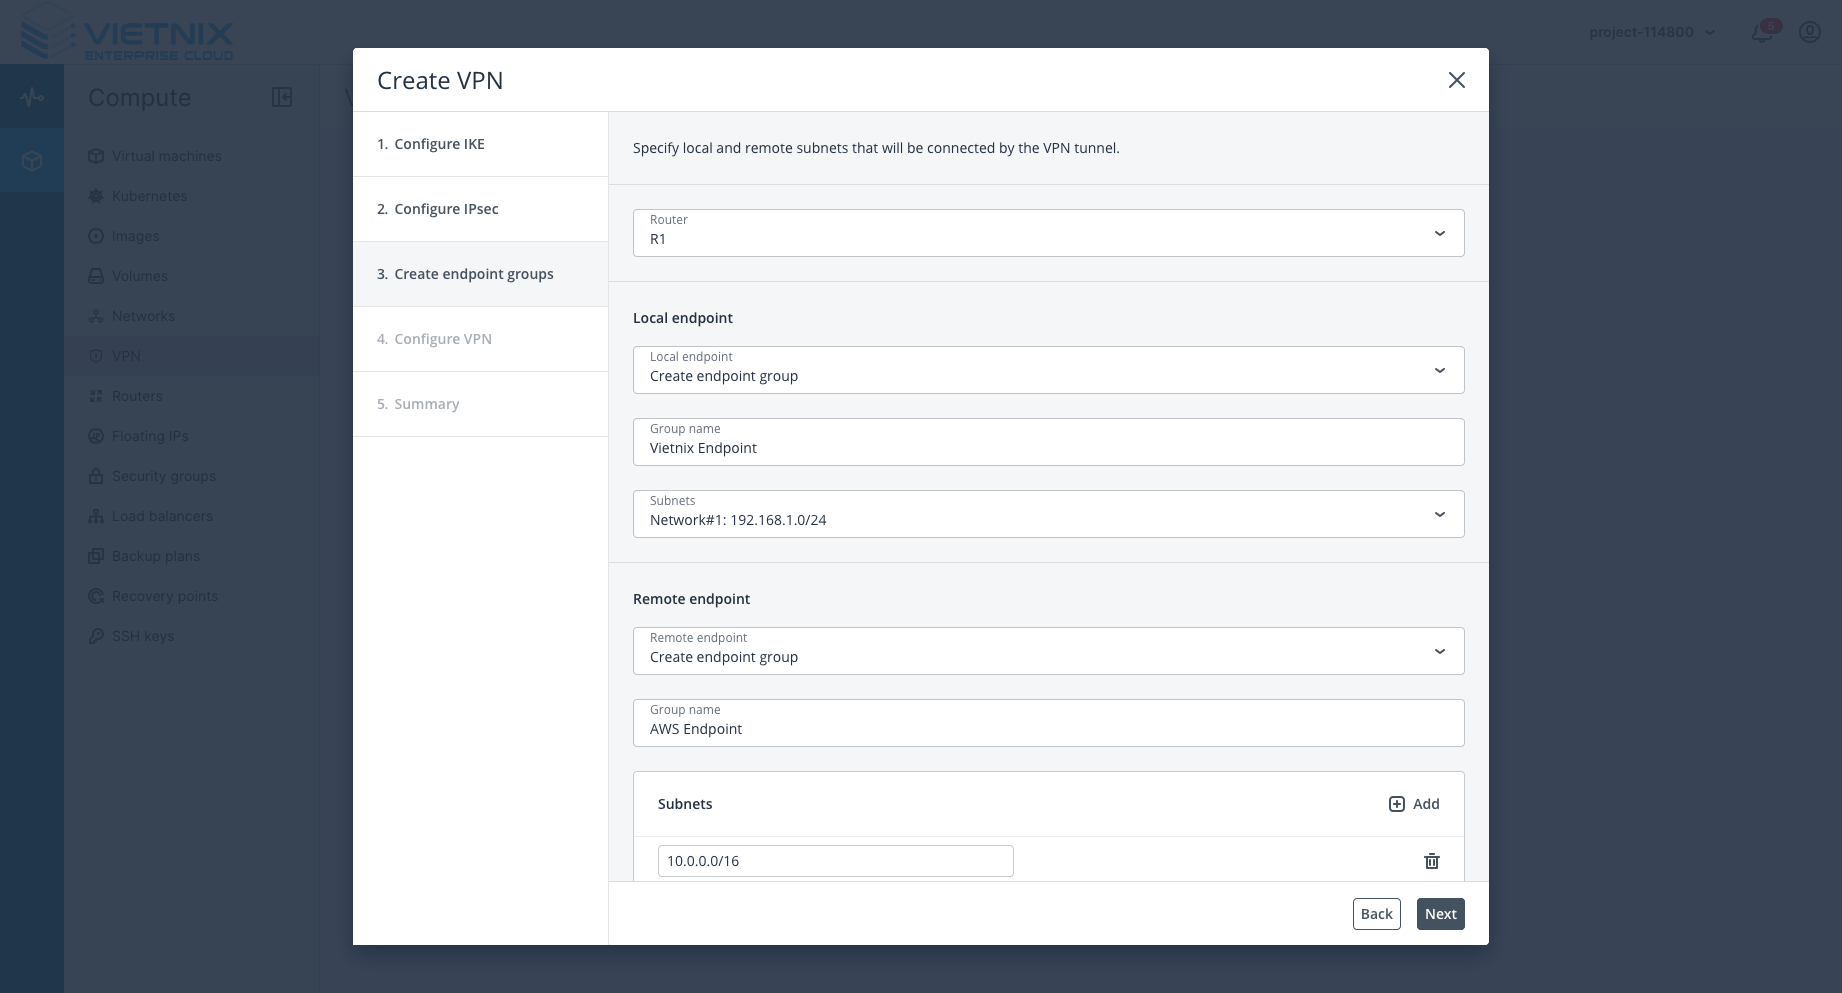
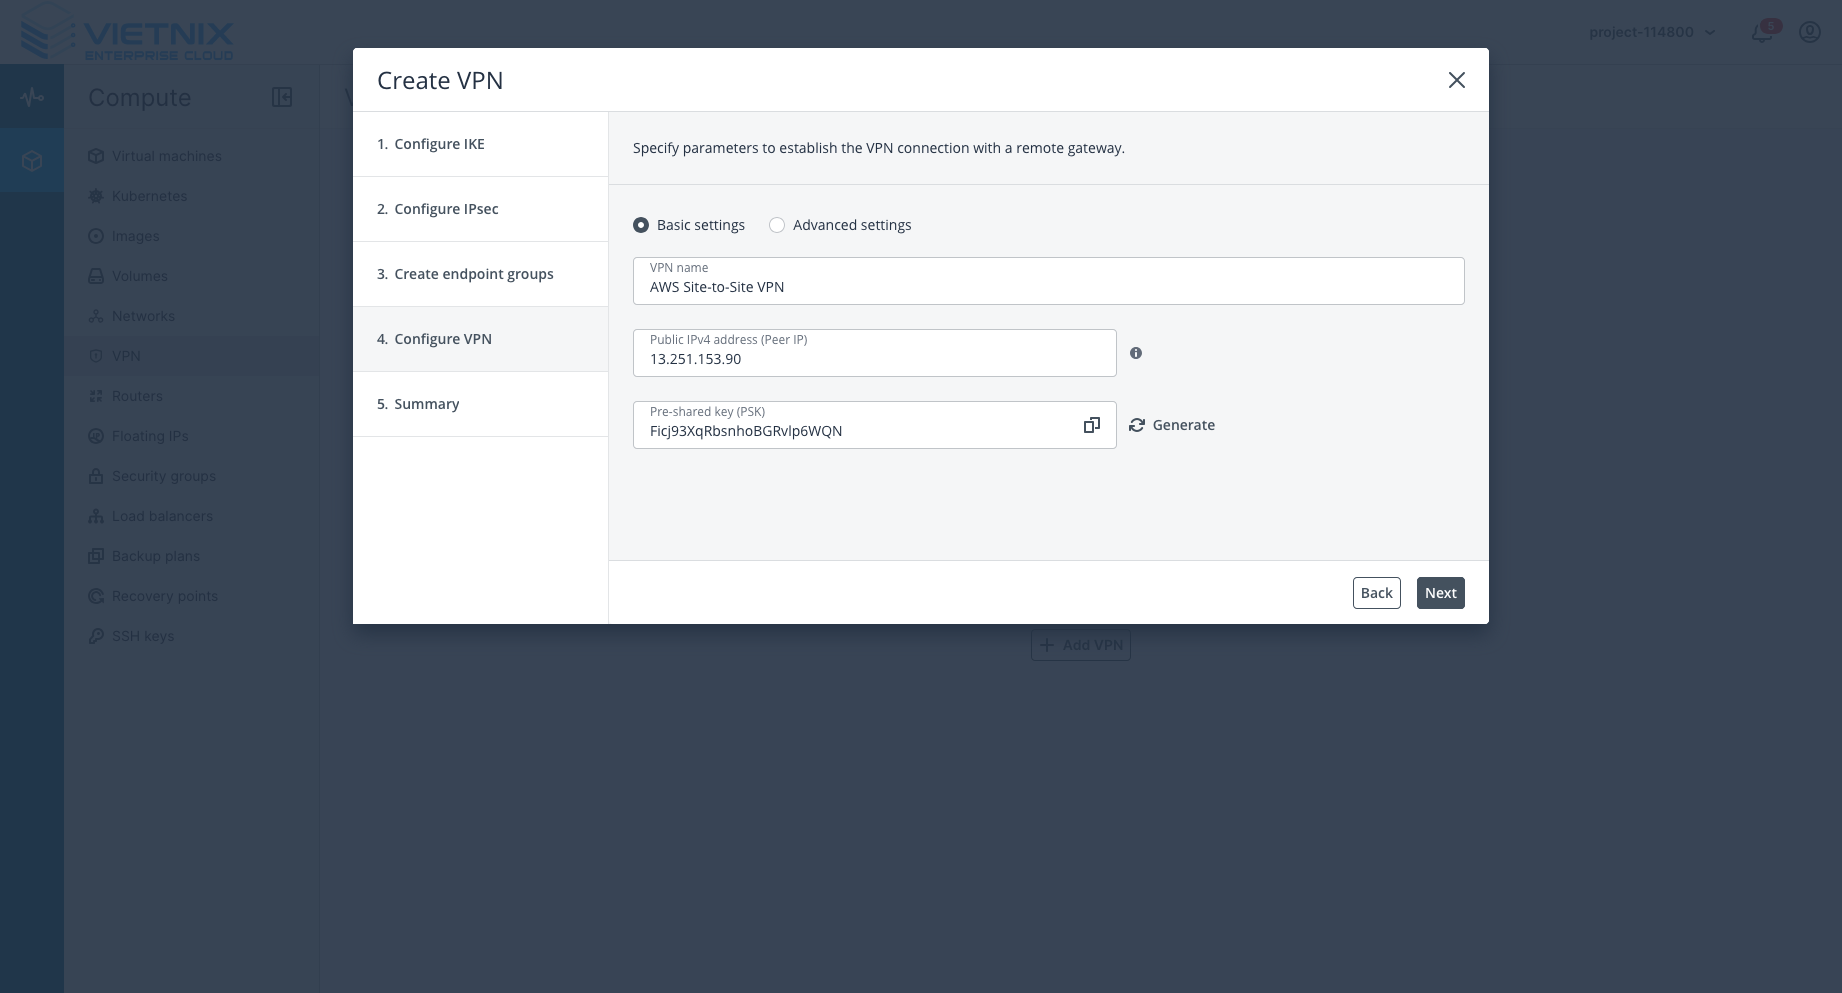
Step 3: Config VPN
-
Public IP address (Peer IP): Input the outside IP address of the tunnel from AWS.
-
Pre-shared key: Must be the same as the key in the AWS Tunnel options.
After this step, you should see that the VPN status is Active/Up.
Step 4: Routes
-
Add a static rule to the route of your subnet.
- Destination subnet: AWS subnet (
10.0.0.0/16). - Next hop: Vietnix external gateway subnet (
45.115.16.0).
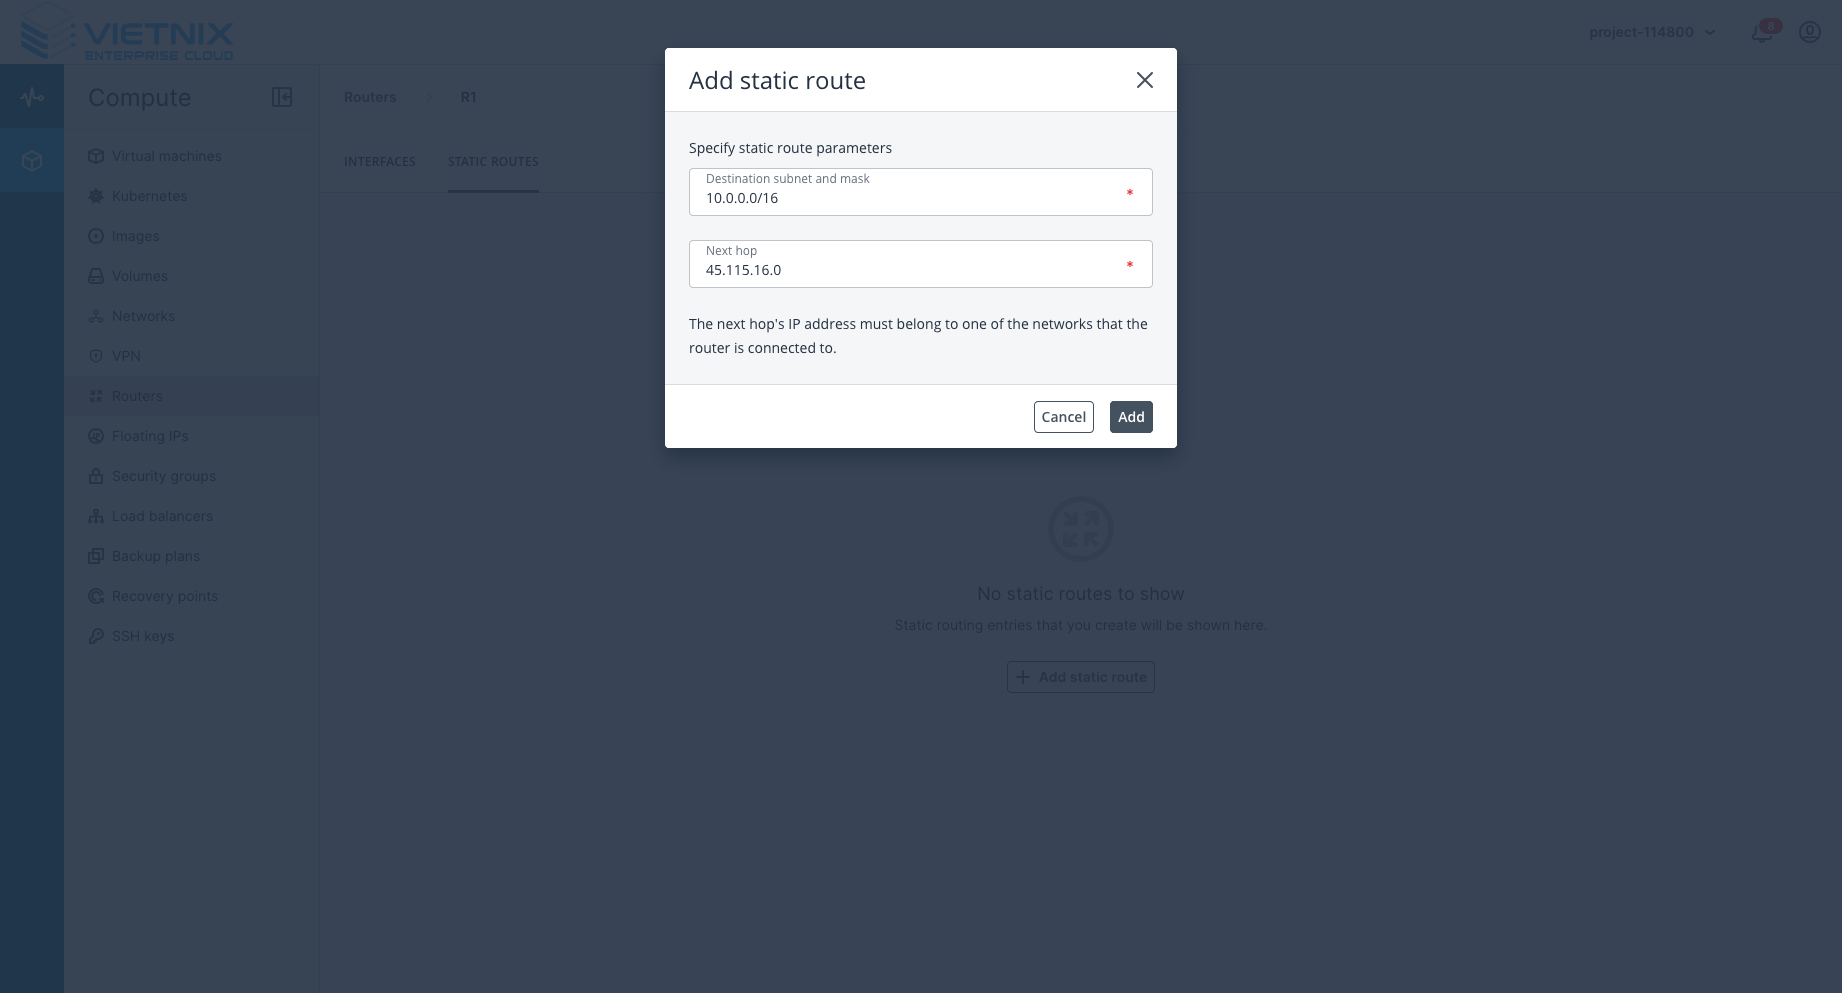
- Destination subnet: AWS subnet (
Verification
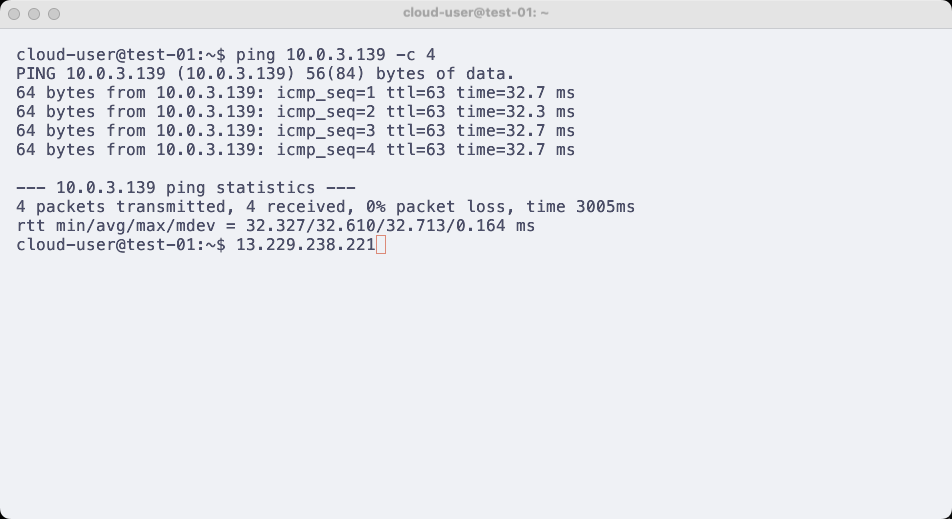
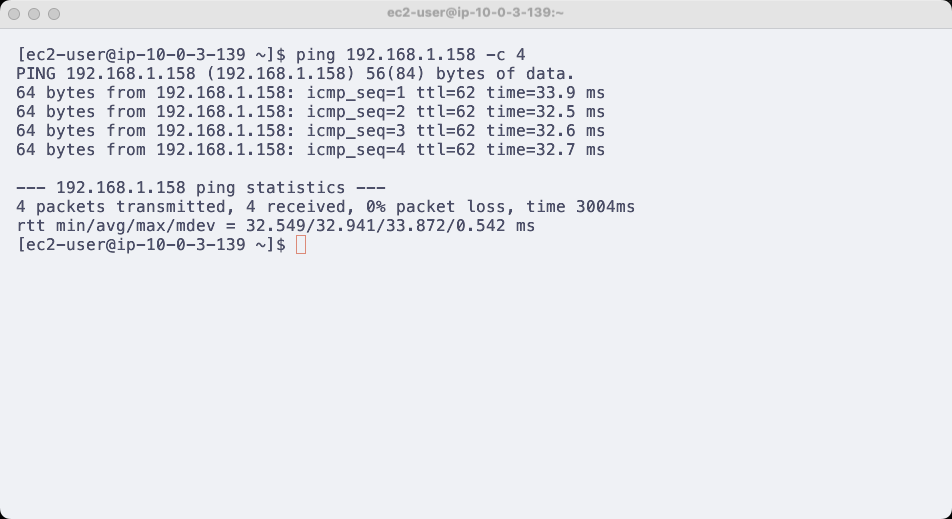
SSH into both instances (Vietnix VM and EC2) and try to ping each private IP. If you can ping successfully, you have successfully created a VPN Site-to-Site connection between AWS and Vietnix Enterprise Cloud.
Summary
In this lab, we have successfully established a VPN Site-to-Site connection between Vietnix Enterprise Cloud and AWS VPC. Now, servers in both networks can communicate securely through the VPN connection.