How to Deploy WordPress on Vietnix Enterprise Cloud
This guide shows how to deploy a scalable WordPress application on a Kubernetes cluster running on Vietnix Enterprise Cloud. A typical WordPress deployment consists of:
- The WordPress server(s) that store and serve the website content.
- The MySQL server that stores users, posts, and configuration.
- A Load Balancer that routes traffic from a public network to the WordPress server(s).
To be highly available and scale out, we run multiple WordPress pods behind a Load Balancer, while keeping a single MySQL server. In production you should also run multiple MySQL servers in an active-active or active-passive setup — that is out of scope of this guide.
The WordPress container serves application code, but all uploads and content live in a persistent volume that is shared by every WordPress pod. Because the Vietnix Cloud storage driver only supports the ReadWriteOnce (RWO) access mode, a shared volume for multiple pods must be provided through an external NFS server using the ReadWriteMany (RWX) mode. That is why this guide sets up an NFS server first.
Prerequisites
Before you begin, make sure you have:
- A Vietnix Enterprise Cloud account with a project that has enough quota to run a Kubernetes cluster plus one extra VM. Make sure your project quota covers CPU, RAM, disk, block storage (Cinder) gigabytes (for the MySQL volume), and Floating IPs (for the Kubernetes API and the WordPress Load Balancer).
- A virtual network and a virtual router in your project (see Create Network and Create Virtual Router).
- An SSH key added to your project (see Manage SSH Key).
- A Floating IP available for the Kubernetes API and the WordPress Load Balancer. A Floating IP for the NFS server is optional (see Step 4.2 and Floating IP).
- A TrueNAS ISO image (Community Edition) uploaded to your project as an image (see Upload Image). This guide uses TrueNAS 25.10.7:
- Download page: truenas.com/download-truenas-scale
- Direct ISO: TrueNAS-SCALE-25.10.7.iso
- SHA256:
54ce9441ce66966a392e28f63604ca3c2c083d0bec4db7bb5af2f74f7a007c8e
- kubectl installed on your workstation. Install kubectl.
- Helm installed on your workstation. Install Helm.
- A basic understanding of Kubernetes concepts (Pod, Deployment, Service, PVC, StorageClass).
Step 1: Create a Kubernetes cluster
Follow Create Cluster to create a cluster on the Vietnix Cloud Dashboard. For the demo in this guide, the recommended configuration is:
- Kubernetes version: the latest supported version (for example
v1.31.2) - Cluster name:
cluster01 - SSH key: your uploaded SSH key
- Network: your private network
- Floating IP address: For Kubernetes API (only the API server gets a public IP)
- High Availability: enabled (3 master nodes)
- Master node flavor:
large(at least 2 vCPU / 4 GiB RAM) - Worker nodes:
3×mediumflavor - Autoscaling: for a demo, leave it off with 3 nodes; for production, enable it with Minimum
3and Maximum5so the cluster can survive a node failure and absorb traffic bursts - Container volume: default (20 GB) or larger
- Integrated monitoring: enabled (optional, recommended)
Autoscaling reacts to the resource requests of your pods, so the WordPress and MySQL manifests below include resources.requests. See Create Cluster for more details on choosing Minimum/Maximum.
Step 2: Connect to the cluster
Once the cluster status is Active, download its kubeconfig and connect from your workstation. See Connect Cluster for all methods. The quickest one:
export KUBECONFIG=/path/to/your/cluster01.kubeconfig
kubectl get nodes
You should see the master and worker nodes in Ready state:
NAME                              STATUS   ROLES    AGE   VERSION
cluster01-xxxxxxxx-master-0       Ready    master   10m   v1.31.2
cluster01-xxxxxxxx-master-1       Ready    master   10m   v1.31.2
cluster01-xxxxxxxx-master-2       Ready    master   10m   v1.31.2
cluster01-xxxxxxxx-node-0         Ready    <none>   9m    v1.31.2
cluster01-xxxxxxxx-node-1         Ready    <none>   9m    v1.31.2
cluster01-xxxxxxxx-node-2         Ready    <none>   9m    v1.31.2
Step 3: Create a StorageClass
Create a storage-class.yaml file. This StorageClass uses the Vietnix Cloud (Cinder) CSI provisioner and is marked as the default, so the MySQL volume can be created automatically.
apiVersion: storage.k8s.io/v1
kind: StorageClass
metadata:
  name: default
  annotations:
    storageclass.kubernetes.io/is-default-class: "true"
provisioner: cinder.csi.openstack.org
parameters:
  type: nvmer3
volumeBindingMode: Immediate
reclaimPolicy: Delete
allowVolumeExpansion: true
Apply it and verify:
kubectl apply -f storage-class.yaml
kubectl get storageclass
NAME                PROVISIONER                RECLAIMPOLICY   VOLUMEBINDINGMODE   ALLOWVOLUMEEXPANSION   AGE
default (default)   cinder.csi.openstack.org   Delete          Immediate           true                   10s
parameters.type selects the Cinder volume type. On Vietnix Cloud this is nvmer3. If your project uses a different volume type, change it accordingly — otherwise volume creation may fail with gigabytes_default ... quota is 0G.
Step 4: Deploy an NFS server
The WordPress pods need a shared volume with the ReadWriteMany (RWX) access mode. Since the Cinder CSI only supports RWO, we deploy an NFS server on a virtual machine (a TrueNAS instance) inside the same private network.
4.1 Create the NFS virtual machine
The NFS server uses three storage devices — do not confuse them:
| Device | Size | Purpose |
|---|---|---|
| Boot volume (1st boot) | 16–64 GiB (this guide: 64 GiB) | The system disk where TrueNAS is installed |
| CD/DVD volume (2nd boot) | ~2.5 GiB | The TrueNAS 25.10.7 installation ISO — installation media only |
| Data volume | 200 GiB | A separate volume, attached after creation; holds the ZFS pool pool1 and the NFS share |
- On the Vietnix Cloud Dashboard, go to Compute > Virtual Machines and click Create Virtual Machine. Configure:
- Name:
nas01 - Boot volume: 64 GiB (16–100 GiB)
- CD/DVD volume: mount the TrueNAS 25.10.7 ISO uploaded in the prerequisites
- Flavor:
large(4 vCPU, 8 GiB RAM) - Network: your private network
- Name:
- Deploy the VM and open its console. It boots the TrueNAS installer from the CD/DVD volume:
- At Choose destination media, select only the boot volume (~64–100 GiB) — press Space to toggle it. Leave the 200 GiB data disk unselected: TrueNAS installation drives cannot be used in storage pools. Select by size, since the device name (
sda/sdb) may vary. - At Web UI authentication method, select
Administrative user (truenas_admin)and set a password. This account is used to sign in to the TrueNAS Web UI. (ChooseConfigure using Web UIonly if you prefer to set the admin credentials later from the browser.) - Complete the installation and reboot. You can keep the ISO attached or detach it afterwards (see Attach Volume to manage attached volumes).
- At Choose destination media, select only the boot volume (~64–100 GiB) — press Space to toggle it. Leave the 200 GiB data disk unselected: TrueNAS installation drives cannot be used in storage pools. Select by size, since the device name (
- Create the data volume: go to Compute > Volumes > Create Volume, set Name to
nas01-data, Size to200 GiB, and click Create (see Create Volume). - Attach it to the VM: open the
nas01-datavolume, click Attach Volume, selectnas01, and click Done. - When you create the ZFS pool in Step 4.3, select the 200 GiB data disk (it appears as a second disk, for example
/dev/sdb) — not the boot or CD/DVD volume.
The CD/DVD volume is the installer ISO (a few GiB), not the data disk. The 200 GiB ZFS pool must be created on the separate data volume attached in step 4.
After the reboot, TrueNAS shows the Console setup menu with the Web UI address (for example http://192.168.1.32). You do not need any option here — continue configuration in the Web UI. Record the VM's private IP now: it is the <nas01_private_ip> you will use in Step 5. If that IP is not in your private network subnet, choose 1) Configure network interfaces (or 2) Configure network settings) to set a static IP before continuing.
4.2 (Optional) Assign a Floating IP
A Floating IP is only needed to reach the TrueNAS Web UI from your workstation. The NFS traffic used by the Kubernetes cluster goes over the private IP (<nas01_private_ip>), so a Floating IP is not required for WordPress itself.
Go to Compute > Floating IPs, click Add Floating IP, select your public network, and associate the IP with the private IP of nas01. This lets you reach the TrueNAS management UI from the Internet.
You can skip this step if you can reach the TrueNAS Web UI through the private network (for example via VPN), or if you configure TrueNAS from its console instead.
4.3 Configure the NFS server
-
Open a browser and go to
http://<nas01_private_ip>(or the Floating IP assigned in Step 4.2). Sign in with:- Username:
truenas_admin - Password: the password you set during installation
Do not use
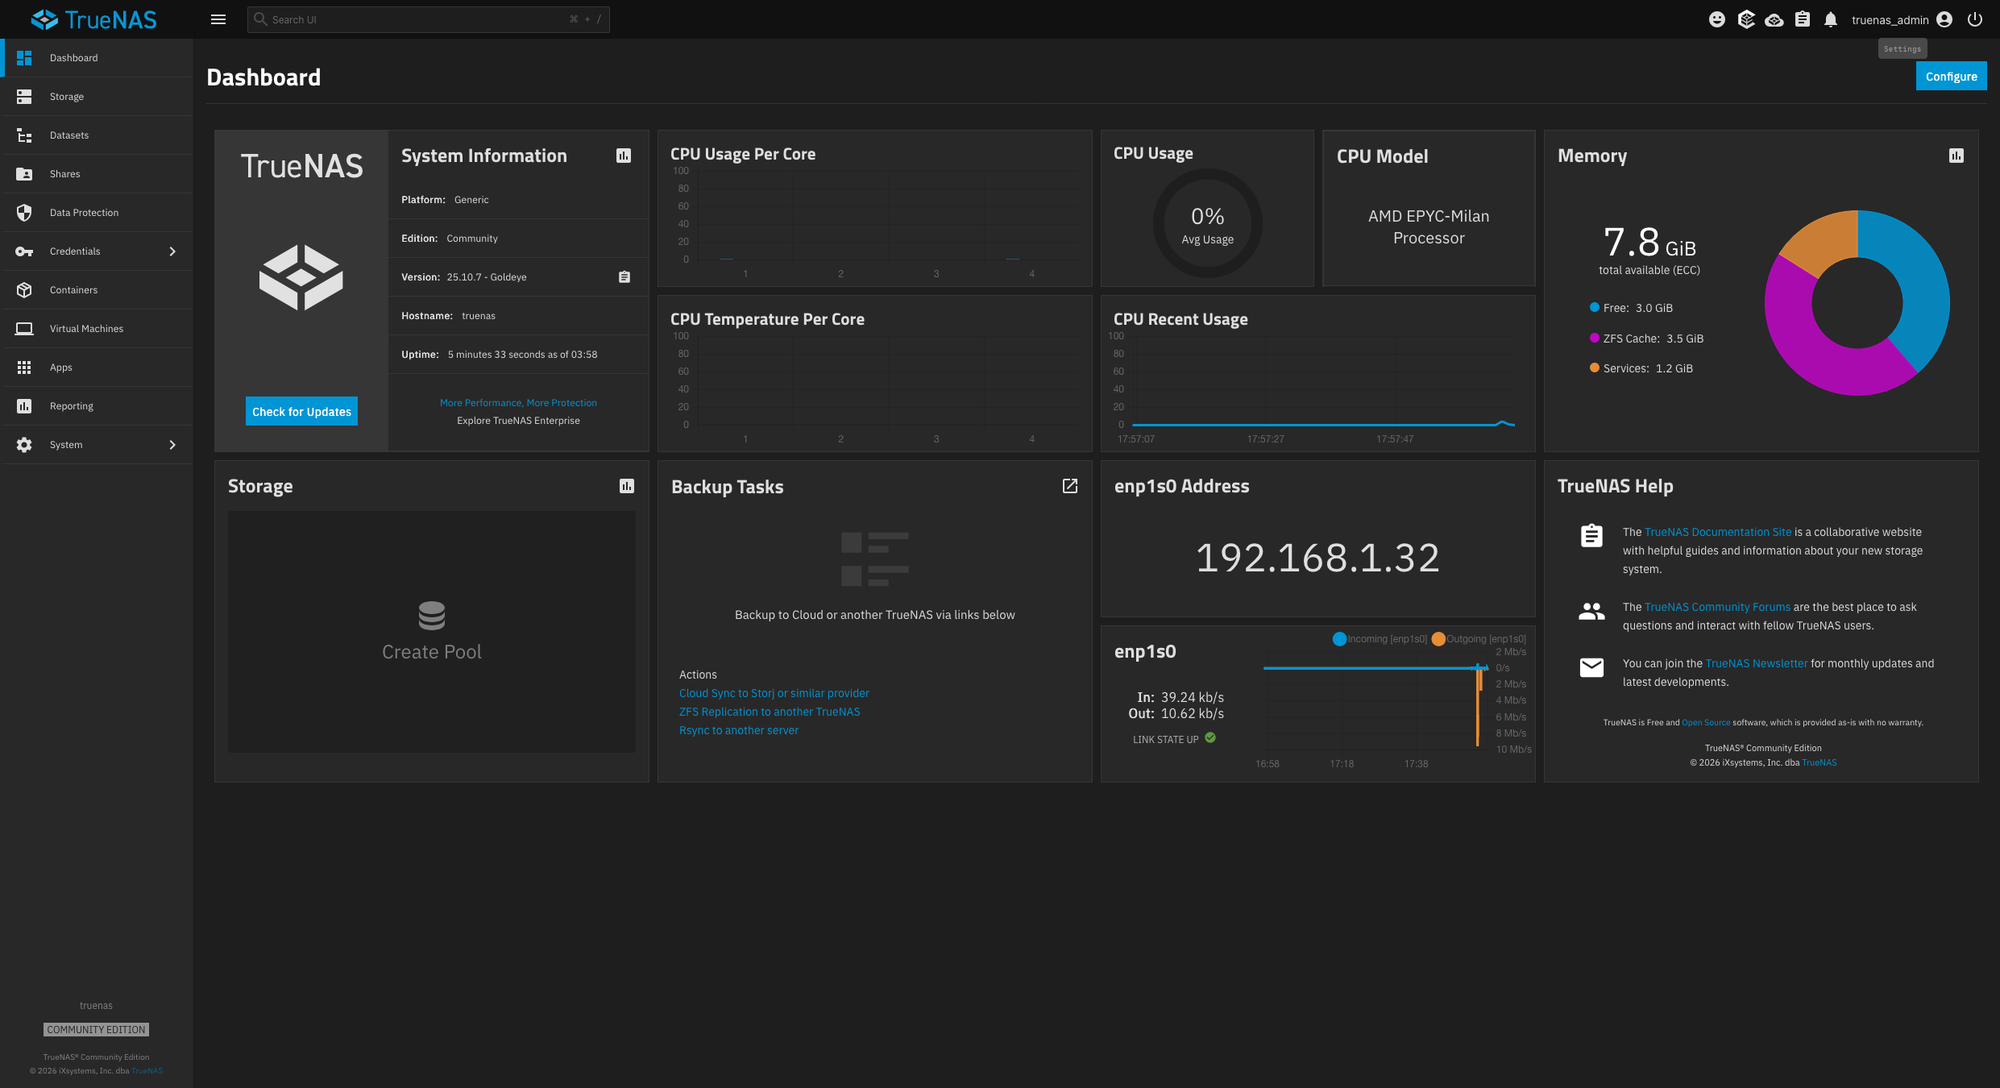
administrator— that account does not exist. If you forgot the password, reset it from the TrueNAS console setup menu with option4) Change local administrator password.After signing in, the TrueNAS Dashboard appears. Use the left navigation to configure services, storage, and shares.
- Username:
-
Enable the NFS service. In TrueNAS 25.10, Services is under System > Services (not in the main left menu). Find NFS, click the Edit (pencil) icon and set:
- Bind IP Addresses: leave empty (listen on all interfaces)
- Enabled Protocols:
NFSv3, NFSv4 - NFSv4 DNS Domain: leave empty
- Require Kerberos for NFSv4: disabled
- Allow non-root mount: enabled
- Ports, RDMA and Manage Groups Server-side: keep the defaults (empty/disabled)
- Click Save, then toggle the NFS service ON (or click Start). Make sure Start Automatically is enabled so NFS starts after a reboot.
-
Create the ZFS pool: go to Storage > Create Pool (or Storage > Pools > Add) and set Name to
pool1. On the Data step of the wizard:- Layout:
Stripe - Disk Size: select the 200 GiB disk (the data volume)
- Width:
1, Number of VDEVs:1 - Click Next, then Save And Go To Review and Create.
WarningA stripe pool has no redundancy — if the single disk fails, the pool and the WordPress data are lost. That is acceptable for this demo. For a production NFS server, use a mirror or RAIDZ layout with multiple disks.
- Layout:
-
Make sure the
pool1pool is created and Online (see Storage > Pools). Then go to Datasets, selectpool1, click Add Dataset, set Name toshare1and keep Dataset Preset =Generic, then click Save.- Dataset names may use only lowercase letters, digits and hyphens — no spaces, underscores, slashes or other special characters.
-
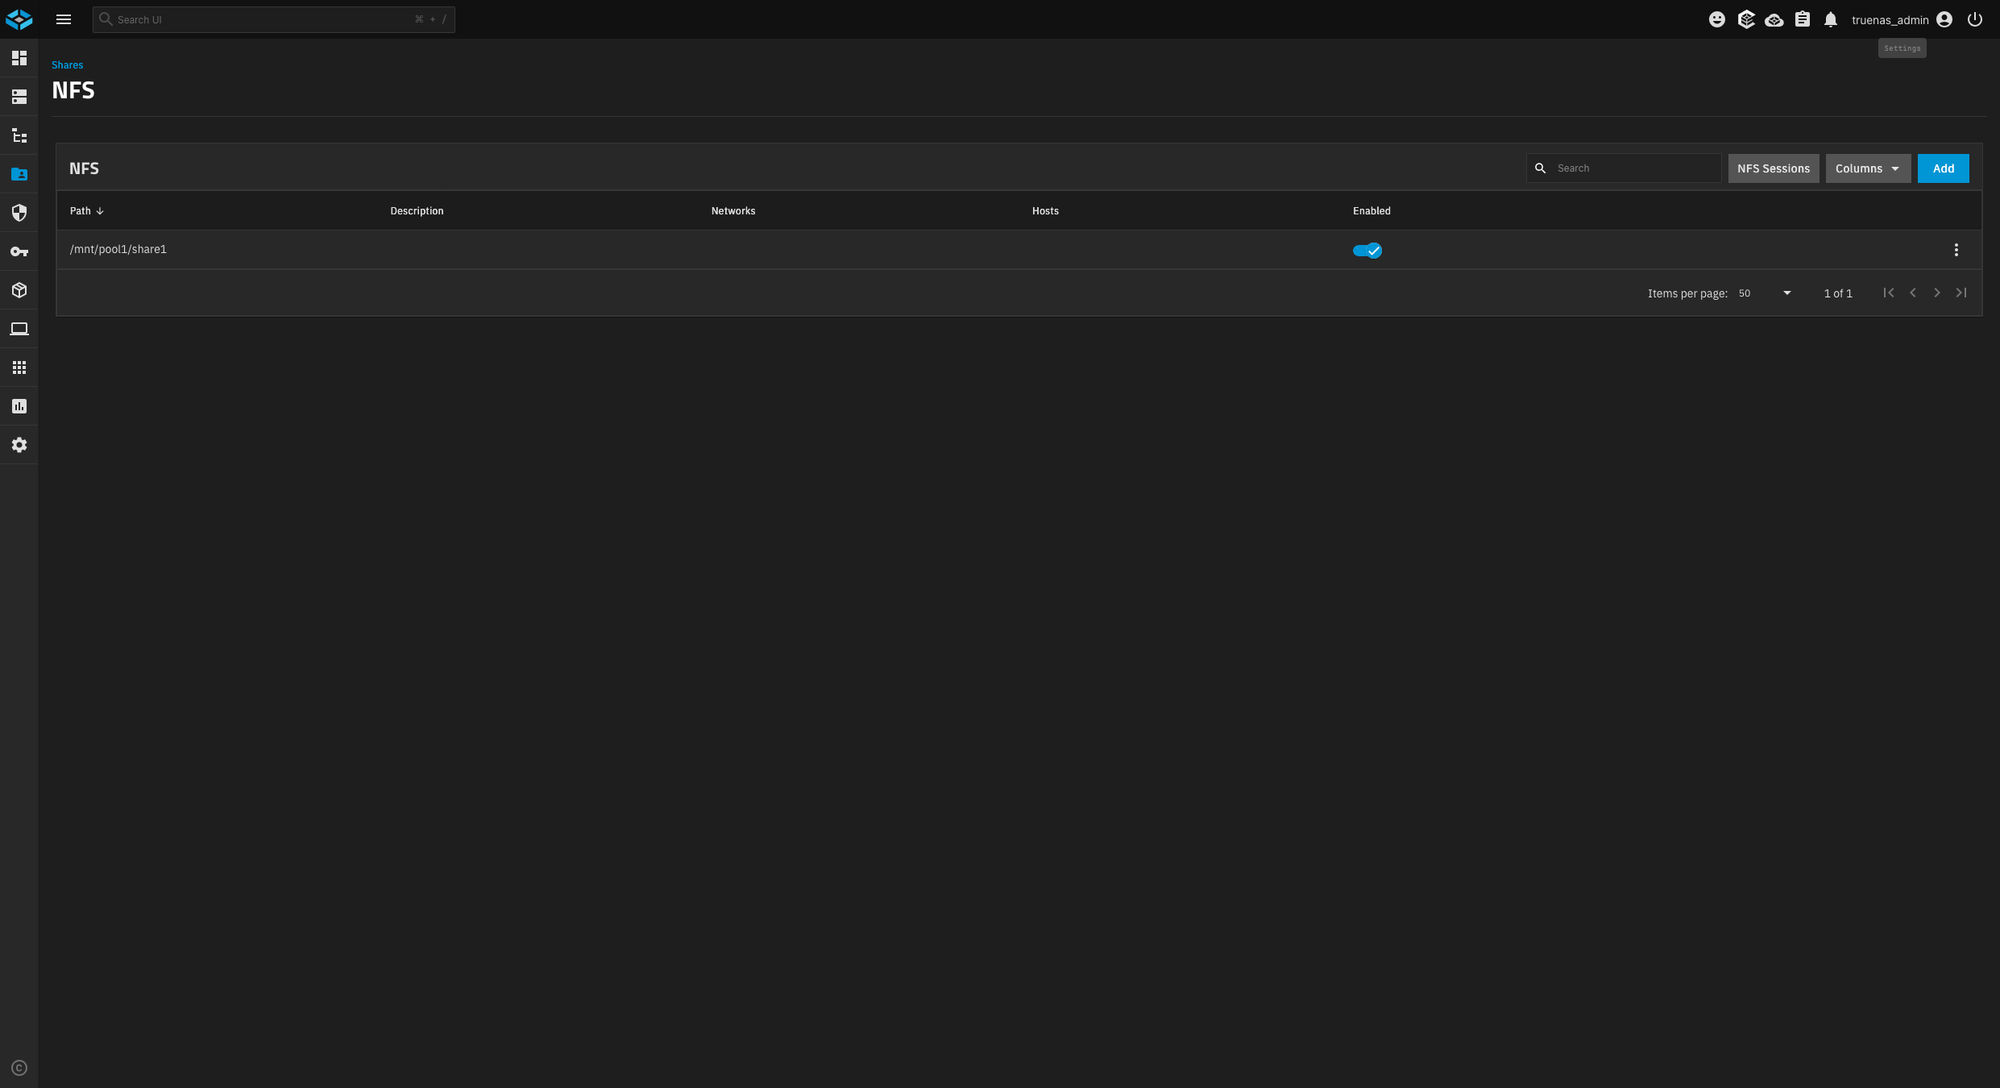
Create the NFS share: go to Shares > Unix Shares (NFS) and click Add. Set:
- Path:
/mnt/pool1/share1 - Enabled: on
- Under Advanced Options: Read Only = off, All Directories = on (if shown)
- Mapall User / Group:
root/root(so the WordPress pods and the NFS provisioner can write to the share); leave Maproot empty - Click Save.
 Note
NoteThe Mapall User/Group setting is required so the NFS provisioner can create the
/persistentvolumesdirectory inside the share. - Path:
4.4 Verify the NFS share
Mount the share from your workstation to confirm it works (example for macOS):
mkdir -p ~/Desktop/nfs
sudo mount -t nfs <nas01_private_ip>:/mnt/pool1/share1 ~/Desktop/nfs
cd ~/Desktop/nfs && touch test-file && rm test-file
For security, restrict access to the NFS server with a Security Group: allow Any inbound only from your private IP range, and allow HTTPS only from your own public IP. Keep the default outbound rules.
Step 5: Deploy the NFS subdir external provisioner
The NFS subdir external provisioner automatically creates persistent volumes on the NFS server. Add the Helm repository and install it:
helm repo add nfs-subdir-external-provisioner https://kubernetes-sigs.github.io/nfs-subdir-external-provisioner/
helm repo update

helm install nfs-external nfs-subdir-external-provisioner/nfs-subdir-external-provisioner \
  --set nfs.server=<nas01_private_ip> \
  --set nfs.path=/mnt/pool1/share1 \
  --set storageClass.accessModes=ReadWriteMany \
  --set storageClass.name=nfs
Where:
nfs.server— the private IP address of the NFS server.nfs.path— the exported share path (/mnt/pool1/share1).storageClass.accessModes— the PV access mode,ReadWriteMany.storageClass.name— the name of the new StorageClass (nfs).
Verify that the new StorageClass exists:
kubectl get storageclass
NAME                PROVISIONER                                                    RECLAIMPOLICY   VOLUMEBINDINGMODE   ALLOWVOLUMEEXPANSION   AGE
default (default)   cinder.csi.openstack.org                                       Delete          Immediate           true                   15m
   nfs                 cluster.local/nfs-external-nfs-subdir-external-provisioner    Delete          Immediate           true                   30s
Step 6: Deploy WordPress and MySQL
Create the following files in the same directory. kustomization.yaml ties everything together: it generates the MySQL secret, then applies the MySQL and WordPress manifests.
secretGenerator:
  - name: mysql-pass
    literals:
      - password=ChangeMe123!
resources:
  - mysql-deployment.yaml
  - wordpress-deployment-nfs.yaml
apiVersion: v1
kind: Service
metadata:
  name: wordpress-mysql
  labels:
    app: wordpress
spec:
  ports:
    - port: 3306
  selector:
    app: wordpress
    tier: mysql
  clusterIP: None
---
apiVersion: v1
kind: PersistentVolumeClaim
metadata:
  name: mysql-pvc
  labels:
    app: wordpress
spec:
  accessModes:
    - ReadWriteOnce
  resources:
    requests:
      storage: 20Gi
---
apiVersion: apps/v1
kind: Deployment
metadata:
  name: wordpress-mysql
  labels:
    app: wordpress
spec:
  selector:
    matchLabels:
      app: wordpress
      tier: mysql
  strategy:
    type: Recreate
  template:
    metadata:
      labels:
        app: wordpress
        tier: mysql
    spec:
      containers:
        - image: mysql:8.0
          name: mysql
          env:
            - name: MYSQL_ROOT_PASSWORD
              valueFrom:
                secretKeyRef:
                  name: mysql-pass
                  key: password
            - name: MYSQL_DATABASE
              value: wordpress
          ports:
            - containerPort: 3306
              name: mysql
          volumeMounts:
            - name: mysql-persistent-storage
              mountPath: /var/lib/mysql
          resources:
            requests:
              cpu: "250m"
              memory: "512Mi"
            limits:
              cpu: "1"
              memory: "1Gi"
      volumes:
        - name: mysql-persistent-storage
          persistentVolumeClaim:
            claimName: mysql-pvc
apiVersion: v1
kind: Service
metadata:
  name: wordpress
  labels:
    app: wordpress
spec:
  ports:
    - port: 80
  selector:
    app: wordpress
    tier: frontend
  type: LoadBalancer
---
apiVersion: v1
kind: PersistentVolumeClaim
metadata:
  name: wp-pv-claim
  labels:
    app: wordpress
spec:
  accessModes:
    - ReadWriteMany
  storageClassName: nfs
  resources:
    requests:
      storage: 20Gi
---
apiVersion: apps/v1
kind: Deployment
metadata:
  name: wordpress
  labels:
    app: wordpress
spec:
  replicas: 3
  selector:
    matchLabels:
      app: wordpress
      tier: frontend
  strategy:
    type: Recreate
  template:
    metadata:
      labels:
        app: wordpress
        tier: frontend
    spec:
      containers:
        - image: wordpress:6-apache
          name: wordpress
          env:
            - name: WORDPRESS_DB_HOST
              value: wordpress-mysql
            - name: WORDPRESS_DB_USER
              value: root
            - name: WORDPRESS_DB_PASSWORD
              valueFrom:
                secretKeyRef:
                  name: mysql-pass
                  key: password
            - name: WORDPRESS_DB_NAME
              value: wordpress
          ports:
            - containerPort: 80
              name: wordpress
          volumeMounts:
            - name: wordpress-persistent-storage
              mountPath: /var/www/html
          resources:
            requests:
              cpu: "250m"
              memory: "256Mi"
            limits:
              cpu: "1"
              memory: "1Gi"
      volumes:
        - name: wordpress-persistent-storage
          persistentVolumeClaim:
            claimName: wp-pv-claim
Deploy everything:
kubectl apply -k ./
Check the created resources:
kubectl get secrets
kubectl get pvc
kubectl get deployment
kubectl get pod
NAME                    TYPE     DATA   AGE
mysql-pass-xxxxxxxxxx   Opaque   1      1m

NAME          STATUS   VOLUME                                     CAPACITY   ACCESS MODES   STORAGECLASS   AGE
mysql-pvc     Bound    pvc-xxxxxxxx-xxxx-xxxx-xxxx-xxxxxxxxxxxx   20Gi       RWO            default        1m
wp-pv-claim   Bound    pvc-xxxxxxxx-xxxx-xxxx-xxxx-xxxxxxxxxxxx   20Gi       RWX            nfs            1m

NAME                                           READY   UP-TO-DATE   AVAILABLE   AGE
nfs-external-nfs-subdir-external-provisioner   1/1     1            1           10m
wordpress                                      3/3     3            3           1m
wordpress-mysql                                1/1     1            1           1m
Step 7: Access WordPress
Get the public address of the WordPress service:
kubectl get services wordpress
NAME        TYPE           CLUSTER-IP       EXTERNAL-IP      PORT(S)        AGE
wordpress   LoadBalancer   10.254.158.185   203.0.113.20     80:30717/TCP   2m
The EXTERNAL-IP is the Floating IP automatically assigned to the load balancer created for this WordPress service in your project. Open it in a browser:
http://<EXTERNAL-IP>/
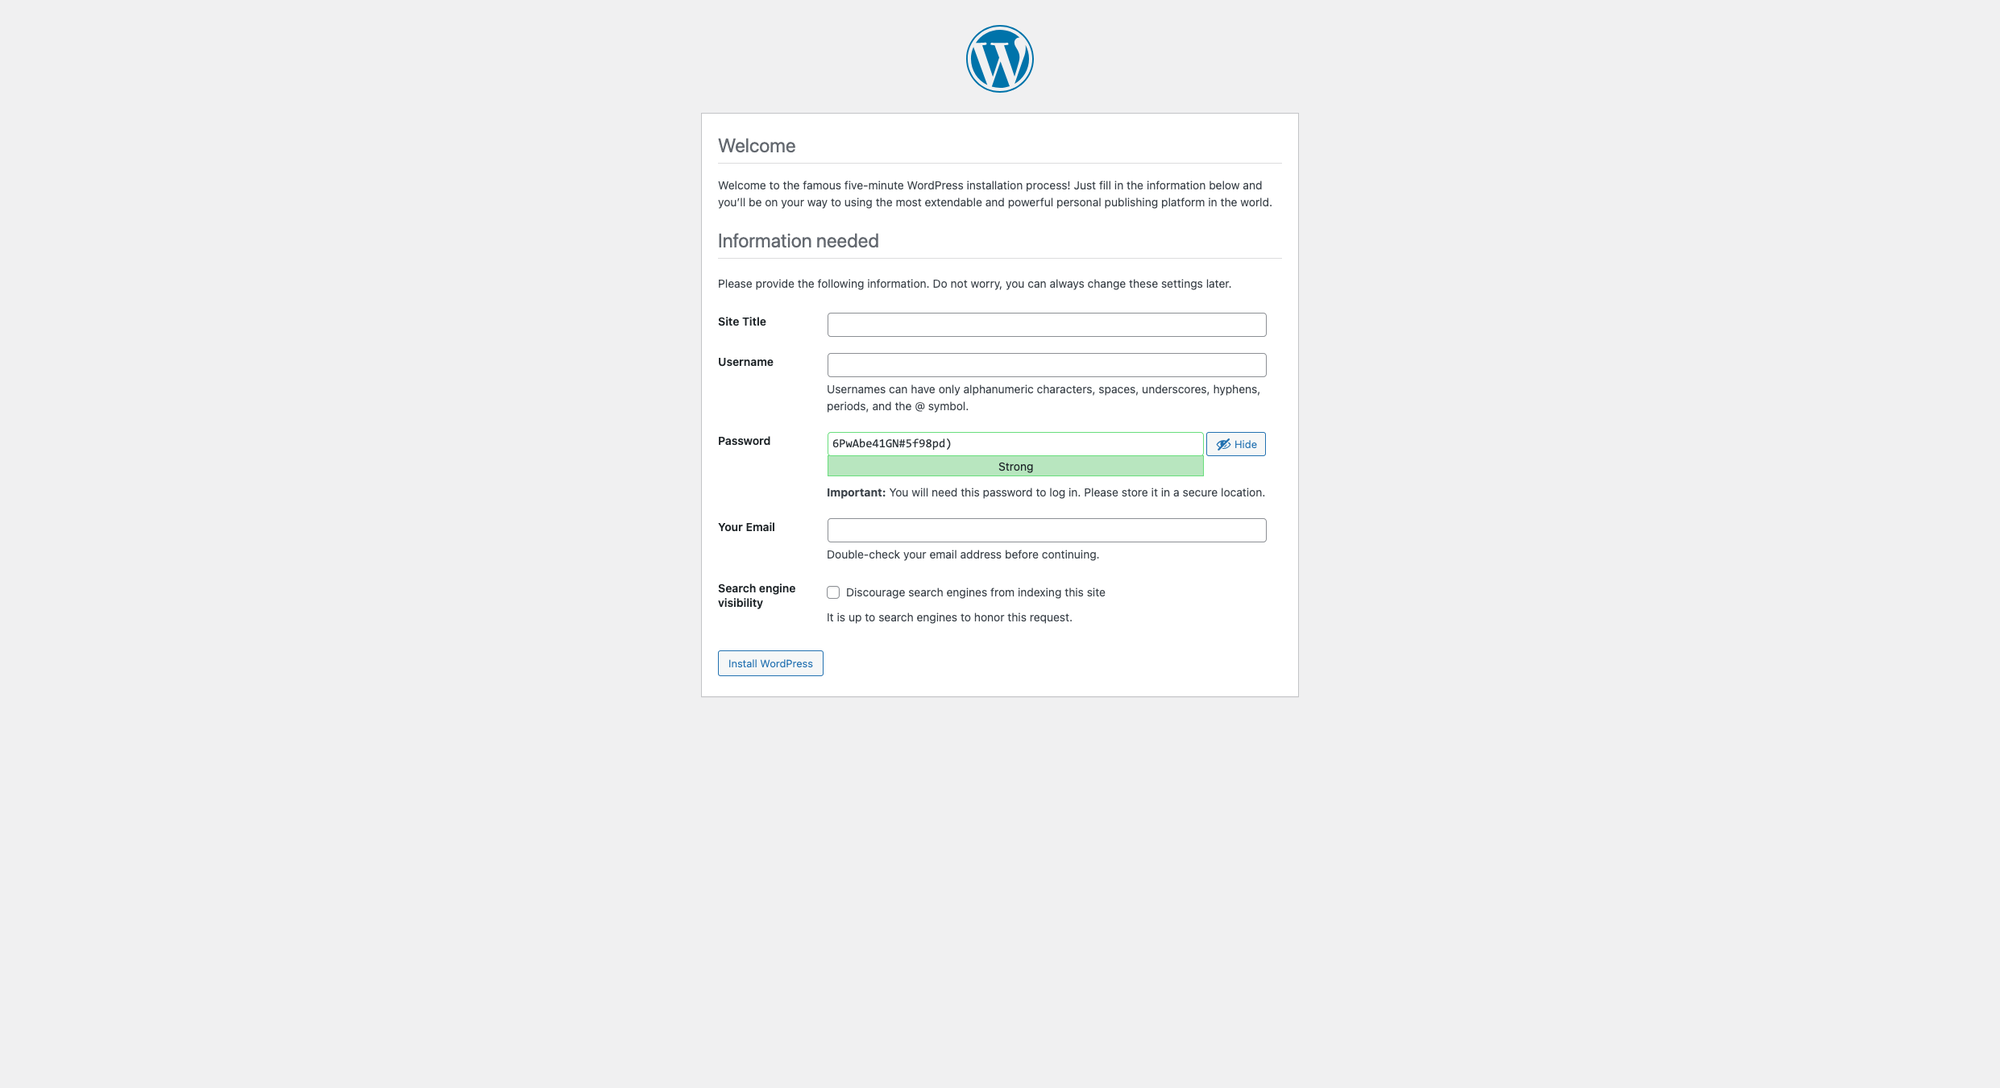
You will get the WordPress installation wizard. Fill in the Site Title, an admin Username, a strong Password, and your Email, then click Install WordPress to finish the setup.
Step 8: Test high availability and scaling
Because we deployed 3 WordPress replicas behind the Load Balancer, WordPress stays available even if a worker node goes down.
-
On the Dashboard, go to Compute > Virtual Machines and Power off one of the Kubernetes worker nodes (
...-node-...). -
List the WordPress pods:
kubectl get pod | grep wordpressYou will see one pod in
Terminatingand a new pod being created. With the default Kubernetes settings, rescheduling can take up to 5 minutes, and the website remains reachable during this time. -
To handle more traffic, scale the WordPress deployment:
kubectl scale --replicas=5 deployment/wordpress
kubectl get pod | grep wordpress
You can also change the replicas value in wordpress-deployment-nfs.yaml and re-apply:
kubectl apply -k ./
Scaling the Deployment adds more pods, but they still need worker node capacity. If you enabled Autoscaling on the worker group (Step 1), the cluster will add worker nodes automatically when pods cannot be scheduled — which is why the deployment defines resources.requests.
Step 9 (Optional): Deploy with Helm and Bitnami
For a fully highly available setup, you can deploy WordPress with the Bitnami WordPress chart, which includes MariaDB (with replication), Memcached, and metrics — all from a single command. This requires the nfs StorageClass from Step 5.
Generate the default values file and inspect it:
helm show values oci://registry-1.docker.io/bitnamicharts/wordpress > wordpress.yaml
Adjust the important settings in wordpress.yaml:
global:
  storageClass: nfs
wordpressUsername: admin
wordpressPassword: "ChangeMe123!"
replicaCount: 3

mariadb:
  enabled: true
  architecture: replication
  primary:
    persistence:
      storageClass: default
  secondary:
    persistence:
      storageClass: default

memcached:
  enabled: true

metrics:
  enabled: true
Install the chart:
helm install -f wordpress.yaml my-wp oci://registry-1.docker.io/bitnamicharts/wordpress
Then follow the on-screen instructions to get the WordPress URL:
export SERVICE_IP=$(kubectl get svc --namespace default my-wp-wordpress --template "{{ range (index .status.loadBalancer.ingress 0) }}{{ . }}{{ end }}")
echo "WordPress URL: http://$SERVICE_IP/"
echo "WordPress Admin URL: http://$SERVICE_IP/admin"
Cleanup
To remove everything created by the kustomize manifests:
kubectl delete -k ./
To remove the Bitnami release (if you installed it):
helm uninstall my-wp
Deleting a PersistentVolumeClaim may delete the underlying volume depending on the reclaim policy. Back up your WordPress content and database before cleaning up.